• Hey Guest!
    British Car Forum has been supporting enthusiasts for over 25 years by providing a great place to share our love for British cars. You can support our efforts by upgrading your membership for less than the dues of most car clubs. There are some perks with a member upgrade!

    **Upgrade Now**
    (PS: Upgraded members don't see this banner, nor will you see the Google ads that appear on the site.)
Tips
Tips

Piston Installation

2wrench

Luke Skywalker
Country flag
Offline
Number three piston held in positon to be placed:

P1010005-20.jpg


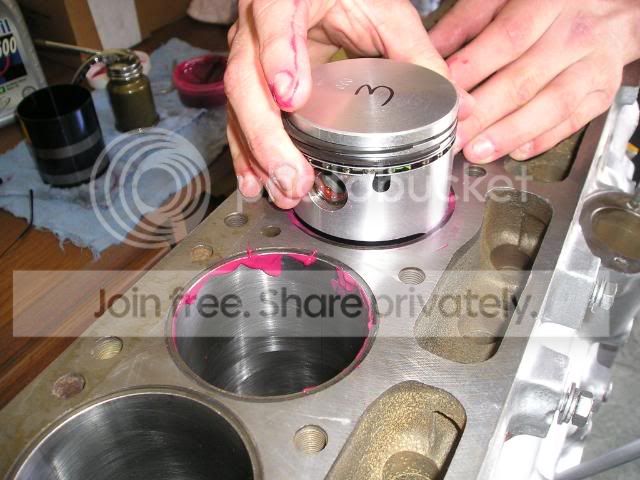
Unsuccessful attempt to install a piston. Ring(s) push
wide of cylinder walls stopping piston from being tapped
into place:

P1010006-19.jpg


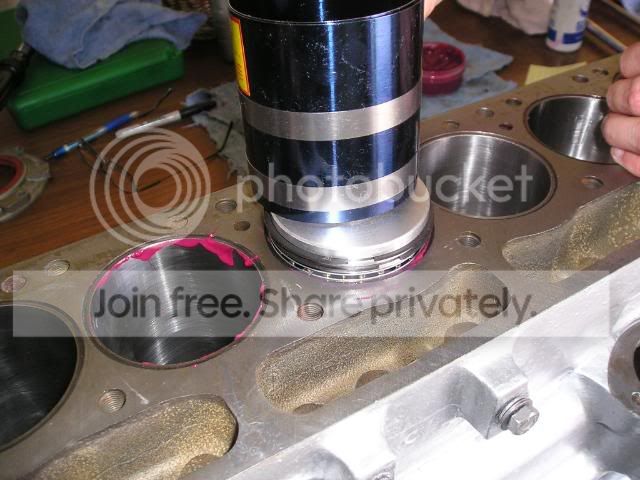
Pic shows ring compressor well placed around piston and
rings so thereafter, the piston can be tapped into the
cylinder:

P1010009-17.jpg


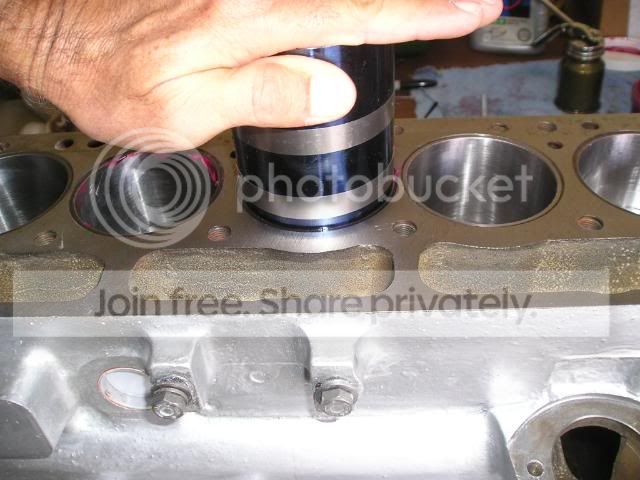
Piston being tapped into place:

P1010010-17-1.jpg


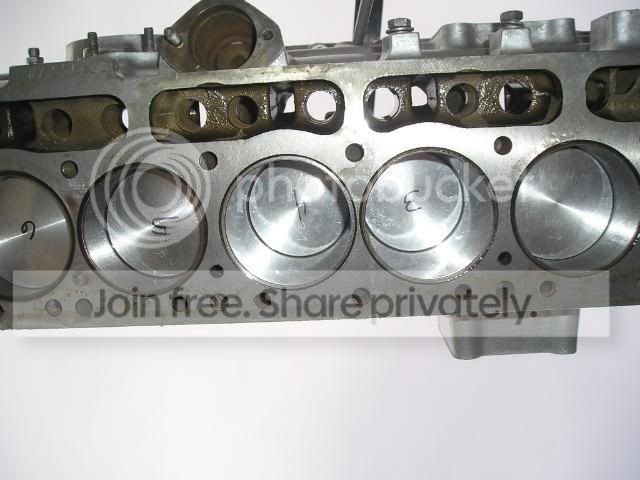
Pic showing five out of six pistons in the block.
Broke a piston ring building the piston set and have
another on order. Will install the last when the part
comes in:

P1010018-10.jpg
 
Dale: A litte lesson on how to place all those real
cool arrows pointing to stuff is something I'd
appreciate. Great for drawing attention to detail.
 
Don't you hate it when ONE breaks! But good progress none the less.
I saw that red on you right index finger in the first photo and thought you were in for a long healing session and a lifetime reminder of this rebuild.
 
DougF said:
Don't you hate it when ONE breaks! But good progress none the less.
I saw that red on you right index finger in the first photo and thought you were in for a long healing session and a lifetime reminder of this rebuild.

Doug: Actually, that is my son Tommy. He has been a great helper and a model
in a lot of our pics (action shots). He is a little lighter skin color
than me...more like his mom...Irish/German. I am Portuguese and Spanish
with a little California Indian on the side. More on the Hispanic, I
suppose.
 
And by the way, you probably know, Doug, it is the
pink-colored engine lube. No damage done.
 
2 wrench
did you keep an eye on open end ring stagger? pic 2 shows the end gaps very close to being inline
 
Casey: You know, I think that might have gotten
past me, to some extent. Seems like I would place
them just so, then when I install the thing, the
rings would be loose enough to spin all over the
place.

Is it critical enough to disassemble the things and
make sure they are correct?
 
IMO, yeah, better do it right, especially since you aren't very far along. Having the gaps lined up can cause a lot of extra blow-by.

Shouldn't need the second hammer (again IMO), just rapping with the handle of the first should be enough. Possibly you've got the compressor tighter than it needs to be, it should only loosely grip the piston itself.
 
If you're going for do over to check the ring gap alignment, I'll also ask this:

How were the ring gaps?

Did you have to file them much (assuming that you checked them before installing the rings)? I've got a handy little diamond wheel gapper that works really well.
 
PeterK said:
How were the ring gaps?
Good thought! Definitely don't want them too tight, and some rings are deliberately supplied oversize so they can be filed to fit.
 
2 wrench looking at your first posted pic.,does the cyl. next to the one your working on show a score mark in it? I blew it up some and to me it looks like a score mark,almost looks like a piston pin mark?
 
Ring gap stagger... I like to start at the bottom oil ring and ensure that none of its gaps line up over the piston vents, then stagger the succeeding rings upward by 60 or so degrees.

Peter C.
 
If you didn't check the gap, then you need to do this now. When I put my engine together last year, I found that the top ring was extremely tight on all four cylinders. If I had tried started the engine that way there definitely would have been very serious damage.

Interestingly, the 2nd ring was right for all 4 pistons. I assume that this is deliberate since the top ring is much more critical for compression than the 2nd ring.

To measure, remove the rings, and gently place in the cylinder, use a piston to make sure that they are in square to the cyl walls. There should be a gap of about 0.03" if my memory serves me correctly.

To enlarge the gap I put a piece of wet dry sandpaper on a sheet of glass, and very carefully enlarged the gap. be careful to keep it square.
 
Back
Top