• Hi Guest!
    If you appreciate British Car Forum and our 25 years of supporting British car enthusiasts with technical and anicdotal information, collected from our thousands of great members, please support us with a low-cost subscription. You can become a supporting member for less than the dues of most car clubs.

    There are some perks with a member upgrade!
    **Upgrade Now**
    (PS: Subscribers don't see this gawd-aweful banner
Tips
Tips

Padded dash replacement MK III Midget: how to?

V

vagt6

Guest
Guest
Offline
Since I have the "can't leave well enough alone" disease, I'm considering ripping the dash out of my Midget and replacing it with the Moss or VB replacement dash (not the dash cap, but the whole shebang).

My current dash is a bit tired and I've noted a few new cracks around a couple of the gauges. The rest of the interior is in near-perfect condition, which also compels me to do this job.

So, how hard is it? How is the dash fastened to the firewall and how do you get it off?

And, does the aftermarket replacement look right? Is it better than the original and will it fool the car show judges?

All ideas and input welcome.

Thanks. :thumbsup:
 
I think the embossing around the gauges is a bit different, and it is a pretty labor intensive job. Maybe you could ask Carl at Eclectic Motors about the one they did for the Modern Midget. Heck, ask him for a quote to do one for you.
 
I don't know anything about the Moss or VB dash replacement. I can tell you what I had to do on my '69 MKIV. When I got the car, the dash was ok, but not great. It had essentially developed a crack down the middle. I continually looked around for a good dash pad replacement that would cover said crack. In the end, I stumbled across a guy who had taken a dash and completely had an upholstery shop(or did the upholstery himself) recover the dash. Apparently something happened to the car and he started parting it out. I consider myself lucky and bought it from him.

One thing I can tell you about my swap. You better have small hands, like standing on your head, and have lot's of band-aids handy to cover the wounds that get created as you attempt to remove and install the nuts holding the dash and all the wiring connections!

It has been a long time since I have posted anything on BCF. If I can remember how to insert a picture in a forum post, I will add a photo of what I have...otherwise PM me with an email address and I can send a copy to you.

Larry
 
Yes a local MOWOG Tribe needs to be recruited for their small hands needed. 4 7/16" bolts secure the padded dash to the firewall. Just getting to them is the problem. I have a prototype Fiberglass Dash sitting in the back of my shop for the past 5 years that someday I will install but it's on the Roundtoit List. Bugsy came with a vinyl overlay that needs to be reglued periodically. Frank C. has done some work with something flexible he used to fill the crack and them used some sort of vinyl paint and sanding. Maybe he'll chime in here.
 
Jim, Trevor, Larry, thanks for the wisdom.

I'm wondering where the screws are located that secure the dash. I'm prepared to remove the seats to give me some wigglin' room, wondering what else might make the job more palatable.
 
To remove the dash it is easiest to drop the steering column a bit. Then remove the tach and speedo to have easier access to the top nuts on that side. Then remove the oil/temp gauge being careful not to break it. Remove the heater control cable at the heater and feed it though, same with the choke cable. Then it becomes a matter of carefully disconnecting and removing. Not a bad job if you take your time and work methodically.
 
So Trevor did you get Ugly Bug running yet? Dayton in August?

Dash replacement, you again just need to be slow and methodical. And there are sharp corners and rusty metal you will find under there. I'll think about dash replacement once I get front end rebuilt and some sheetmetal rust repairs complete.

Don't remember who had this fiberglass dash made, but I bought off of E-Bay about 5 years ago for $50. Now Moss gets substantially bigger bucks for these. Curious if anyone has installed one of the fiberglass dash pieces. Any info on instrument fit, grounding etc. that I need to be aware of.
 
Jim, the UglyBug is running. It is the Midget that is still laid up.
 
vagt6 said:
Jim, Trevor, Larry, thanks for the wisdom.

I'm wondering where the screws are located that secure the dash. I'm prepared to remove the seats to give me some wigglin' room, wondering what else might make the job more palatable.

remove the seats - good idea. then lie on your back with a flashlight and look up. You will have to remove the clove box (do you have one?) and the bolts are spaced evenly along the top edge of the dash. It's inconvenient but not impossible.
 
I recovered the dash in my MGB with the complete overlay. It turned out beautiful. It wasn't incredibly difficult, but did require a good deal of patience. I have some photos in my Journal on the MGExp if you want to check them out. The big thing I remember was that you have to make sure that everything is 100% lined up before you let the contact cement set. Also, depending on the year there is some foam you'll remove with the old cover and some that remains on the frame. For my B, the "hard" foam on the passenger side remained. Just make sure you have a very sharp Xacto knife to cut out the new gauge holes. Like I said, it turned out beautifully! Good luck.
 
Disconnect the battery before you place wrenches up under the dash. Don't ask me how I know about sparks, being upside down, and pretty much immobile under there. Scared the crap out of me. Don't know what I hit but it made pretty sparks.
 
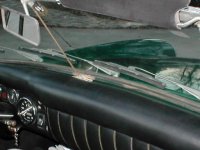
OK, so I hope I got this right. Here is a kinda close-up picture of the dash I installed into my car. You can probable tell it is more padded than the original dashboard, but I like the look. The covering is a good quality heavy vinyl (I think)...and yes, the white lines are actual REAL stitching, not electro-welded seams or injection molded plastic!
 

Attachments

  • 21907.jpg
    21907.jpg
    94 KB · Views: 184
Back
Top