OP
Deleted member 21878
Guest
Guest
Offline
so i have hooked up my overflow bottle to give it a try.
first thing i did was boil some water and pour in to the bottle to see how it would handle the heat. did not seam to affect it.
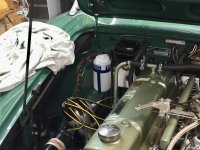
next i mounted the bracket for the bottle. i thought about putting it on the fender brace but in the end i really did not want anything else in that area. cleaner the better for changing plugs, etc. so i mounted the bottle up where a BJ8 would have their washer bottle.
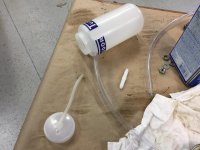
i drilled a hole in the top of the bottle and slid in some clear tubing i had bought. i pulled the black overflow hose on the radiator out of it's clips and routed it behind the fender brace. i did not want to cut the black tubing in case i decide to put it back the way it was. i could have drilled the hole in the cap as opposed to the bottle. in the cap it would have made it easy to take the cap off and empty or clean the bottle. but drilling in to the bottle made the cap look a little cleaner. So that is the way i went. it took about 2-1/2' of tubing to reach the end of the radiator drain tube and i connected with a plastic barb fitting.
i put some silicone in the hole in the cap and plan to use the connector that ran to the wipers as my vent. i am going to get some tubing for that so i can extend it to the bottom of the car.
My radiator cap actually was missing the outside seal. i never noticed it. so i made one out of some rubber i had. the seal on my TR6 cap is .057 thick and this seal is .046. guess we shall see if it will pull coolant back out of the bottle. it is only a 7lb cap.
all in an easy job and i can put it back without an issue if i like.


 Hi Guest!

 smilie in place of the real @
 Pretty Please - add it to our Events forum(s) and add to the calendar! >>

