 but were afraid to ask:
 Just picked up my TR3 from the upholstery shop last night. The interior looks beautiful. I asked if they filled the gas tank too because the needle pegged full. No, they replied and a yard stick in the tank confirmed just a couple gallons. Did they reverse the wires on the gauge when they reinstalled the dash panel? Or do I have a new electrical challenge?

-
 Hey Guest!
British Car Forum has been supporting enthusiasts for over 25 years by providing a great place to share our love for British cars. You can support our efforts by upgrading your membership for less than the dues of most car clubs. There are some perks with a member upgrade!**Upgrade Now**
(PS: Upgraded members don't see this banner, nor will you see the Google ads that appear on the site.)

Tips
- We have a special forum called "Member Articles" where you can submit actual articles for consideration for publication. Learn More
- Don't have an Avatar? If not, your avatar will default to the 1st character in your username. Go into "Account Details" to change your Avatar.
- Some basic forum navigation info: click
 Hey - did you know if you click on the title of a thread it will take you to the first unread post since you last visited that thread?
- Hey Guest - Is your British Car Club in our Clubs database? If not, send me a PM - Basil

- Looking for a local club? Click the "Clubs" tab above and browse hundreds of clubs world-wide.
- Add Android or iPhone APP: click
- Did you know - any picture or video you add in your posts in any marque-specific forum will also get added to the Media Gallery automatically.
- A few more tips about posting and replying: click
- Hey there Guest - be sure to keep your profile page up to date with interesting info about yourself: learn more
- More tips and tricks on Posting and Replying: click
 STOP!! Never post your email address in open forums. Bots can "harvest" your email! If you must share your email use a Private Message or use the
  smilie in place of the real @
- Want to mention another member in a post & get their attention? WATCH THIS

- So, you created a "Group" here at BCF and would like to invite other members to join? Watch this!
- Hey Guest - A post a day keeps Basil from visiting you in the small hours and putting a bat up your nightdress!
- Hey Guest - do you know of an upcoming British car event?
 Pretty Please - add it to our Events forum(s) and add to the calendar! >> Here's How <<
- Hey Guest - you be stylin' Change the look and feel of the forum to fit your taste. Check it out
- If you run across an inappropriate post, for example a post that breaks our rules or looks like it might be spam, you can report the post to the moderators: Learn More
- If you would like to try some different "looks" or styles for the site, scroll to the very bottom, on the left and click the Style Selector.
You are using an out of date browser. It may not display this or other websites correctly.
You should upgrade or use an alternative browser.
You should upgrade or use an alternative browser.
Optimistic gas gauge
- Thread starter Photo703
- Start date

dklawson
Yoda
Offline
On cars without the voltage stabilizer the fuel gauge terminals should be marked "T" (for the sending unit connection from the Tank) and "B" (for the Battery connector). In addition, the pre-stabilizer gauges MUST have an earth connection for the fuel gauge case. If the gauge looses its earth connection the gauge will read full all the time. They will also read full if the sending unit wire becomes disconnected or the sending unit looses its earth connection.
RJS
Jedi Warrior
Offline
How about the inverse? I seem to have a pessimistic gas gauge. When I read 1/4 tank on the gauge, it's really only 1/2. Once I fill it, it will read full but, then starts to drop very quickly thereafter.
No big deal, better to read too low than too high. On my Chevy Blazer it's just the opposite. It reads 1/4 too high. How do I know? Well, when I first owned the car I ran out of gas with a 1/4 tank showing on the gauge.
Bob
No big deal, better to read too low than too high. On my Chevy Blazer it's just the opposite. It reads 1/4 too high. How do I know? Well, when I first owned the car I ran out of gas with a 1/4 tank showing on the gauge.
Bob
dklawson
Yoda
Offline
A 1966 Triumph would have the later gauge system with the voltage stabilizer. Your gauge system will be different than Photo703's.
The quick test for the later gauge system is go ground the green/black wire (at either the sending unit or gauge), turn on the ignition, and watch the gauge. If it goes all the way to full (above full actually) then the gauge itself is operating properly. If the gauge is reading low there are two possible problems. The first is simply that the gauge is out of calibration. If the gauge was accurate before... calibration isn't likely to be the cause unless you have opened the gauge or otherwise worked on it. More likely will be the build up of corrosion inside the sending unit. The float arm must make contact with the sending unit housing for its ground connection. It's not uncommon for corrosion to build up on the pivots and a spring that is inside the sending units. The corrosion increases the contact resistance and will make the gauge read low. With care the inside of the sending units can be cleaned.
Another reason a gauge can read low is if the float is perforated or otherwise partially filled with gas. However, when that happens they don't typically read right anywhere through their range and generally read low for all conditions.
TR3driver
Great Pumpkin - R.I.P
Offline
Most likely explanation IMO is a worn-out sender. The slider rides directly on the resistance wire, and over time can wear the wire thin (raising the resistance) in the middle of the range. Only real solution is a new sender, although you may be able to compensate to some extent by adjusting the gauge to match your sender.RJS said:How about the inverse? I seem to have a pessimistic gas gauge. When I read 1/4 tank on the gauge, it's really only 1/2. Once I fill it, it will read full but, then starts to drop very quickly thereafter.
I had a 65 Olds with the same malady; it eventually got to the point where the gauge was binary and read either empty or full. As long as the needle kept bouncing around, I knew there was at least 1/4 tank or so. Once it quit bouncing, it was time to look for a filling station :laugh:
Bob_Brennan
Freshman Member
Offline
Originally Posted By: RJS
How about the inverse? I seem to have a pessimistic gas gauge. When I read 1/4 tank on the gauge, it's really only 1/2. Once I fill it, it will read full but, then starts to drop very quickly thereafter.
Mine is even more pessimistic! Ever since I took TS24528 on a spin to Brunswick last summer and forgot that 13mm wrench I left under the hood, I have been left with a fuel gauge that just slightly blips when the key is turned to on, and then resumes its position pegged to empty. The errant wrench shorted a fuse and when I replaced it the turn signals worked, but alas, no such luck with the gauge.
It appears that the wires are ok on the back of the gauge.
I'm wondering if I should be looking at the sending unit, too.
Bob Brennan
S. Freeport, ME
dklawson
Yoda
Offline
Bob_Brennan said:I took TS24528 on a spin to Brunswick
The errant wrench shorted a fuse and when I replaced it the turn signals worked, but alas, no such luck with the gauge.
Bob Brennan
S. Freeport, ME
Forgive my serial number ignorance but which car and what vintage is TS24528?
As mentioned above, the gauge systems before the voltage stabilizer operate very differently from those that came later. You did mention that the gauge "blips" when the key is turned on. The later gauges typically respond too slow to "blip" so I'm assuming this is a TR built without a voltage stabilizer.
If the sending unit wire is pulled off the sending unit or early gauge, the fuel gauge will read "full", not empty. If you short out the sending unit wire to earth, the tank will read "empty". I would start by confirming the gauge itself is working properly by removing the wire on the "T" terminal of the gauge to confirm that the gauge itself is working.
Bob_Brennan
Freshman Member
Offline
Thanks for the info Doug. TR24528 is an early TR3A commissioned in late '57, probably sold as a '58. It spent the 50's and 60's in Arizona and then in the Columbus, Ohio area in the 70's till 2004. No rust and has been owned by enthusiasts who have taken care. Last year it received a panel-off paint job and radiator re-core. This year it had it's side curtains restored by TRF. My other LBC is an MG TC and the TR seems like a rocket by comparison!
Bob Brennan
S. Freeport, ME
Bob Brennan
S. Freeport, ME
TR3driver
Great Pumpkin - R.I.P
Offline
Anything with a TS prefix will have the early 'balanced' fuel gauge.
I would try grounding the gauge first (I've had a lot of trouble with the ground through the clamp, so I added a permanent ground wire). Then try disconnecting the sender and grounding, as Doug suggests.
If the gauge itself is the problem, they can sometimes be repaired. The TR2/3 gauge is nearly identical to the one described here https://mgaguru.com/mgtech/electric/fg_01.htm (but the resistances are not exactly the same, just close).
Oops, I forgot, the tank also needs to be grounded. I can't believe the factory didn't use a ground wire, but none of my cars had one when they came to me. A simple wire from the ground terminal on the sender to a tank mounting bolt is a good idea, IMO. (Mine is incorporated with the ground wire to the tail lights, etc.)
https://mgaguru.com/mgtech/electric/circ_f1b.htm
Bob_Brennan
Freshman Member
Offline
Thanks Randall - Great links to "MGA Guru". I sent him a message to get his opinion. I would really hate to have to remove the gauge - it looks like a real back-breaker! I'm hoping that the problem is under the hood rather than inside the panel. And since the gauge worked perfectly before the wrench shorted the fuse, I want to make certain that I didn't overlook something simple (read easy).
Bob
Bob
TR3driver
Great Pumpkin - R.I.P
Offline
Well, the gauge does get it's own power feed from the fuse block, so I guess it's possible there is a problem there. And the panel gets grounded through the control box, but if that wasn't working then the wipers and dash lights wouldn't work. Other than that, there is nothing under the hood that has to do with the fuel gauge.
Removing the gauge isn't too hard at all, if you can work by touch. Just feel behind the dash for the single knurled nut that holds the clamp, then remove the nut, lockwasher, ground wire (if present) and clamp. Then you can push the gauge out through it's hole, and undo the wires working outside. Installation is a bit trickier, but can be done just working in reverse.
You can see my old fuel gauge in the lower RH corner of this shot, to get a better idea of what you are feeling behind there.
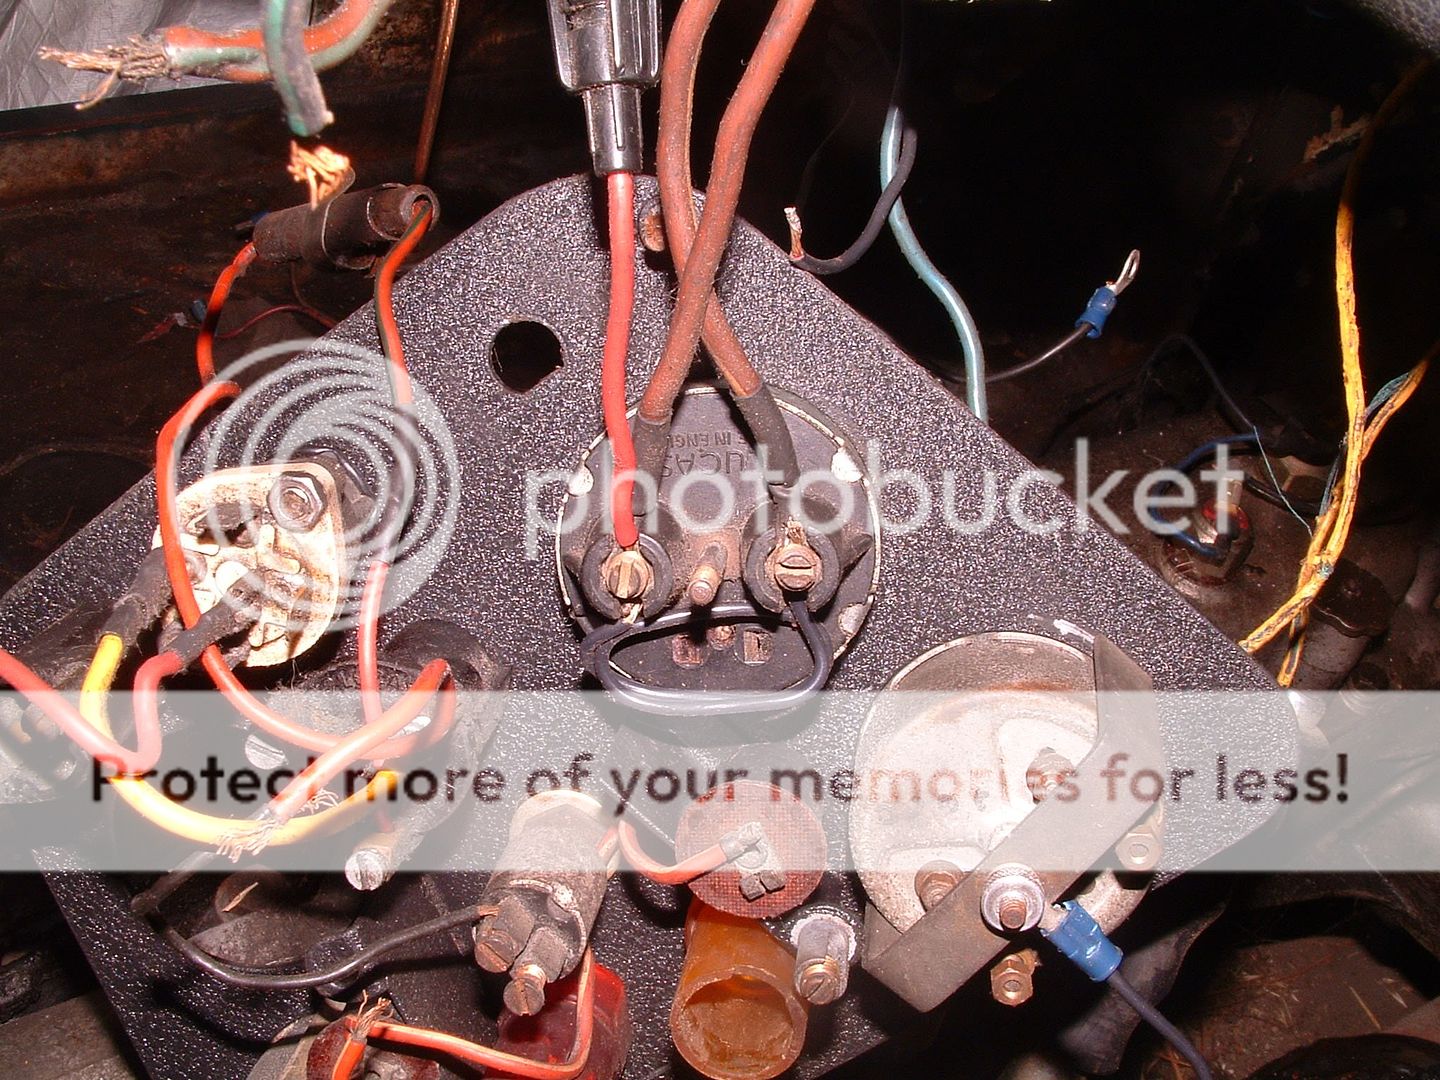
Bob_Brennan
Freshman Member
Offline
Randall, that photo will definitely help when I attack it tomorrow. The MGA Guru link you referenced also has some good pics. I don't think he would mind if I shared his reply regarding the gauge:
"Before you can fix anything you need to know what's broken and what's not. If it ain't broke don't fix it, 'cause if you do it will surely be broken after.
Disconnect the sender wire at either end, and test the gauge and sender unit separately. The sender unit is just a variable resistor (rehostat), so you can test that with an ohm meter. The gauge needs 12-volts power, ground return to the battery, and some reisistance between the "T" terminal and ground. If you install a fixed resistor on the back of the gauge in place of the signal wire, make resistance equal to the sender unit with half tank of fuel, and the gauge should read 1/2. That's just the first step of diagnostics, figuring out which device is faulty.
Barney Gaylord"
This is way over my head and I pass it on hoping that someone will benefit.
Bob
TR3driver
Great Pumpkin - R.I.P
Offline
Yup, all good advice. Barney is a Good Guy, even if he does prefer those octagonal carsBob_Brennan said:"Before you can fix anything you need to know what's broken and what's not. If it ain't broke don't fix it, 'cause if you do it will surely be broken after.
Disconnect the sender wire at either end, and test the gauge and sender unit separately. The sender unit is just a variable resistor (rehostat), so you can test that with an ohm meter. The gauge needs 12-volts power, ground return to the battery, and some reisistance between the "T" terminal and ground. If you install a fixed resistor on the back of the gauge in place of the signal wire, make resistance equal to the sender unit with half tank of fuel, and the gauge should read 1/2. That's just the first step of diagnostics, figuring out which device is faulty.

Usually the terminology is what baffles people, so I'll trot out the old plumbing analogy: Voltage is (roughly) comparable to water pressure, it's the force trying to 'push' electricity through something. Current is a measurement of how much water is flowing; you can think of "amps" (which is shorthand for amperes) as being buckets of electrons per second (or whatever) without worrying about how big such a bucket is.
Then "resistance" is whatever prevents the water from flowing; a large pipe (wire) presents almost no resistance, while a tiny pinhole presents a high resistance. If no water/electricity can flow at all, we say the resistance is infinite.
And a "variable resistor" is kind of like a faucet, turn the handle (or lift the arm in the tank) and the resistance goes from high to low allowing water/current to flow.
To measure resistance, one uses an "ohm meter", or more commonly a multimeter (which can measure several different parameters like volts, amps & ohms). These days, digital multimeters are so cheap and rugged that there is no excuse for any old car owner to not have at least one of them. (I've probably got a dozen, because I keep one in every car, plus a couple on the workbench and one in the tool chest, etc.) This unit is reasonably accurate for automotive work:
https://www.harborfreight.com/cpi/ctaf/displayitem.taf?Itemnumber=98025
although something like this
https://www.amazon.com/Actron-CP7677-Auto...0616&sr=8-2
may be worth the extra money (it also measures rpm & dwell).
TR3driver
Great Pumpkin - R.I.P
Offline
Oops! Well, actually, on a TR2-3B, the resistance goes up as you lift the arm; the gauge reads 'full' with maximum resistance at the sender.TR3driver said:And a "variable resistor" is kind of like a faucet, turn the handle (or lift the arm in the tank) and the resistance goes from high to low allowing water/current to flow.
But the principle is the same.
Bob_Brennan
Freshman Member
Offline
Keeping Barney Gaylord's advice in mind,"If it ain't broke don't fix it, 'cause if you do it will surely be broken after", I first cleaned all the fusebox connectors and then made sure to give a good squeeze with the needle-nosed pliers after reattaching. I then gave it juice, turned the key on and - nothing. Frustrated and fearing that I might have to learn all that nomenclature Randall and Barney have patiently explained, I gave the fuel gauge a little flick with my finger. Well, surprise, surprise! The needle immediately shot to 3/4 full- just where it should be. I was so amazed that I must have turned the key a half dozen times just to make sure.
TS24528 had the original Lucas fuses - a 50 on the left and a 35 on the right. I replaced them with a NAPA 30 and 20. Does that sound equivalent?
Thanks again for your help - clearly a case of casting pearls (of wisdom) before swine!
Bob
TS24528 had the original Lucas fuses - a 50 on the left and a 35 on the right. I replaced them with a NAPA 30 and 20. Does that sound equivalent?
Thanks again for your help - clearly a case of casting pearls (of wisdom) before swine!
Bob
martx-5
Yoda
Offline
Bob_Brennan said:TS24528 had the original Lucas fuses - a 50 on the left and a 35 on the right. I replaced them with a NAPA 30 and 20. Does that sound equivalent?
Bob
That's pretty close. The general rule of thumb is to replace the original Lucas fuses with the ones we get here at approximately half the rating.
More info here about British fuses.