• Hey there Guest!
    If you enjoy BCF and find our forum a useful resource, if you appreciate not having ads pop up all over the place and you want to ensure we can stay online - Please consider supporting with an "optional" low-cost annual subscription.
    **Upgrade Now**
    (PS: Subscribers don't see this UGLY banner)
Tips
Tips

TR2/3/3A ? on removing tr3 starter?

Jim Lee

Jedi Trainee
Offline
I know that I have been here before and it was a struggle but I cannot remember what I need to do.
The problem is the top bolt of the starter. I can get to the front of the bolt and turn it without
too much trouble but all I can do is turn it round and round. There is obviously a nut behind it
that I have to get to keep it from turning. I am stumped at how I get to that backside of the bolt
to allow me to remove it. The best I could come up with was using a long screwdriver and stick
it down in what looks like the vicinity of the nut and get really lucky in being able to stop it from
turning. I would imagine that I need to figure out some way to get to this as reinstalling
the starter will be an even bigger problem. I will need to more than just get to the nut to stop it from
turning. Is it possible to even see this part of the bolt? If so I have not found it.

Thanks very much,
Jim Lee
Tr3a 1959
 

TRTEL

Jedi Trainee
Offline
Jim, If you have a universal/swivel joint in your socket set, access the back one with a breaker bar and a couple of extensions so someone (your wife?) to hold it steady. Decades (4 or 5) ago Sears used to sell a curved box wrench with a 3" radius and a 9/16 on one end and which the shop I worked in had one.
 

Geo Hahn

Yoda
Country flag
Offline
I am just able to slip a slim open end wrench between the tunnel cover and the bulkhead -- this is working from inside the passenger side footwell -- to latch onto the nut.

Re-assembly is even more challenging and involves taping the nut to the wrench.

Some fit the bolt to that spot from behind to make it slightly easier.

Best improvement I've heard of is a helicoil in the hole in the bell housing making the nut unnecessary.
 

TR3driver

Great Pumpkin - R.I.P
Offline
May vary by car, but I was able to slip a "tappet" wrench down there from inside the engine compartment and get it on the nut. Then I reinstalled by taping the nut to the wrench with masking tape.

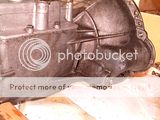
Even so, it was a royal pain in the anatomy. The helicoil works slick! I originally installed it with the engine & transmission in place, but later re-did it while I had the transmission out. Sorry I don't have a good photo, but if you zoom way in, you can see it here
 
OP
J

Jim Lee

Jedi Trainee
Offline
The battle is o'er.

Thanks to all for their prompt assistance.
Putting back that top bolt was 99 percent of the job.
Tried all kinds of crazy nut holding stunts until I came up with a winner.
If you had described this technique to me I would have thought it ridiculous.

I sprayed 3m adhesive on my ring finger tip. Attached problematic nut to the same and
was actually able to use my nut carrying left hand to just barely, and I mean barely, place the
nut where it needed to go and use my right hands to turn the bolt. I also had to
remove the right air cleaner and the left fuel bowl to remove the old starter from the top.

Do not think for a minute that I did not try many, many variations of glues and long screwdrivers
and magnetic pickups for much of the day. What was bizarre about the primitive non-tool
technique described above was that it worked on my very first try. The stupidity I felt for not having
tried this a few hours sooner was outweighed by the elation of getting this done.

I guess this is why we write these things down.

Thanks very much,
Jim Lee
 

CJD

Yoda
Country flag
Offline
Aaaah...the old glue the nut to your finger technique! I prefer super glue for that one.
 

DornTRoriginal

Jedi Hopeful
Gold
Country flag
Offline
I am considering adding the helicoil but I'm not thrilled with the idea of pulling out the transmission. Does the helicol have to be installed from the front or can it be placed on the backside? Or what if the helicoil is installed in the steel flange and not into the aluminum of the bell housing? Is it worth worrying about if I am installing a new high torque starter will the starter need to be removed again any time soon?
 

TR3driver

Great Pumpkin - R.I.P
Offline
Dorn, I think that tip came from me originally. At least I did it before I heard of anyone else doing it, and I'm pleased with the results.

I originally installed the Helicoil with the transmission and engine both in the car, working from the front. The starter was out, of course, but as I recall I didn't even remove the rear carb for better access. It would probably be best to have some sort of guide to help get the tap started squarely in the hole, but I did mine "by eye" and it worked out for me. The hole is already large enough, no need to drill first. The tap of course cut threads into the (iron) cylinder block, but they won't hurt anything.

I wanted the threads to be in the aluminum transmission housing, because the starter mounting bolts also help anchor the tranny to the engine. Maybe that isn't important, but I've had that flange break off once and I know the factory beefed up that area several times over the years (one of the reasons I now have a later TR6 box in there was to get the extra beefy flange after breaking a TR4 tranny in a previous TR3A). Hmm, come to think of it, if you still have the early thin flange, there may not be enough "meat" there to hold the threads securely. Should be OK I think, but not certain.

Experiences will vary, obviously, but I've had to remove the starter several times even after switching to a gear-drive starter. Once was when I moved the transmission to my current TR3; again when I blew up the OD; and again when the bearings in the starter went bad. (Actual problem was probably just a loose connection, but I had the starter out and found the bad bearings before I realized the connection was loose.) Every time, I've been pleased to have those threads there. If I should need to change the transmission, I will be sure to put a Helicoil in the new one.

But, I plan to keep driving (and fixing) my TR3 as long as I can. If you don't plan to keep yours as long, or don't drive it much, your decision might well be different.

PS, even with the transmission out of the car, I would still run the tap in from the front. Having the curve of the bellhousing nearby when working from the back would make it harder to get the tap lined up properly, IMO.
 

GerryL

Jedi Hopeful
Offline
I originally installed the Helicoil with the transmission and engine both in the car, working from the front. The starter was out, of course, but as I recall I didn't even remove the rear carb for better access. It would probably be best to have some sort of guide to help get the tap started squarely in the hole, but I did mine "by eye" and it worked out for me. The hole is already large enough, no need to drill first. The tap of course cut threads into the (iron) cylinder block, but they won't hurt anything.

I wanted the threads to be in the aluminum transmission housing, because the starter mounting bolts also help anchor the tranny to the engine. Maybe that isn't important, but I've had that flange break off once and I know the factory beefed up that area several times over the years (one of the reasons I now have a later TR6 box in there was to get the extra beefy flange after breaking a TR4 tranny in a previous TR3A). Hmm, come to think of it, if you still have the early thin flange, there may not be enough "meat" there to hold the threads securely. Should be OK I think, but not certain.

Experiences will vary, obviously, but I've had to remove the starter several times even after switching to a gear-drive starter. Once was when I moved the transmission to my current TR3; again when I blew up the OD; and again when the bearings in the starter went bad. (Actual problem was probably just a loose connection, but I had the starter out and found the bad bearings before I realized the connection was loose.) Every time, I've been pleased to have those threads there. If I should need to change the transmission, I will be sure to put a Helicoil in the new one.

But, I plan to keep driving (and fixing) my TR3 as long as I can. If you don't plan to keep yours as long, or don't drive it much, your decision might well be different.

PS, even with the transmission out of the car, I would still run the tap in from the front. Having the curve of the bellhousing nearby when working from the back would make it harder to get the tap lined up properly, IMO.[/QUOTE]
 

GerryL

Jedi Hopeful
Offline
What would be negatives associated with welding a nut to the back of the flange for TR3 and TR4 transmissions which have the thinner flange?
 

TomMull

Darth Vader
Silver
Country flag
Offline
What would be negatives associated with welding a nut to the back of the flange for TR3 and TR4 transmissions which have the thinner flange?
My welding is very much amateur quality and I would shy away from this out of concern for heat damage to the flange. I know some of the pros claim they can TIG anything though.
Tom
 

TR3driver

Great Pumpkin - R.I.P
Offline
AFAIK it's pretty much impossible to weld steel to aluminum. So you'd need to find an aluminum nut, and a welder good enough to weld it in place. Not likely you could do that without removing the transmission from the car.

Personally, I'd try the Helicoil first. I would have done that even if I still had the thin flange, it just happened that I didn't.
 

TomMull

Darth Vader
Silver
Country flag
Offline

CJD

Yoda
Country flag
Offline
You're right, I just wouldn't think of using one to hold the starter. It's more of an impact load, and aluminum doesn't tolerate that well. The helicoil would be a much better alternative, in my opinion.
 

Don Elliott

Obi Wan
Offline
I had my transmission tunnel out and cut a 1.5" diameter hole in it right where that nut goes. So if I have to do the starter again, I pull back the tunnel carpet, remove the rubber plug sealing the hole and voila - there is easy access that way.
 
Similar threads
Thread starter Title Forum Replies Date
D TR2/3/3A Removing TR3 'starter' bolt Triumph 3
K TR2/3/3A Removing TR3 windshield stanchions Triumph 4
L TR2/3/3A Any trick to removing TR3 doors? Triumph 12
M TR2/3/3A Removing and replacing distributor in TR3 Triumph 15
K TR2/3/3A Removing the water pump on a TR3? Triumph 11
tinman58 TR2/3/3A Removing head studs TR3 Triumph 15
B TR2/3/3A Tr3 removing front wings Triumph 8
RedTR3 TR2/3/3A Removing TR3 OD transmission Triumph 5
ekamm TR2/3/3A removing tr3 instrument panel Triumph 15
Number_6 TR2/3/3A Removing front fenders on a TR3 Triumph 20
CCURTISS Removing Seat Track Screws TR3 Restoration & Tools 3
Tinkerman TR2/3/3A Removing Fabric From TR3 Dash Panel Triumph 7
tr6web TR6 Need advice removing downpipe nuts Triumph 3
L Removing Master Cylinder Without Paint Damage Austin Healey 27
D Removing the steering wheel hub Spridgets 12
J General MG Thoughts on removing a stubborn 2-ear spinner MG 5
K TR2/3/3A Removing scratches and scrapes fro the wind wings that screw to the windshield? Triumph 9
Gatheringtree TR2/3/3A Removing the headlamp bezel rim Triumph 2
R TR6 Removing the charcoal cannister considerations Triumph 7
S TR2/3/3A Removing a stuck oil drain plug Triumph 13
KVH General Tech Removing Piston Wrist Pin Triumph 2
C Removing AH Sprite Mk 1 windscreen washer pump Restoration & Tools 2
M Need help removing the pinion assembly from a late 1275 steering rack Spridgets 7
jfarris TR2/3/3A Removing choke cable from dash insert Triumph 3
doakley Spitfire Removing facia Triumph 2
7 Wedge Removing sunroof frame Triumph 5
D Removing the last rust from pitted steel Restoration & Tools 11
D Removing Old Radio Austin Healey 4
S Removing Overdrive Shaft Lever Pin Austin Healey 7
M TR2/3/3A Removing Wires From Stator Tube Triumph 7
BN6_2197 Removing connecting link between shock absorber and rear axle Austin Healey 4
T TR2/3/3A Requesting help on removing TR3A steering column and box Triumph 21
longbridgehealey Removing BN4 Bonnet Austin Healey 9
C Removing the Healey "Flash"? Austin Healey 11
Gliderman8 TR6 Removing Left Rear brake line... help! Triumph 9
maxwedge5281 Removing Complete Rear End From BN6 Austin Healey 5
Jim_Gruber Removing a Spridget Engine Checklist Spridgets 5
S TR2/3/3A removing the temp gauge needle Triumph 5
Sarastro General Tech Any good ideas for removing liners? Triumph 20
R TR2/3/3A Removing WD-40 Triumph 6
F Removing oil and water guage from BT7 dash Austin Healey 17
R TR2/3/3A Removing transmission Triumph 3
Joe Schlosser Removing Control Knobs Spridgets 9
W TR2/3/3A Tell me there is a trick to removing lower control arm pin... Triumph 45
Bona42na Spitfire Removing Transmission/Gearbox from underneath Triumph 3
pkmh Removing Passenger Rear Bearing Nut Austin Healey 26
BN6_2197 Advice on removing the float from the chamber Austin Healey 6
B TR6 Removing the ckoke/heater control knobs Triumph 4
Jim_Gruber Removing the Rear Axle Seal Spridgets 4
Jim_Gruber What is the correct tool for removing brake lines from a BE Master Cylinder Spridgets 10

Similar threads

Top