I had the same thing happen on an oil pan. Some kids thought they would be funny and lifted my tr3 up by the oil pan with a floor jack to move and hide the car.
It took some time to figure it out why my pan was leaking, and like yours it leak weird at the split in the tin and leaked worse and then better sometimes. Anyways that was some time ago.
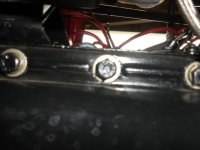
I am going to pull my pan on a different tr3 in a few weeks and cannot decide how to approach it. Getting under the car is a big part of the job because for me; I like room. I will lift the car up as high as a dare and use jack-stands and also put the front tires under the car with some blocks on metal wheel center for insurance.
I am actually thinking about non-hardening permatex for a sealer plus I was going to cut my own gasket out of 1/16 think gasket paper. You said you had some gaskets made out of something other than paper? What are they made of?
There should be a lot of old posts about oil pan leaks, and the way people went after them. I will probably use some of their suggestions like put the gasket on the pan and then set the pan down on some glass or was it put the glass on top of the gasket when the gasket is down on the pan with sealer on it and some weight, like 20pounds on the glass.
Steve

 Hey Guest!

 Hey - did you know if you click on the title of a thread it will take you to the first unread post since you last visited that thread?
 but were afraid to ask:
  STOP!! Never post your email address in open forums. Bots can "harvest" your email! If you must share your email use a Private Message or use the
  smilie in place of the real @
 Pretty Please - add it to our Events forum(s) and add to the calendar! >>