Perfect! Thanks I have FX6

-
 Hey Guest!
British Car Forum has been supporting enthusiasts for over 25 years by providing a great place to share our love for British cars. You can support our efforts by upgrading your membership for less than the dues of most car clubs. There are some perks with a member upgrade!**Upgrade Now**
(PS: Upgraded members don't see this banner, nor will you see the Google ads that appear on the site.)
You are using an out of date browser. It may not display this or other websites correctly.
You should upgrade or use an alternative browser.
You should upgrade or use an alternative browser.
TR6 New tr6 purchase
- Thread starter slegsonly
- Start date
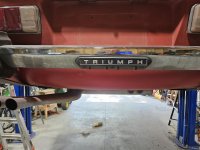
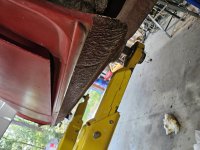
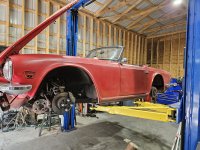
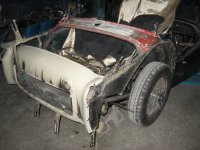
Ok. $2500.00 bought it. Soild car. Dash needs replacing and pad. Interior items missing. Body and frame zero rust. Front end rebuild next and new brake lines and master. Pretty happy with the car.
Attachments


Offline
In this area it is called" grand theft auto" Now instead of blowing the life savings on cosmetics , you can
invest in lots of other goodies. there by accomplishing the same outcome.
Rember "sport cars will get you through times of NO money better than money will get you through times
of NO Sports Cars" Life is about the smiles per gallon!!
Mad dog
invest in lots of other goodies. there by accomplishing the same outcome.
Rember "sport cars will get you through times of NO money better than money will get you through times
of NO Sports Cars" Life is about the smiles per gallon!!
Mad dog
Attachments
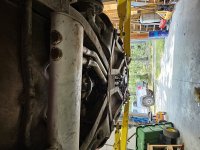
Normally I like surprises but this not so much. So I'm going to have to replace this. I thought I could fix it but it's too far gone. Some other funky things but this is the worst part. Poorly installed Cedar dashboard caused the switch for the lights to short out on the metal Dash plate. Looking at an aftermarket with an upgraded fuse box does anyone have any insight on this? Thanks


Tybalt
Jedi Warrior
Offline
In this area it is called" grand theft auto" Now instead of blowing the life savings on cosmetics , you can
invest in lots of other goodies. there by accomplishing the same outcome.
Rember "sport cars will get you through times of NO money better than money will get you through times
of NO Sports Cars" Life is about the smiles per gallon!!
Mad dog
I seem to recall a character called Freewheelin' Franklin say something similar, but he wasn't talking about sports cars...(from my old adverse information file according to the folks at DISCO)
Normally I like surprises but this not so much. So I'm going to have to replace this. I thought I could fix it but it's too far gone. Some other funky things but this is the worst part. Poorly installed Cedar dashboard caused the switch for the lights to short out on the metal Dash plate. Looking at an aftermarket with an upgraded fuse box does anyone have any insight on this? Thanks
Looks like somebody let the smoke out of those wires. Here are a few things to check out:
When Dan Masters decided to hang things up sometime back, these guys above took over his British car wiring stuff. Especially check out the "Instruction Manuals" to give you an idea of how their stuff installs.
Here's a page where a guy did his own up from scratch, impressive:
A thread from another forum that among other things has a couple of shots from Ed's work (above)
And finally, it's essentially all stock stuff and some specialty tools along with wire that matches up to Lucas color coding:
That should at least keep you busy for a couple of hours as you trip down the rabbit hole.
Thanks but i think they are different. This dash has 3 lights in center. May have one already though.And so it begins!
I have a used wiring loom from a non-overdrive ‘74 TR6 that I got from eBay about 15 years ago, now in storage. I can dig it up if you would want to purchase it. I think I know where it is….
Offline
As I see it, you have a couple of options: (1) just get a new wiring harness and be done with it, or (2) you probably could replace the burned sections of wire. Use the same gauge of wire, solder it and use shrink-wrap on the connections. Since it will be under a wrapping tape, the insulation color doesn't matter. More work, less money, and you keep the original stuff.
I know, it looks daunting, but replace one wire a a time, so you don't get lost, and it should go well.
I know, it looks daunting, but replace one wire a a time, so you don't get lost, and it should go well.