• Hi Guest!
    You can help ensure that British Car Forum (BCF) continues to provide a great place to engage in the British car hobby! If you find BCF a beneficial community, please consider supporting our efforts with a subscription.

    There are some perks with a member upgrade!
    **Upgrade Now**
    (PS: Subscribers don't see this gawd-aweful banner
Tips
Tips

Mike's 1964 Elva Courier MkIV Build Thread!

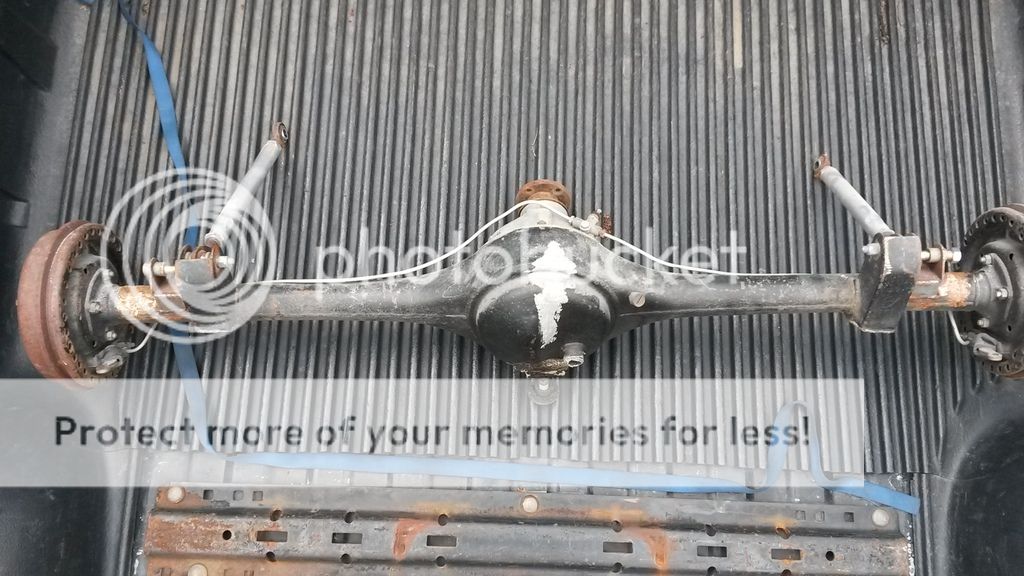
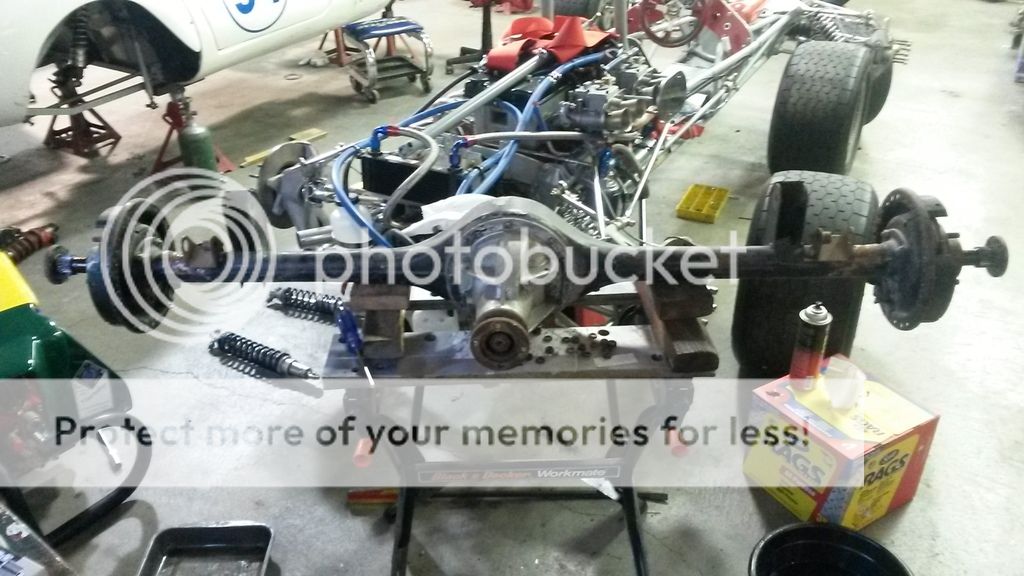
Time for another update! I was able to remove the rear axle housing from the car and bring it back to the shop:


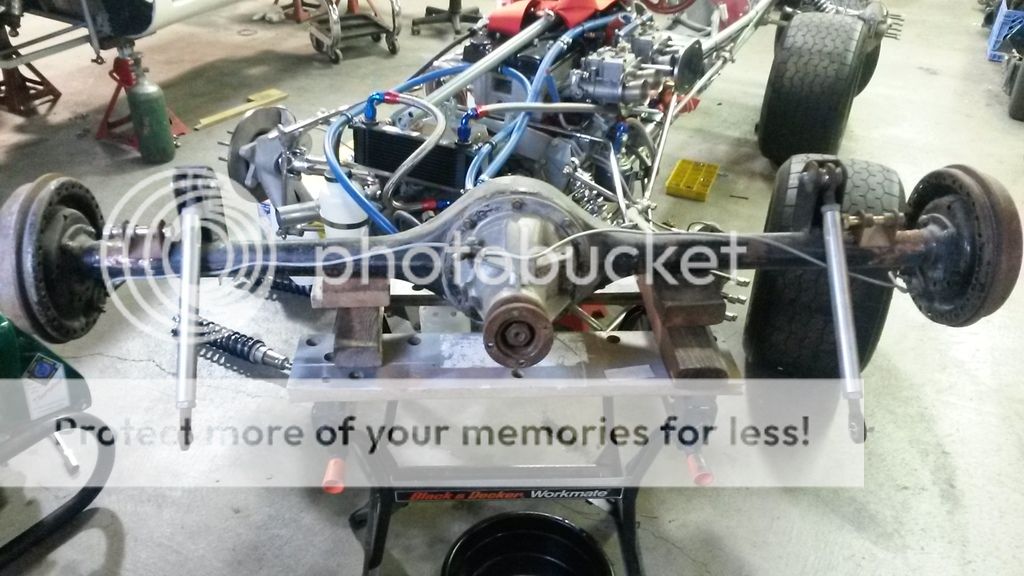
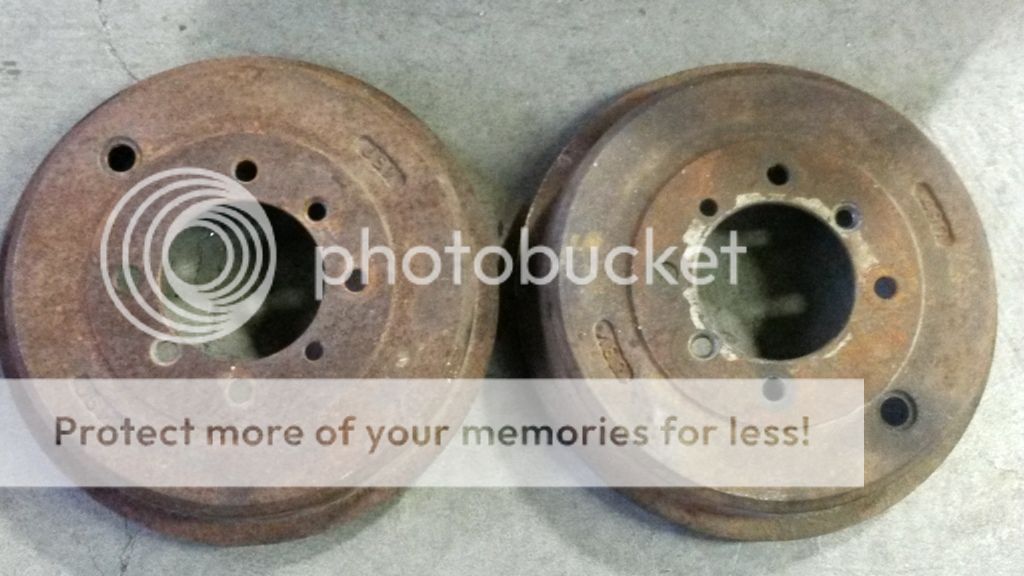
I wiped it off and removed the brake drums (with a screwdriver and a hammer) to see what things looked like:


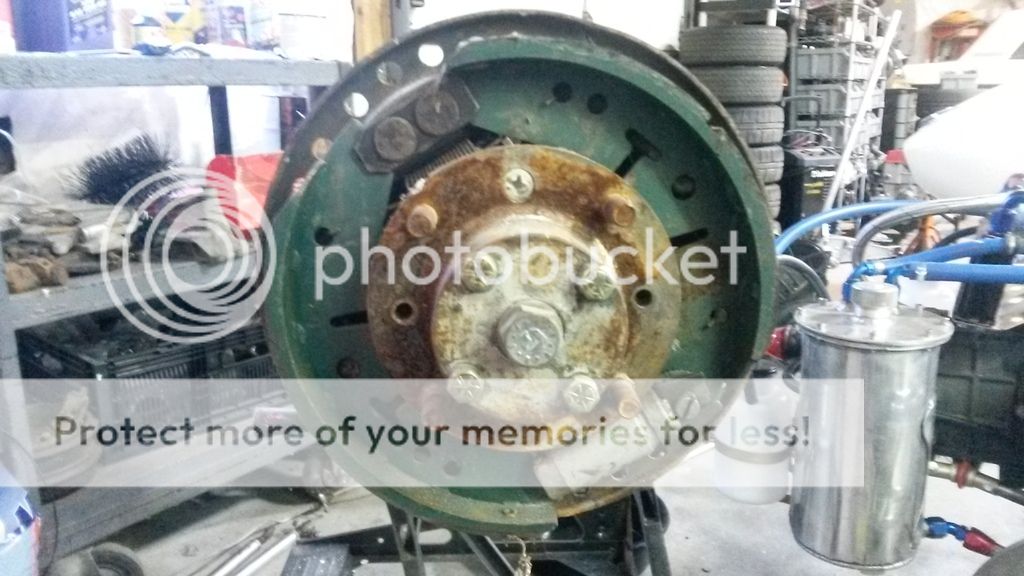
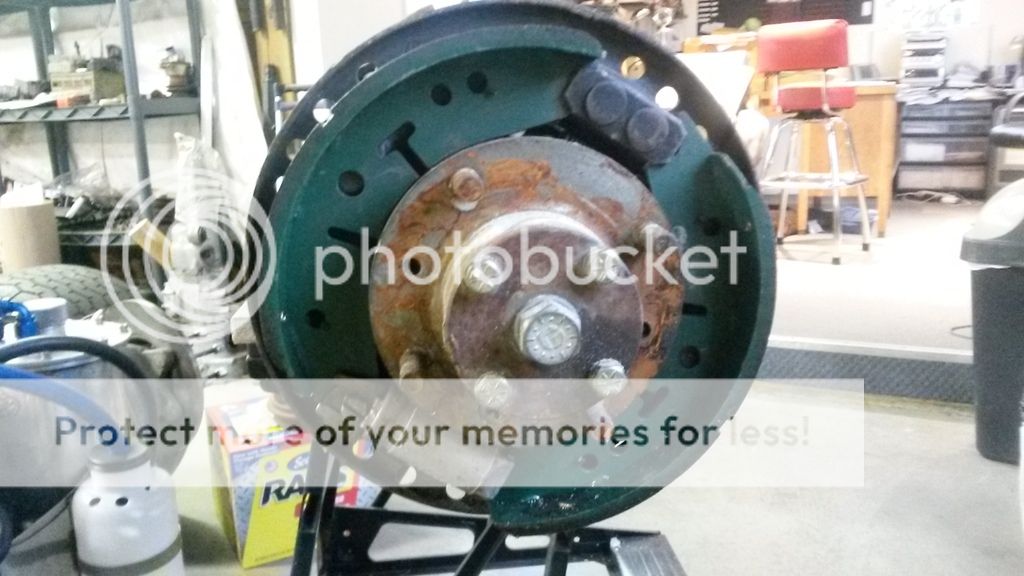
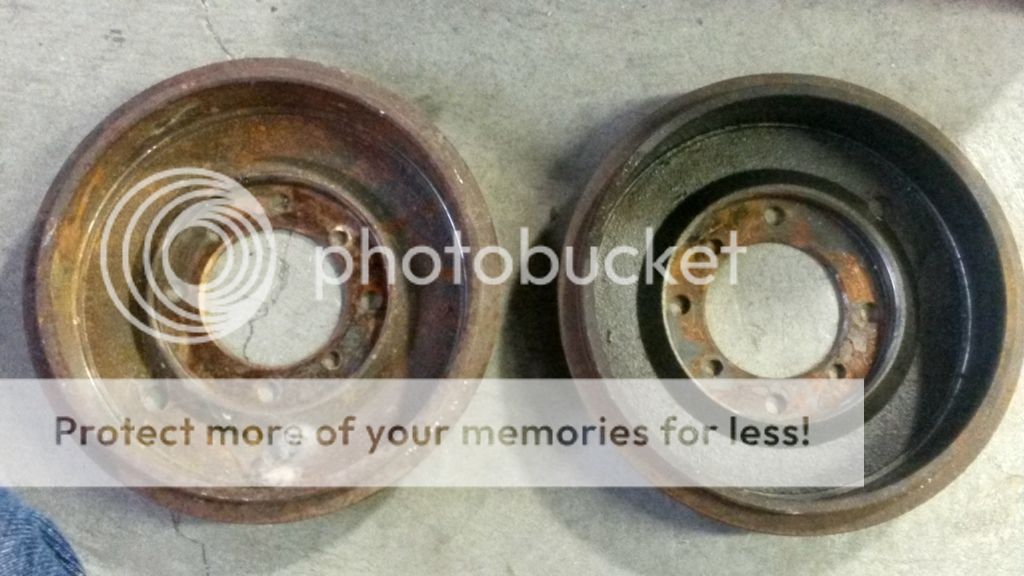
Both drums were pretty rusty and one of the slave cylinders was leaking, but the shoes are probably passable. I decided to sandblast the drums to remove the rust and check for cracks:
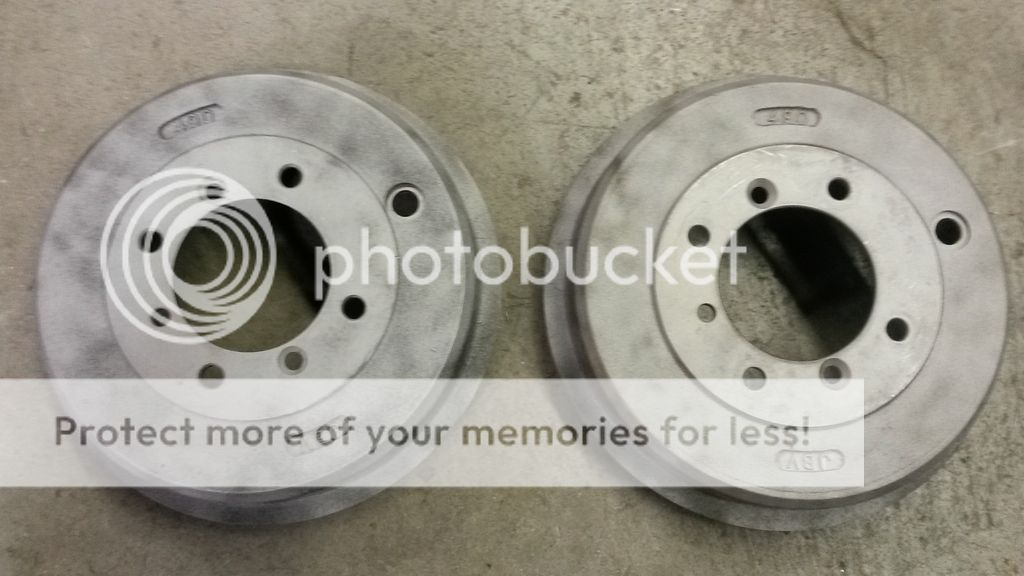
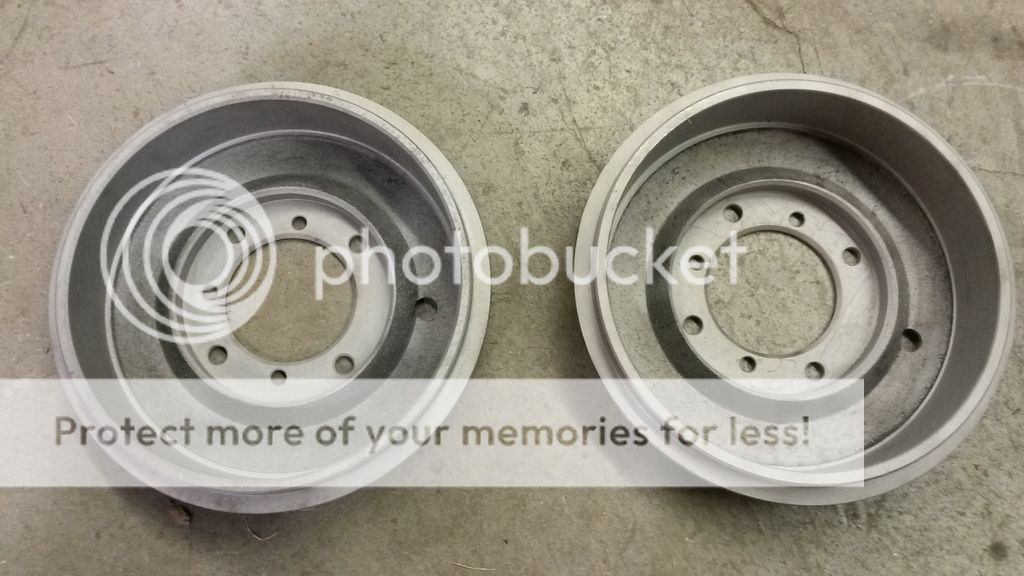


Good thing I did:


Luckily we have a spare drum around here somewhere.

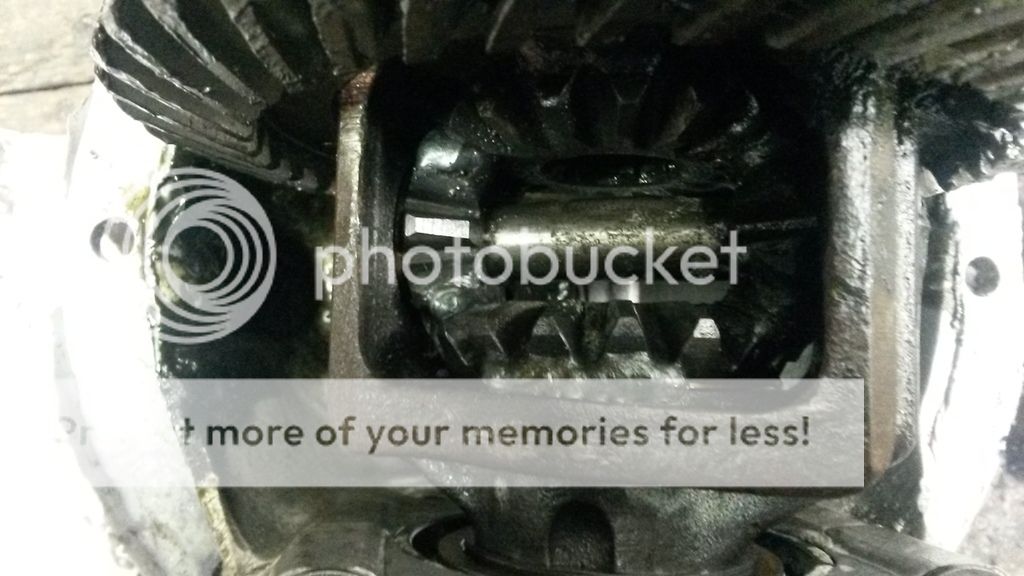
With the drums off, I slid the axles out some and removed the ring and pinion:


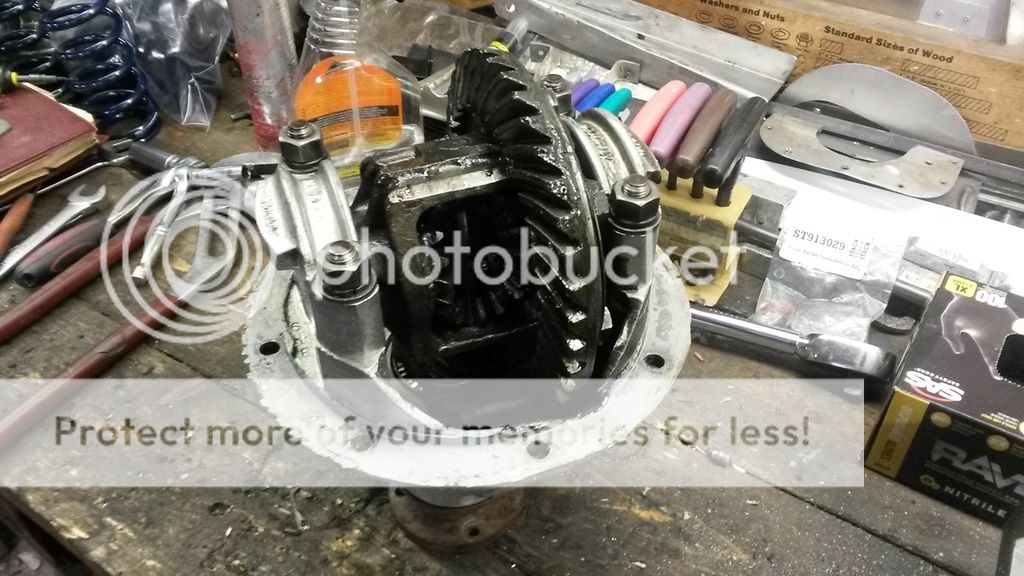
10-year-old gear oil is pretty interesting stuff!
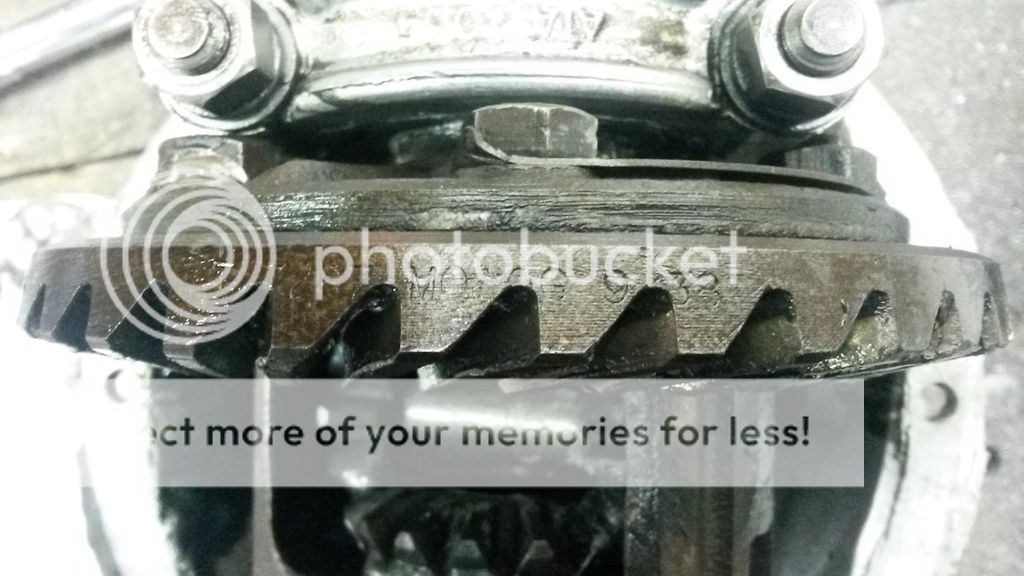
Turns out I have a 4.22 welded rear! Guess I'd better try to find some footage of Mark Donohue!


I also got a box filled with the Courier's old front suspension pieces!

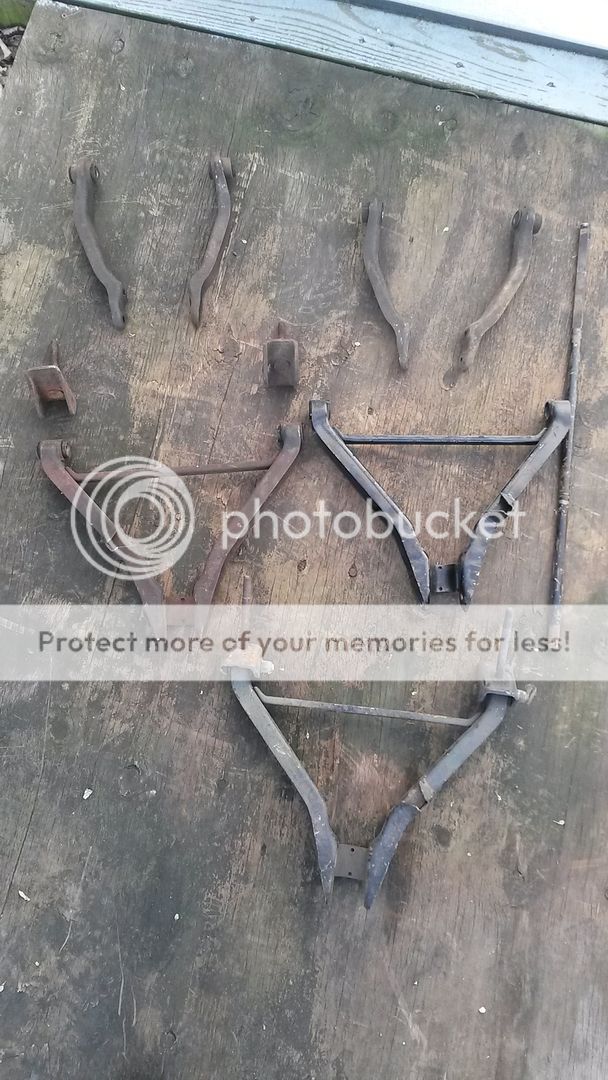
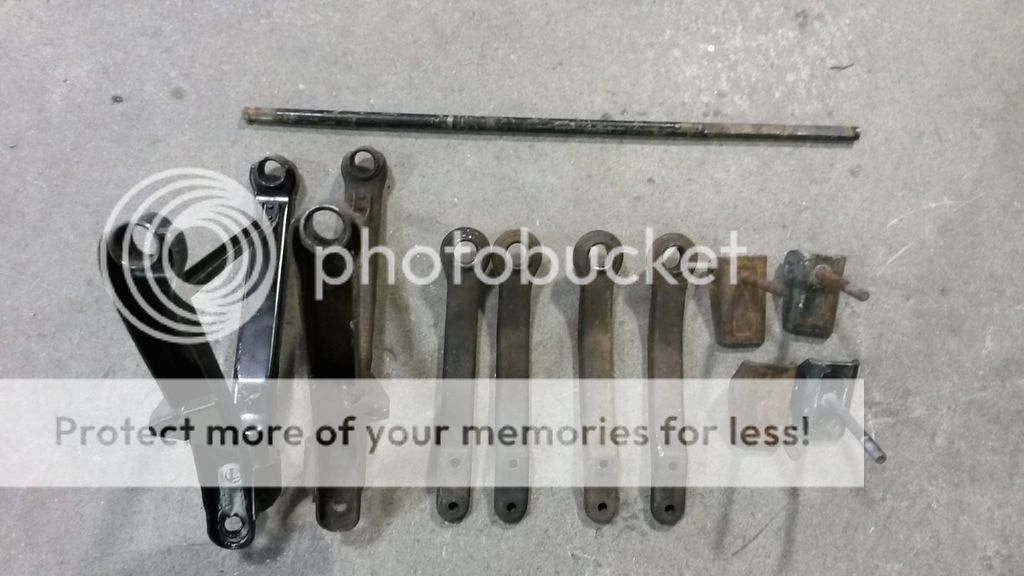
A whole front end assembly plus half the steering column and a spare lower control arm. I immediately removed all the bushings and got ready for the sand blaster:
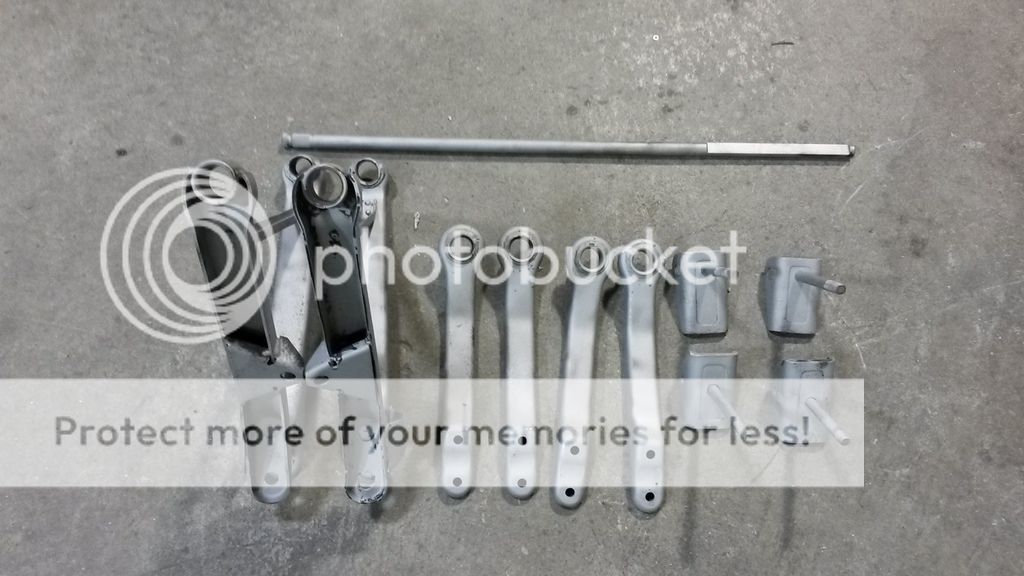
Looking better!

Finally, I got a few coats of paint on everything and it's ready for new bushings and assembly!


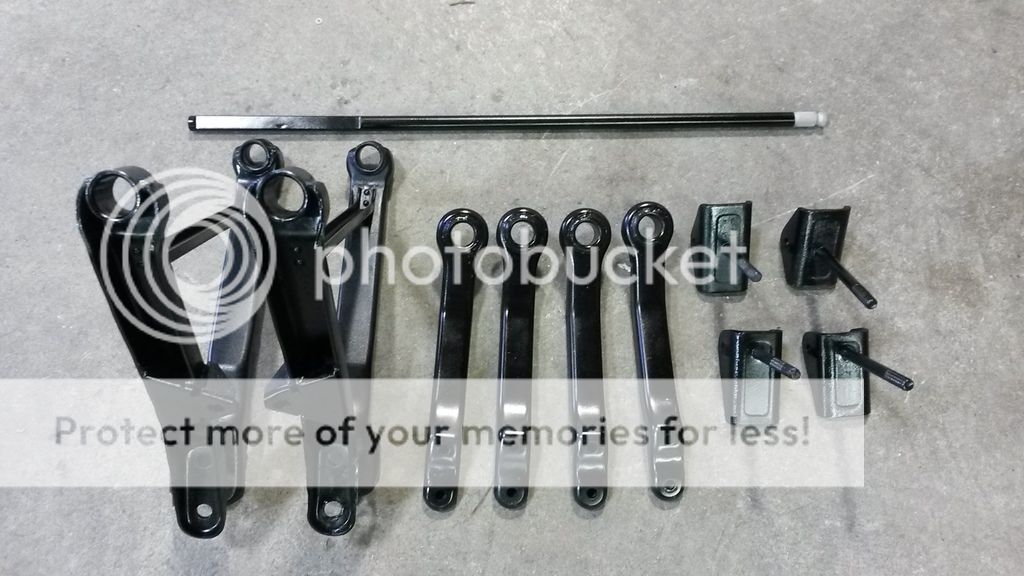
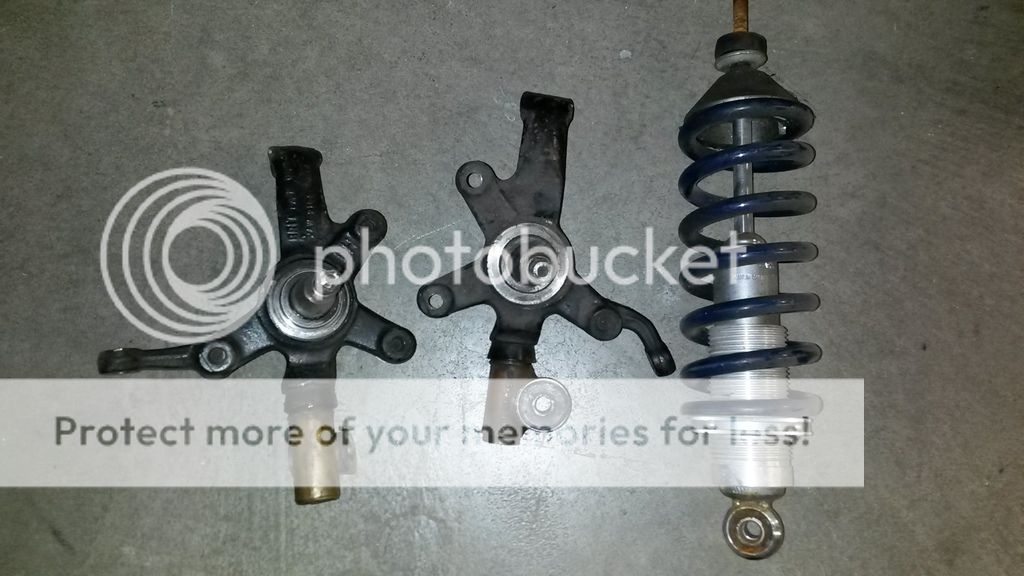
I've got both front uprights (which will have to be crack tested) and the one surviving front coilover to use as a reference!


I'm getting excited!
 
Last edited:
Another small update!
I pulled the axle housing out again and took a quick look at the floating hubs:

Everything came apart pretty easily and I made sure to label the brake backing plates very carefully:

I packed the hubs, set screws, and other bits in two bags for later:

Next, I took at look at where the bottom halves of the radius rod brackets had been cut off. They looked pretty gnarly:


After a bit of grinding:


And one more kicker: Apparently the brake drum wasn't the only cracked piece:


Womp womp.
 
"Turns out I have a 4.22 welded rear!"

That might explain the slip angle in your signature photo.
 
I got back from Summit Point at midnight, but I still had plenty of energy to do fiberglass work today! I made what I think is quite a bit of progress. I'll post everything as a "before" and "after."

First, I did all of today's work with the car on a rotisserie at this angle:


It made some parts a bit easier and some MUCH harder.

I started with a seam on the passenger pedal box:


I patched up the inside of the panel I'd previously attached:


I filled a couple cracks/cuts around the hood opening:


I also cut a couple patches for holes in the firewall and taped them into place:


I filled a seam between the left inner fender and the nose, as well as a large hole under the nose:


I cleaned up along the firewall and sealed it:


Finally, I fixed two large cracks and a hole in the rear of the car:


Finally, the hood finally fits properly!


We did have to...modify it a little to get it to fit though:


That's all for now, but I felt pretty accomplished!
 
It's been an unbelievably busy season thus far and I've only just gotten some time to work on the Courier again. There are some things I didn't get pictures of, but this will get the idea across for now!

I've been heading to the shop where the car is located after work, usually after the owner is done for the day. The last couple times I went, nobody was there and I couldn't figure out how to get the compressor turned on. That meant instead of grinding the areas I had to fiberglass, I had to file them by hand. Took a while longer but worked alright!

The biggest news first: We have one of the doors fitted! We had to remove a bit in front of it to get the hinge to work, but we'll add it back in once it's settled.


On the other side of the car, I did a bit of smoothing out around the front and rear of the left-hand door.


I reattached the two halves of the area underneath the car's "mouth."


There was a hole after reattaching the upper part of the mouth, but I forgot an "after" picture of that. (It's filled now)


I cleaned up the area between the passenger footwell and the inner fender:

As well as attaching the footwell to the chassis rail.


A super-nifty bar has been added under the front cowl so I glassed one of the feet to the chassis (it's been welded already, just so everyone knows):


I also started to attach the center of the bar to the underside of the cowl:


I sealed up the gap between the rear shelf and the underside of the rear cowl. This part was pretty tough as the glass mat had to wrap from a vertical surface to the underside. I started with a single piece but discovered it was too heavy so I used three smaller pieces with more success.


I cleaned up the rear vertical members of the chassis so I can reattach them to the body:


Then I stuck them together!


On a different note, the transmission tunnel is almost completely done and will ultimately be attached with screws for easy removal!
 
HUGE update, guys! I've been working full days at the shop, then heading to the Courier and working there! Lots of pictures, so hopefully you aren't reading this on a phone with a limited data plan! :D

First off, my sister did her first fiberglass work a couple weeks ago! Her first experience was with the hood. We had to spread it slightly on one side to get it to match the fender:

After a quick tutorial from yours truly, she got to work!


Great results!

I also showed her how to use leftover resin to fill in rough spots, and she smoothed out this bumperette:


Before we left, I prepped a number of areas for future work:


I also got a nice preview of the second inner fender!


A lot of work got done on the rear firewall and interior!


The inner fender is glassed in!


We also made some super-nifty pieces to locate and secure the transmission tunnel!
Front:

Rear:

Along with some screws, these will allow us to remove the tunnel quickly and easily to access the transmission!

My next visit, I discovered my car at this orientation:


Time to look at the underside! :D
Glassed the back of the rear firewall, under one of the front fenders, and filled some small gaps with the extra:


These final pictures are from today. First of all, it appears we won't be keeping the front bumperette "whiskers:"

I've seen a car without them, and I have to admit it looks quite nice. Hopefully mine will come out as cleanly!

First off, the new gallon of resin was slightly....dried out about four inches in. I had to drill my way in:

That was annoying.

Once I had the resin, I got a number of areas stuck together! Patched the underside of the fenders, the old rollbar holes in the rear, areas around the floor, gaps between the inner and outer fenders, some small gaps in between other panels, and a couple small cracks.


The car is almost ready to come home and then I can make it into a roller!
 
Another update, and another evening spent covered in dust and fibers!

I took pictures of most of my target areas before I worked today, so there's a good "before and after" this time.
Areas I worked on include...
The gaping hole that was once the right-hand whisker:


A small patch on the right inner fender:


Holes in the rear firewall and tail area from the old rollbar:


The left-hand inner rocker:


I also covered a small gap between the rear firewall and the rear of the chassis to prevent rubber and rocks and things from getting trapped in there:


Oh, and we have a roughed-out rollbar sitting in the car! Woo! It'll need a couple more bars obviously but I like it so far!
 
So I was finally able to pick up the engine block and transmission case yesterday to take home and start working on!


I separated the case and started preparing to clean the pieces. First, I took a look at the center section:

It had a fair amount of rust, so I decided to glass bead it. I think it came out well!


I'll spend a bit more time making 100% sure all the grit is out of the drillings, but I'm confident it'll get nice and clean.

Today, I decided to work on the bellhousing. It's cast iron, like the rest of the drivetrain is (unfortunately...). Here's my starting point:


First order of business was removing the throw-out bearing arm pivot!
Next was removing the mount for the throw-out bearing arm and a section of the starter shield. Here's my dad's bellhousing as an example of my goal:


Using a combination of hacksaw and cutting wheel, I got the mount first...

...and the shield second.

A bit of work with the angle grinder and I'll be good to go! Not bad for a rough cut!


And by the way, it looks like I saved a pound of weight with my cutting!


Next is painting the cleaned pieces, cleaning the second brake drum, organizing the parts for the gearbox and rear axle, and--dare I say it--some assembly!
 
It's been quite a while since my last update but I have a few developments to share! Most importantly, the car is at our shop and accessible all the time!


I also found hugely important piece of fiberglass: The second parking light! I really wasn't looking forward to recreating it myself.


With the car now accessible, I decided to prep and rust-proof the metal areas of the car:


I started by prepping and spraying the steel floors:


I also sanded/wire brushed the rest of the chassis, but the rust-proofing paint didn't really look very different.

Speaking of painting, I finally cleaned up and painted my repaired axle housing!


In preparation for future assemblies, I've laid out a table of goodies including some new gearbox bits!


Looking to make some more strides soon!
 
Mike--

I too sourced a bunch of stuff for repairs to the Courier's front end from RD--looks like between the two of us he is doing okay. I am putting a diff back in the Courier and have a set of wheels on order to eliminate what you termed the steroidal look the car had when you last saw it. I am probably going to bring it to the Turkey Bowl.

BTW I am still planning to be at Sebring--have you guys measured the trailer yet to see if the G4 will squeeze in? Having four of them under your tent would be an impressive sight and if it will make the difference I am happy to remove the "Prepared By Town Creek Shop" decal from the front quarter.
 
It's been a while, but I finally have an update of sorts!


I loaded the body and chassis up and brought them to the blaster to have the whole shell, hood, trunk, and doors cleaned up! I'm hoping it'll gain me back some of the weight I've added in fiberglass resin....

I'm picking it up tomorrow and can't wait to see the results!
 
I picked up the car today and I'm stoked with the results! :D


The benefits to soda blasting are twofold: First, the car is now completely clean and ready for finishing bodywork and paint. Second, this will reveal any areas which need further attention like the small perforation at the bottom of the door and the cracks in the nose. I'm excited to finish up the prep work and get the girl to the bodyshop!
 
Since it'll be a day or two until our body/paint guy can come look at the car, I took a little time to clean up the rear brake backing plates today!

They started out in decent shape, but someone had attacked them with a drill to add a number of "cooling holes."

Sorry about the blur, my blood sugar must've been low.

I cleaned up the holes with a chamfering tool to clean things up and avoid any future injuries!

Then I took the plates into the bead blaster and got them nice and clean:


It was about 70Âş too cold to paint, so that'll be next! This way everything is ready to install after I rebuild the slave cylinders.
 
Another update! Looking at the car after the soda blasting, it became clear I would have to sand off all the original primer to know exactly which areas needed attention and to best take care of them. This is how the car looked beforehand:


You can see there are a number of obvious issues. First, the front right fender was obviously cut out and replaced at least once. During that process, a pretty excessive amount of bondo was applied and in some places never even bonded to the car. I'll have to approach this with caution, as I don't want to open Pandora's Box much farther than I already have...

In the meantime, I decided to try out my new Harbor Freight orbital palm sander on the area between the headlights. I think it came out pretty good for my first stab at this type of sanding!


Not only will this provide a cleaner base to work with, it gives a great view of the cracks in the fiberglass resin. For areas like this, I'll be applying a thin fiberglass mat over the whole area to prevent these cracks from resurfacing.

In other news, I've started assembling the rear axle assembly! I stumbled upon a limited slip unit to replace the welded spider gears, which is very exciting:

And I got it attached to the housing for good!


My new wheel studs arrived today, so there's officially nothing but myself keeping me from assembling the hubs, axles, and brakes! It'll be great to have a big piece of the car ready to go!
 
I got back from VIR a couple days ago (awesome weekend!) and we leave for Road Atlanta on Monday, but I still found some time to work a bit on the car! I pulled the studs into one of the rear hubs, but I spent most of my time sanding. I spent a lot of time taking the huge amount of Bondo and primer off the right-front fender: You can see some of the steps taken to (badly) reinstall the fender. There are some rivet holes: That white ridge around the seam was much higher than it should have been, and instead of taking the surface down someone just added a ton of filler. Problem solved: Along the same lines, there was a HUGE chunk of Bondo and fiberglass barely attached under the bumperette. Not anymore! You can see how much they built the outside edge up to match the nasty fender. I need to decide how I want to tackle this going forward. I also cleaned up a bit on the headlight shelf, the front of the nose, and the left-front fender: I'm happy to make some more progress and hope to continue sanding and/or rebuilding the rear axle assembly when I get back from Road Atlanta!
 
Alright, I got a bit lazy with the updates but I have been getting some work done when I can!

First, the rear hubs were one thing keeping me from assembling the rear axle housing so I decided to get those all finished. I ordered the appropriate bearings and seals and removed the old bearings:


I installed the new bearings using the vice, bearing drivers, and careful hammer work:


Unfortunately, the seals I'd ordered are apparently slightly different now for some reason:

I did track down the correct seals (special order from Alabama!) and install them.

In preparation for assembly, I began installing the repainted and cleaned up rear backing plates and the rear shoes:


The old wheel cylinders were installed just for fun; I've got a pair of new ones ready to go in.

In the meantime, I decided to start preparing the front suspension pieces and make some headway on the car becoming a roller. I collected some spare Spitfire front end pieces we had in the shop:


I started with the uprights and found two from each side which looked like good candidates for crack testing. I began sandblasting:


Then performed the crack test using penetrant and a red dye:


All four looked okay so I picked my favorites!

Paint will be next, followed by front hub cleaning and assembly.

Speaking of paint....I dropped the car off at the body shop last week to have the rear end worked on!!


This is after ONE DAY:


(There were some...low spots in the doors.)

Then almost before I knew it, the car was sanded, leveled, and primed up to the front of the doors!


Pretty exciting stuff! It's great seeing the car start to literally take shape and it gives me good incentive to finish the cosmetic surgery in the front so that can get smoothed out too!
 
Back
Top