Offline
I got my TD on the road July 4, but I noticed immediately that it was burning some oil. Not a lot, but enough to create smoke and a noticeable, burned-oil smell. Not the worst case I've ever seen, but still unacceptable. Here's the story of the fix, in case it might be useful to someone else.
The compressions were good, so it seemed that the problem had to be valve guides. I hadn't checked them before reinstalling the head--since the compressions were good, the valves' seating was OK, and I let it go at that. Perhaps a little self-delusion, since I really didn't want to have to take the head apart. I should have done that, however.
I removed the head and checked things out. After I got the valve springs off, I saw immediately that the guides were pressed too far into the head--really too far, like about a quarter inch! Whoever replaced them must have assumed that the step in diameter must be flush with the head surface, which is not right. This defeats the purpose of the oil shield, allowing too much oil to get to the valve stem, so oil burning is possible even if there is no wear. Also, it blocks the ports and probably costs a few HP.
I don't have any way to measure the inside diameter of the guide, but it's possible to get a sense of the clearance between the valve stem and the guide by putting a dial gauge on the stem near the point where it emerges from the guide and wiggling it. Most were around 4-5 mils, where the specified maximum difference between the valve stem diameter and guide ID is 3.6 mils. A couple were a lot more, 7-8 mils. Seemed like time to replace the guides, for sure.
The valve stems, fortunately, were within spec (0.315" +- 0.0004"), and they looked good. In the end, I needed only new guides and of course a gasket set. I got these from British Parts Northwest.
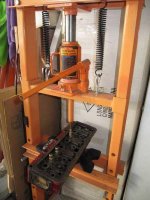
First task is to remove the old guides. The shop manual tells us to fabricate a drift, 1/2" rod with one end turned down to the diameter of the valve stem, and to use it with a hammer to drive the guide out through the combustion chamber side of the head. I fabricated the drift and set to it, but--guess what, folks--this DOESN'T WORK! The guides are way too tight, and I was worried about cracking some part of the head, with all the force it seemed to need. Instead, I tried pressing them out with my 12-ton press. That required scary amounts of force, but the guides finally broke loose with a lout BANG! (Time for fresh underwear!) After they broke loose, however, they were not hard to press out the rest of the way.
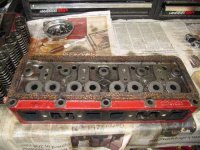
Pressing in the new ones was pretty easy. I propped the head at an angle so I could press them in straight.
The guides, however, were a little undersize. I couldn't get the valve stem into them without binding, and once they were pressed into the head, the diameter probably was reduced a couple more tenths of a mil. So, I had to ream the guides. I don't know if this is standard procedure, but given the tolerances, it's probably not bad to start small and ream to the right diameter. I had a 0.316" reamer in my tool stash, but it was not quite enough. I had to buy a 0.317" reamer, which is the minimum specified guide ID.
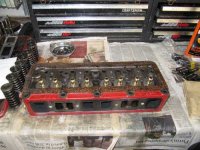
That manganese bronze is hard stuff! I didn't realize how hard--I should have bought a carbide reamer, but with the ordinary one, plus a little sweat, I got them reamed out.
Reassembling everything was straightforward. I did a light valve grind, since it's possible that the holes in the guides are not precisely in the same positions as the new ones, and if not, this would help them seal well. Of course, it's important to get the valves back into their original positions.
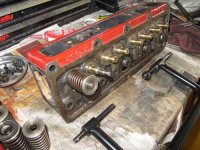
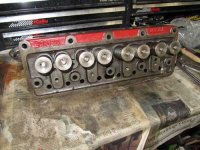
All back together. I took the car out for a test drive this morning, and no more oil burning. Yay!
The compressions were good, so it seemed that the problem had to be valve guides. I hadn't checked them before reinstalling the head--since the compressions were good, the valves' seating was OK, and I let it go at that. Perhaps a little self-delusion, since I really didn't want to have to take the head apart. I should have done that, however.
I removed the head and checked things out. After I got the valve springs off, I saw immediately that the guides were pressed too far into the head--really too far, like about a quarter inch! Whoever replaced them must have assumed that the step in diameter must be flush with the head surface, which is not right. This defeats the purpose of the oil shield, allowing too much oil to get to the valve stem, so oil burning is possible even if there is no wear. Also, it blocks the ports and probably costs a few HP.
I don't have any way to measure the inside diameter of the guide, but it's possible to get a sense of the clearance between the valve stem and the guide by putting a dial gauge on the stem near the point where it emerges from the guide and wiggling it. Most were around 4-5 mils, where the specified maximum difference between the valve stem diameter and guide ID is 3.6 mils. A couple were a lot more, 7-8 mils. Seemed like time to replace the guides, for sure.
The valve stems, fortunately, were within spec (0.315" +- 0.0004"), and they looked good. In the end, I needed only new guides and of course a gasket set. I got these from British Parts Northwest.
First task is to remove the old guides. The shop manual tells us to fabricate a drift, 1/2" rod with one end turned down to the diameter of the valve stem, and to use it with a hammer to drive the guide out through the combustion chamber side of the head. I fabricated the drift and set to it, but--guess what, folks--this DOESN'T WORK! The guides are way too tight, and I was worried about cracking some part of the head, with all the force it seemed to need. Instead, I tried pressing them out with my 12-ton press. That required scary amounts of force, but the guides finally broke loose with a lout BANG! (Time for fresh underwear!) After they broke loose, however, they were not hard to press out the rest of the way.

Pressing in the new ones was pretty easy. I propped the head at an angle so I could press them in straight.
The guides, however, were a little undersize. I couldn't get the valve stem into them without binding, and once they were pressed into the head, the diameter probably was reduced a couple more tenths of a mil. So, I had to ream the guides. I don't know if this is standard procedure, but given the tolerances, it's probably not bad to start small and ream to the right diameter. I had a 0.316" reamer in my tool stash, but it was not quite enough. I had to buy a 0.317" reamer, which is the minimum specified guide ID.


That manganese bronze is hard stuff! I didn't realize how hard--I should have bought a carbide reamer, but with the ordinary one, plus a little sweat, I got them reamed out.
Reassembling everything was straightforward. I did a light valve grind, since it's possible that the holes in the guides are not precisely in the same positions as the new ones, and if not, this would help them seal well. Of course, it's important to get the valves back into their original positions.


All back together. I took the car out for a test drive this morning, and no more oil burning. Yay!

 Hi Guest!

 smilie in place of the real @
 Pretty Please - add it to our Events forum(s) and add to the calendar! >>

