-
 Hi Guest!
If you appreciate British Car Forum and our 25 years of supporting British car enthusiasts with technical and anicdotal information, collected from our thousands of great members, please support us with a low-cost subscription. You can become a supporting member for less than the dues of most car clubs.
There are some perks with a member upgrade!**Upgrade Now**
(PS: Subscribers don't see this gawd-aweful banner

Tips
- We have a special forum called "Member Articles" where you can submit actual articles for consideration for publication. Learn More
- Don't have an Avatar? If not, your avatar will default to the 1st character in your username. Go into "Account Details" to change your Avatar.
- Some basic forum navigation info: click
Hey - did you know if you click on the title of a thread it will take you to the first unread post since you last visited that thread?
- Hey Guest - Is your British Car Club in our Clubs database? If not, send me a PM - Basil

- Looking for a local club? Click the "Clubs" tab above and browse hundreds of clubs world-wide.
- Add Android or iPhone APP: click
- Did you know - any picture or video you add in your posts in any marque-specific forum will also get added to the Media Gallery automatically.
- A few more tips about posting and replying: click
- Hey there Guest - be sure to keep your profile page up to date with interesting info about yourself: learn more
- More tips and tricks on Posting and Replying: click
 STOP!! Never post your email address in open forums. Bots can "harvest" your email! If you must share your email use a Private Message or use the
  smilie in place of the real @
- Want to mention another member in a post & get their attention? WATCH THIS

- So, you created a "Group" here at BCF and would like to invite other members to join? Watch this!
- Hey Guest - A post a day keeps Basil from visiting you in the small hours and putting a bat up your nightdress!
- Hey Guest - do you know of an upcoming British car event?
 Pretty Please - add it to our Events forum(s) and add to the calendar! >> Here's How <<
- Hey Guest - you be stylin'
Change the look and feel of the forum to fit your taste. Check it out
- If you run across an inappropriate post, for example a post that breaks our rules or looks like it might be spam, you can report the post to the moderators: Learn More
- If you would like to try some different "looks" or styles for the site, scroll to the very bottom, on the left and click the Style Selector.
You are using an out of date browser. It may not display this or other websites correctly.
You should upgrade or use an alternative browser.
You should upgrade or use an alternative browser.
Making Progress
- Thread starter M_Pied_Lourd
- Start date
M_Pied_Lourd
Darth Vader
Offline
M_Pied_Lourd
Darth Vader
Offline
A few more video updates
Door Gap
https://www.youtube.com/watch?v=9anMwVuNUsI&feature=plcp
https://www.youtube.com/watch?v=9Ta7nVtgTDs&feature=plcp
https://www.youtube.com/watch?v=y9L4w1vTafE&feature=plcp
Rear Valance
https://www.youtube.com/watch?v=4wvxXSmv_y8&feature=plcp
https://www.youtube.com/watch?v=avn4v624b98&feature=plcp
Drivers Side Front Fender Repair
https://www.youtube.com/watch?v=ivbLndgDRDU&feature=plcp
https://www.youtube.com/watch?v=0Lz6PmiEKZs&feature=plcp
Front Valance Repair
https://www.youtube.com/watch?v=ELPQwHPiQRI&feature=plcp
Cheers
Tush
Offline
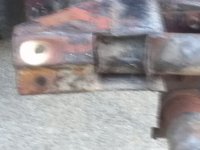
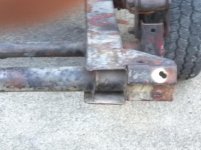
Really nice work! I am in a similar state of execution. How did you go about working on the rear leaf springs? What do you recommend I do to clean mine up? Did you use graphite dry lube? I noticed the painted numbers on the top of the springs, I have them on mine but they are much smaller what do they refer too anyway? I am also wondering why the holes on the rear frame are the way they are see the attached picture. I think the body shop drilled them this way, any suggestions on what to do about them? Thanks!


M_Pied_Lourd
Darth Vader
Offline
Hi Dorn,
If you do a search on here, you will find lots of discussions on leaf Springs. Mine appear to be fairly new and are in excellent condition. I think that there are many different thoughts on what to use to lube the leafs. I like the idea of using the old engine oil...I think it was Randall on here who aslo experimented with putting some material between the leaves..he might be able to expand on that or you might find it in a search.
Yes, looks like the body shop was having some alignment issues and decided to drill so extra holes. Once you decide what holes to use you can weld up the other holes to close them.
Good luck with your project.
Cheers
M. Pied Lourd
When I did a frame-off on my '67 IH Scout, I disassemblked the leaves and painted them with EZ-Slide, a graphite impregnated paint available at agricultural shops, etc. for grain hoppers and the like. That truck rode great! I can't really comment on durability though b/c I didn't ut more than 1000 miles on it until I sold it.
M_Pied_Lourd
Darth Vader
Offline
Hi All,
Been quite some time since I updated this thread. Have been making a lot of videos on this project. For anyone interested, you can find the on my Youtube Channel here
https://www.youtube.com/user/cheftush
I did take some photos over the past couple of weeks and though I would post them here. Getting pretty close to paint. Hopefully will get to spray in the next 3 to 4 weeks.
Anyway, a few photos.
I have been using white epoxy primer as secondary primer coat. First primer coating is self etching primer. I like using the white as a base as when you are sanding later coats of primer (using grey) you can see when you are getting into the epoxy before you sand through to the etch and bare metal....
Here is the tub in Epoxy

Here are the body panels in various stages of primer. After the epoxy, I went with a Polyester Primer (Featherfill G2/Evercoat). I block sanded the Polyester Primer and am now moving on to a Urethane Primer (Uro-Fill 2.1/Evercoat) for final blocking.

Here is the body tub in a combination of Urethane Primer (Tub Interior) and Polyester Primer (Engine Bay/All Exterior Panels). The Polyester will be blocked out first and then recoated with Urethane Primer for a final blocking.

And a quick shot with the body panels back on this weekend. You can see some the scuttle area being prepped for final priming and some black graphite guide coat on the sides of the Bonnet where I am doing final sanding.

That's all for now.
Cheers
Tush
Been quite some time since I updated this thread. Have been making a lot of videos on this project. For anyone interested, you can find the on my Youtube Channel here
https://www.youtube.com/user/cheftush
I did take some photos over the past couple of weeks and though I would post them here. Getting pretty close to paint. Hopefully will get to spray in the next 3 to 4 weeks.
Anyway, a few photos.
I have been using white epoxy primer as secondary primer coat. First primer coating is self etching primer. I like using the white as a base as when you are sanding later coats of primer (using grey) you can see when you are getting into the epoxy before you sand through to the etch and bare metal....
Here is the tub in Epoxy

Here are the body panels in various stages of primer. After the epoxy, I went with a Polyester Primer (Featherfill G2/Evercoat). I block sanded the Polyester Primer and am now moving on to a Urethane Primer (Uro-Fill 2.1/Evercoat) for final blocking.

Here is the body tub in a combination of Urethane Primer (Tub Interior) and Polyester Primer (Engine Bay/All Exterior Panels). The Polyester will be blocked out first and then recoated with Urethane Primer for a final blocking.

And a quick shot with the body panels back on this weekend. You can see some the scuttle area being prepped for final priming and some black graphite guide coat on the sides of the Bonnet where I am doing final sanding.

That's all for now.
Cheers
Tush
M_Pied_Lourd
Darth Vader
Offline
Thanks Guys. I appreciate it.
Cheers
Tush
Cheers
Tush
M_Pied_Lourd
Darth Vader
Offline
Hi Guys, Sorry I haven't been doing a good job of updating this thread....
Car is painted and the re-assembly has begun!
https://www.youtube.com/watch?v=ZwFO-2U5_lk
Cheers
Tush
Car is painted and the re-assembly has begun!
https://www.youtube.com/watch?v=ZwFO-2U5_lk
Cheers
Tush

