• Hi Guest!
    You can help ensure that British Car Forum (BCF) continues to provide a great place to engage in the British car hobby! If you find BCF a beneficial community, please consider supporting our efforts with a subscription.

    There are some perks with a member upgrade!
    **Upgrade Now**
    (PS: Subscribers don't see this gawd-aweful banner
Tips
Tips

Making a steering wheel

TomFromStLouis

Jedi Trainee
Country flag
Offline
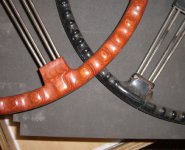
There aren't too many wooden parts on a Healey, so this is one of the few mods I am qualified to make. My BJ8 came with a laminated Moto Lita wheel, which is nice and all, but neither of the laminated woods match the walnut burl dash. My feeling is that a walnut wheel would look terrific. The car also came with the original wheel, complete with severely cracked Bakelite. From all I have heard and read, trying to repair the Bakelite is an exercise in frustration.

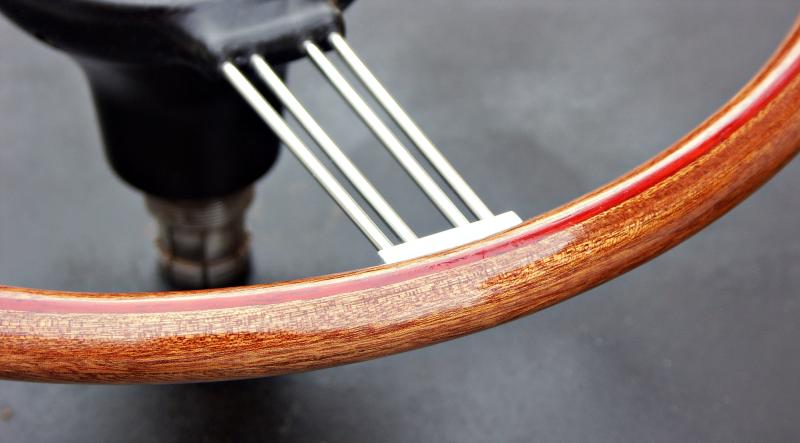
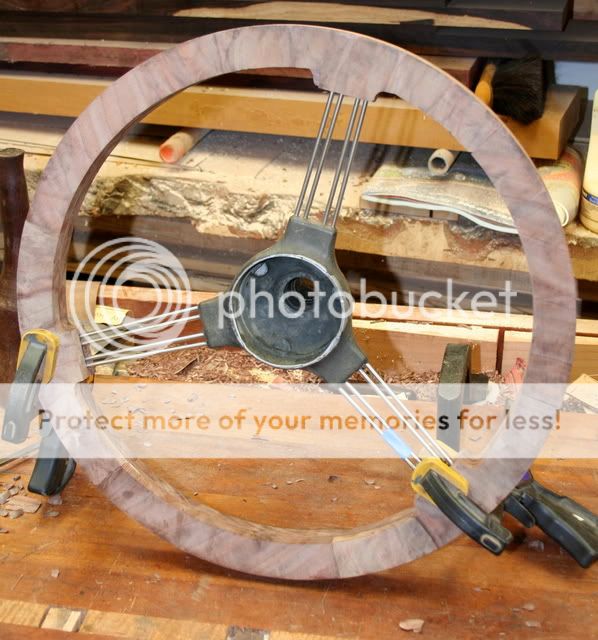
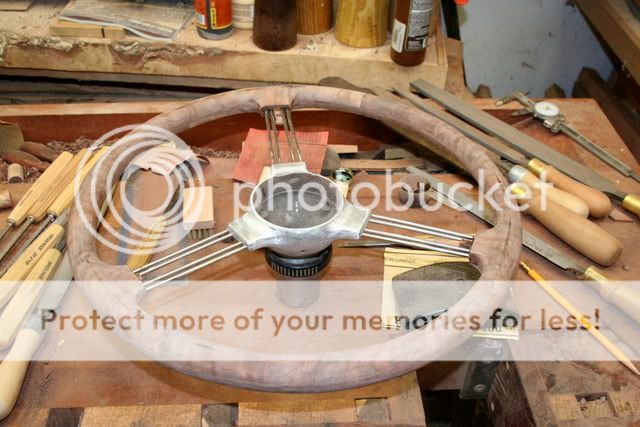
So I am attempting to build a walnut wheel to install over the original frame. After removing the bakelite, here is what I have so far:

IMG_7753.jpg


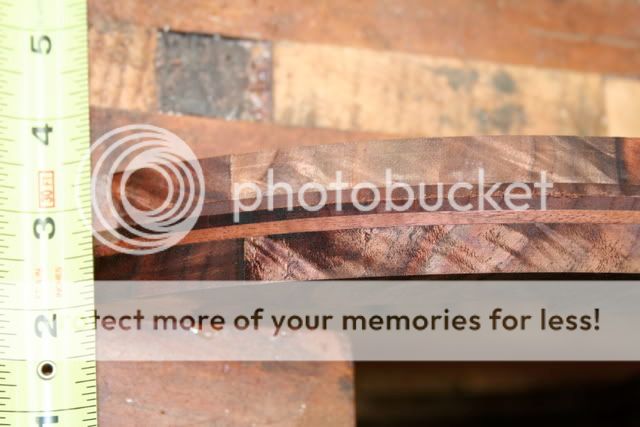
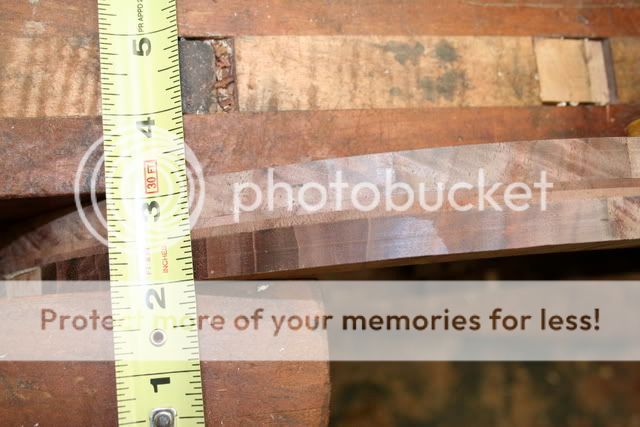
I had a hunk of walnut with the kind of swirling grain you see in burl that I had been saving. Bought it off a toothless guy years ago. I figure the wheel grip will be roughly 1" diameter, so I ripped some ~1/2" thick slabs and carefully chose a dozen segments for the front and back of the wheel. You might be able to steam bend straight grain walnut to a 17" circle, but no way swirling grain pieces would stay together. I then glued up 3 sections of 1/8" thick plain walnut, alternating the grain as in plywood for strength and stability. I am now gluing one 6 piece segmented burl circle to the one layer "ply" and another 6 piece segmented burl circle to the other double ply. I will have some thickness to play with when shaping the finger grips on the back of the wheel.

IMG_7754.jpg


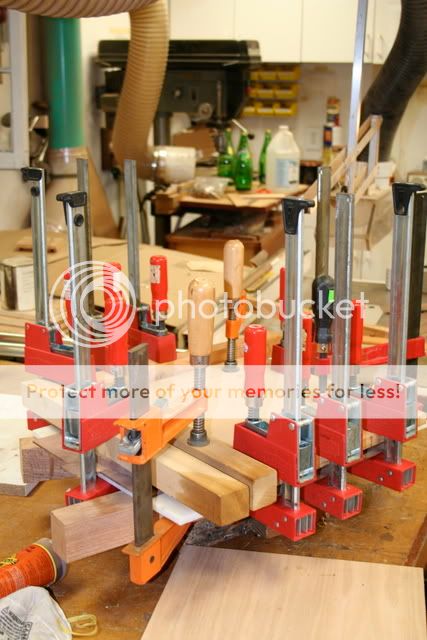
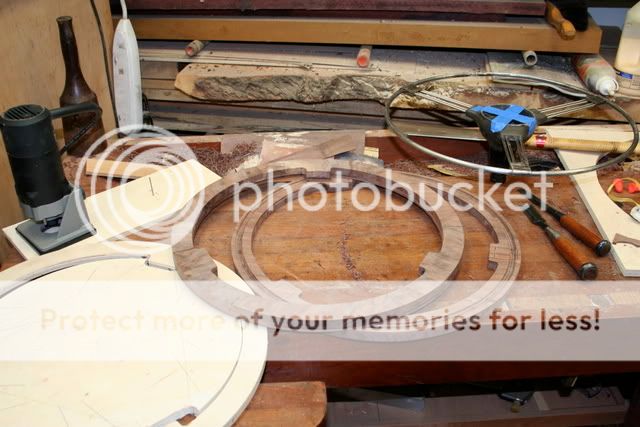
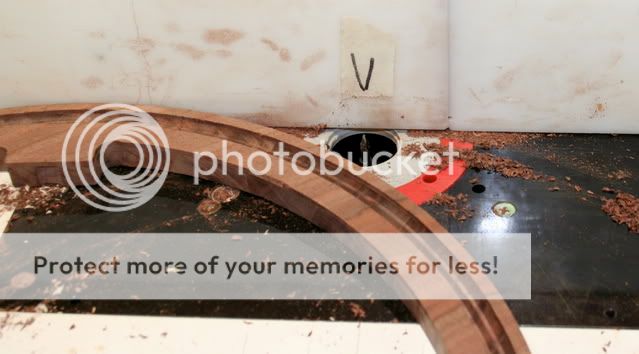
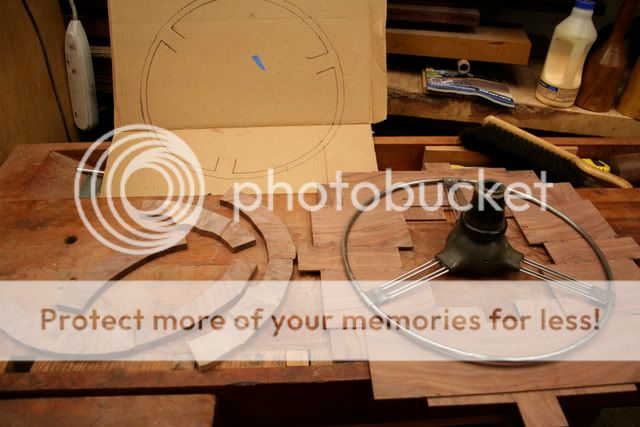
Polyurethane glue needs clamping pressure. Once out of the clamps, I will route each circle using a template to give me the exact size and shape of the final piece. Then route a groove in each half for the 5/16" diameter wire of the original wheel to be epoxied in place and glue the two halves together. Some shaping with hand tools and lots of finish should give me a wheel that will better match the dash. I will keep you posted on progress.

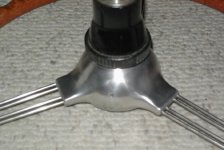
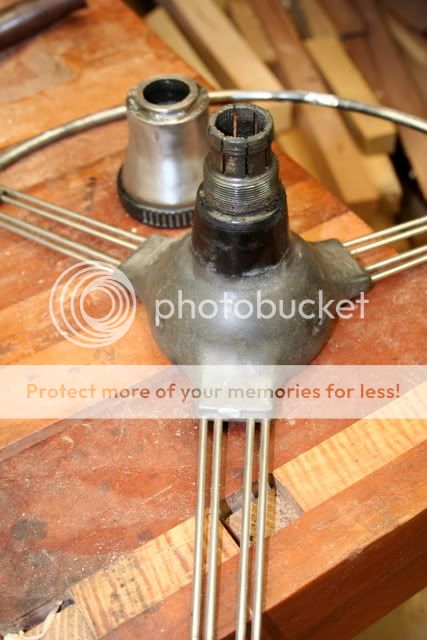
Meanwhile, perhaps you could suggest a course of action for the original cup shaped thingy that holds the horn. The acrylic? paint is chipped in several places; would you strip it all off and prime and paint from scratch or what?

IMG_7755.jpg
 
I'm sure you are going to end up with a beautiful ,one-of-a kind steering wheel. Nice work. I'd certainly strip the wheel hub and prime and paint it, if you are set up for that. You might consider having the hub area powder coated. It is more scratch resistant. Don't forget to show us the finished product. I guess you won't be putting a leather cover on that wheel!
 
Tom,
I would suggest making it a little thicker than the stock steering wheel. Much more comfortable on the hands on a long days drive.
 
Tom,

Please post pictures along the way! I would like to see the entire process (not that I'm qualified, just interested!).

Mark
 
Hey Greg, That looks nice! I am definitely going to strip and smooth mine like that, but I think I'll stick with a black coating.

The powder coating idea makes some sense, but I don't think I can easily find an oven large enough. I am thinking several coats of paint ought to withstand my normal tortures well enough. Hmmmm, glossy or matte black? Leaning glossy.

Bob, I know I want thicker than that bakelite was for the reason you mentioned. I just don't want the final product look like it came out of a Peterbilt or something. If the wood looks good enough, maybe big (17") and chunky won't look like a misfit.

I will post progress as it occurs, but be warned: I am slow.
 
Hi Tom,
The main reason I leaned away from going with a shiny finish is getting a glare in my eyes while driving. It may look great parked there, but I'd hate to mash the front of my car from blindness because of the wheel finish. Just a thought.
 
Tom,
One of the guys on the MGA section of the MGCARS.org (I think that is the correct webb address) did the exact thing and it turned out great, it was alot of effort but the result was beautiful. Have a good day!

John
 
Hi Tom,
In your first post you mentioned making the wood grip 1" wide. I went and measured mine which is 3/4" wide and 7/8" deep at the low spot of the finger grip to 1 1/8" and the high spot of the fingers. Here is a shot of my wheel next to an original wheel for reference.
9785.jpg
 

Attachments

  • 9785.jpg
    9785.jpg
    78.3 KB · Views: 843
Thanks Greg, that helps a lot. Are these new dimensions comfortable for you? I wear large gloves and sometimes wish the fingers were a bit longer, so mine may end up a bit larger than you show. No promises, though, these things can vary. /bcforum/images/%%GRAEMLIN_URL%%/blush.gif

It is useful to know that yours is by no means circular and has the larger and fewer finger grip bumps. And your original looks just like mine did!
 
TomFromStLouis said:
Are these new dimensions comfortable for you? I wear large gloves and sometimes wish the fingers were a bit longer
A large size glove fits quite comfy on me.

TomFromStLouis said:
mine may end up a bit larger than you show. No promises, though, these things can vary. /bcforum/images/%%GRAEMLIN_URL%%/blush.gif

That's the way it should be. Don't make it to fit me, I may want to drive your car then. /bcforum/images/%%GRAEMLIN_URL%%/laugh.gif

One other note you probably already thought of; when you are recessing for the spokes, remember that the taper of the front pieces will slope in opposite direction of the rear pieces.
 
John_Progess said:
Tom,
One of the guys on the MGA section of the MGCARS.org (I think that is the correct webb address) did the exact thing and it turned out great, it was alot of effort but the result was beautiful. Have a good day!

John

John,

I am unable to locate the appropriate section. Do I need to be a member to see whatever he posted?
 
Dremel with a sanding drum. Then hand sanded with steps of finer sandpaper. The aluminum casting wasn’t great on my wheel, there are several voids and pits in the metal, so it isn’t perfect. Finished off with 3M aluminum polish and restorer.
 
Good work, Tom. It looks like you're going to have some fun. I'll add a couple of thoughts if you don't mind. While the original banjo wheels have an unusually thin grip. one that is too thick will stand out on a care of that era. Wood rims were generally a little thicker. A period grip would be .75" to .8" wide at most, and a target depth should be .82" to .86". Of course this is also a personal choice if you want something thicker. However, also be aware that a wide rim will add to the already large overall diameter (stock banjo is 16.5").

Segments are the way to go when using any highly figured wood. Segments can provide a very beautiful rim. You will experience some difficulty fitting the wood rim where the spokes attach to the internal metal rim. Additionally, those sheet metal tabs do need to be covered or replaced. The spokes are usually pretty tatty around that point where the welding occurred.

The hub area is a bigger pain than you might think. It was covered with a thin layer of Bakelite, not paint. I suggest scraping it off carefully with a sharp knife (razor). Be careful not to gouge the metal. Sand if needed, but make sure you thoroughly clean the metal with mineral spirits or other solvent. I have found that either the Bakelite residue or something in the casting causes a bad reaction with paint. I am currently using an epoxy paint. It takes a good week to fully cure, but otherwise works well.
52044216.jpg


Regards,
Mike Lempert
https://www.lempertwheels.com
 
Tom,
Try mgcars.org.uk, then go to buletin board, select MGA and then search the archives. As I remember he had several pictures of his progress. Hope this helps and have a good day!

John
 
Brief progress update: First up is a picture of what I used to rout the walnut blanks into circles. Starting from left, a trim router with custom base and nail for center pivot, the plywood template that was cut, and the two blanks after cutting.

IMG_7756.jpg


I figure I made the two halves too thick and decided to remove one of the straight grain plies. After doing so, I remembered why I attached them in the first place; the big segmented circles began to feel pretty fragile.

Before, with a little moisture to preview how the walnut might look:

IMG_7757.jpg


After thinning:

IMG_7759.jpg


I routed the groove for the wire on the router table using a too small bit, since that is what I had. Multiple passes are okay with me since I prefer to creep up on an exact fit.

IMG_7760.jpg


I then cut the wood away by hand for where the spokes enter the rim. Carving with a sharp tool is one the joys of working walnut. Here is where I am:

IMG_7761.jpg


The rim is 1 1/8" wide, much wider than stock rims and Mike's helpful numbers. I have room to remove material on the inside of the rim and expect to do so once it is glued on and I can round over some parts and get my hand around it.
 
Good idea. I'll make one as soon as I stop looking at the numbers that are on the one I have now. /bcforum/images/%%GRAEMLIN_URL%%/rolleyes.gif
 
Some progress to report and share. I fit the two halves together with epoxy and let it cure in my cold shop for a few days. Since then I have rounded over each edge with a router and reduced the size further with rasps and sandpaper. The router bit left some flats (maybe I should have used a larger bit) and I decided to take a little more from the inside by hand. Last night I glued in some walnut into the spoke hole voids; I hope that cleans up all right. I still want to do more shaping and cut in the finger grips on the back. The rim will probably end up about an inch wide, and the depth is ~ 1 1/8" before finger grip cutting. It feels pretty good.

IMG_7762.jpg


I also removed the Bakelite from the hub and am prepping it for primer. The paint store guy said my spray paint needs at least 65 degrees F, so I may not get this project done until it gets warmer outside. I don't think I will be allowed to set up a spray booth in the dining room....

Still, I'll post another picture after some finish gets on the wood. That should be a big step.
 
Back
Top