• Hi Guest!
    You can help ensure that British Car Forum (BCF) continues to provide a great place to engage in the British car hobby! If you find BCF a beneficial community, please consider supporting our efforts with a subscription.

    There are some perks with a member upgrade!
    **Upgrade Now**
    (PS: Subscribers don't see this gawd-aweful banner
Tips
Tips

TR2/3/3A Lead sled, spiral shank nails and dead battery box’s.

Country flag
Offline
46E4A765-D51D-40FC-B979-4F131B1B08EF.jpegC767F4DB-DD81-485F-A828-C7F968129DC8.jpegF901C43F-E715-4357-B390-73D7F839063C.jpeg60BCACD5-F6A3-4064-941D-104843B5FFCE.jpeg3A6599F3-E4D5-40F9-9AE4-A969B874DA70.jpeg
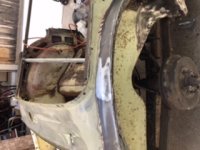
A productive and dirty day today.
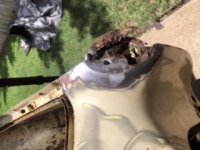
Still in the tear down phase, but I discovered LEAD in a few places and was curious if this was common to all TR3’s?
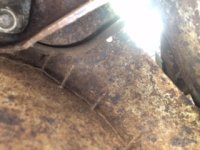
Also, it ​would seem that I got a Monday OR Friday car because the upholster used spiral shank nails to install the interior. I guess it lasted 60 years so maybe it wasn’t such a bad thing anyway. Again, curious if anyone else has come across this unusual use of fasteners?
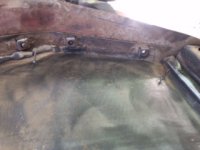
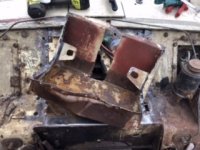
And finally, the battery box had seen better days, so out she goes. I’m making a sheet metal parts list that should make Moss Motors happy.
Any thoughts or insights on today’s developments?
Thanks.
Joe in TX
 
Your question. Lead? Yes on my 59 but not like what yours appears to be poured into a seam. On mine it has been used as a finishing like we use bondo today. I did not find lead on my 3B.
I do not recall any spiril shank nails on either the 59 or 3B(62). Triumph used small screws with chrome washers as is recommended today.
Very often what looks original now is actually a replacement part. Using the various originality and concours guides will lead you to a good idea of what was used in production.
 
View attachment 64338View attachment 64339View attachment 64340View attachment 64341View attachment 64342
A productive and dirty day today.
Still in the tear down phase, but I discovered LEAD in a few places and was curious if this was common to all TR3’s?
Also, it ​would seem that I got a Monday OR Friday car because the upholster used spiral shank nails to install the interior. I guess it lasted 60 years so maybe it wasn’t such a bad thing anyway. Again, curious if anyone else has come across this unusual use of fasteners?
And finally, the battery box had seen better days, so out she goes. I’m making a sheet metal parts list that should make Moss Motors happy.
Any thoughts or insights on today’s developments?
Thanks.
Joe in TX
Go with the TRF battery box. I believe they come with the tabs On the reverse side for the dash support, the Moss ones don’t. Jim
 
Go with the TRF battery box. I believe they come with the tabs On the reverse side for the dash support, the Moss ones don’t. Jim


Thanks for that tip Jim! A box with no tabs would have been a unwelcome surprise.
On that note, the floor pans are next, any suggestions there?
the lower firewall will need replacing also but I was planning on fabricating those myself, unless, that is, someone has a better suggestion?
Thanks again Jim!
Take care.
 
Jim, if you are useing an iPhone to take your pictures you need to hold it the right way up lens at the top or volume buttons up, this windows system will not keep them the right way up. I did find a few spiral nails in my body I think they were in the kick panels near the top of the A post I pulled one out to see what it was. No idea what they were used for.

Graham
 
I have seen those nails/screws also, and yes the TRF battery box is a much better fit and the quality is better. The seam you mentioned is always filled with lead, but what is interesting is the last tr3Bs had the seam unfilled with anything just the seam in the metal open and painted. A guy that goes to the west coast shows has tr3B with less than 40K which his uncle gave him, and he tells the story of the lead.
 
Jim, if you are useing an iPhone to take your pictures you need to hold it the right way up lens at the top or volume buttons up, this windows system will not keep them the right way up. I did find a few spiral nails in my body I think they were in the kick panels near the top of the A post I pulled one out to see what it was. No idea what they were used for.

Graham
if you are useing an iPhone to take your pictures you need to hold it the right way up lens at the top

Graham, this is good to know. I didn’t think about that.

Re, spiral nails, they were used through out the interior, kick panels and rear carpeting. I firmly believe this is the original interior, as the car was one owner before me and it’s HIGHLY unlikely Uncle Dick would have replaced ANYTHING. Therefore, I think these came from the factory. I might be wrong, but knowing what I do know about the car, I think the nails were used when they ran out of screws, just my thought.
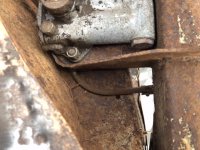
Interestingly, the middle picture I posted above of the 4 nails in a row, the top left nail is actually TOUCHING the fuel, I mean petrol line coming from the tank. Which takes me back to my original comment about a Monday or Friday car.
In any case, it’s been interesting looking at 60 year old assembly work.
Carry on.

 
53A79003-493A-41F7-99C8-EC12734DBDAA.jpeg
Well now, I took that picture with an IPhone holding it vertically and it still rotated it 90* to the left.
Thats the petrol line coming from the tank by the left read wheel, with a well placed nail nearby.
 
TR3aguy,
I just looked thru your photobucket album, NICE work there! Question, on your front suspension disassembly, did you CUT out the front Shocks so you could THEN install the spring compressor? I am facing the same situation and looking for suggestions.

Also, did you sand blast the front suspension bits and then spray with Por15? It appears as you did something like that. I’m trying to avoid sandblasting in the yard, been there, done that. Not anxious to do it again.

My project looks very similar to yours, only 5 years behind.

Very nice work, it was cool to see your son getting BIGGER over the course of the project too.
Take care.
Joe
 
TR3aguy,
I just looked thru your photobucket album, NICE work there! Question, on your front suspension disassembly, did you CUT out the front Shocks so you could THEN install the spring compressor? I am facing the same situation and looking for suggestions.
No I used a chain and a pry bar to compress the spring so I could remove the shock from underneath, then I mad a homade Spring compressor to get the lower a arm up far enough to get the last two bolts out(the ones closest to the frame) the release the spring very slowly....

Also, did you sand blast the front suspension bits and then spray with Por15? It appears as you did something like that. I’m trying to avoid sandblasting in the yard, been there, done that. Not anxious to do it again.

I sand blaster at a friends cabinet and then primed, painted and clear coated them..... just what I could do at the time

My project looks very similar to yours, only 5 years behind.

Very nice work, it was cool to see your son getting BIGGER over the course of the project too.
Take care.
Joe[/
 
Back
Top