• The Roadster Factory Recovery Fund - Friends, as you may have heard, The Roadster Factory, a respected British Car Parts business in PA, suffered a total loss in a fire on Christmas Day. Read about it, discuss or ask questions >> HERE. The Triumph Register of America is sponsoring a fund raiser to help TRF get back on their feet. If you can help, vist >> their GoFundMe page.
  • Hey there Guest!
    If you enjoy BCF and find our forum a useful resource, if you appreciate not having ads pop up all over the place and you want to ensure we can stay online - Please consider supporting with an "optional" low-cost annual subscription.
    **Upgrade Now**
    (PS: Subscribers don't see this UGLY banner)
Tips
Tips

Installing front hubs, tips?

drooartz

Moderator
Staff member
Gold
Country flag
Offline
I'm doing new bearings for the front hubs on my Morris Minor (same as a disc brake Spridget). Haven't done front hubs in a while, so looking for some tips/thoughts.

I know the bearings need to go in a specific way (and I believe should be labeled). Plenty of grease. Then torque up to 46ftlb (I think, manual is not in front of me).

Any other tips or thoughts? I need to get this done tonight (Thursday).
 
Country flag
Offline
Do you have new seals ready as well?
 
Country flag
Offline
And don't forget, there are little channels on the inside of the hub to allow you use a drift punch to knock out the old bearings.
 

Gerard

Luke Skywalker
Country flag
Offline
Drew,

There are two small cutouts in the ledge each bearing is pressed against. A long punch with a small diameter (1/8" to 1/4") will allow good purchase of the outer bearing race to knock it out. The 2 cutouts are 180 degrees apart. When doing the rear bearing, you can usually knock out the seal simultaneously, but you can pry out the seal separately if you wish. Don't be surprised if you knock out the center race in the process of knocking out the outer races.

Original bearings used to be labeled "Thrust" on one side, but I've not seen this on new bearings in a long time. Typically the thrust side is the side that has the bearing part numbers engraved. You can also identify the thrust side by the thicker lip on the outer race. The thrust sides face each other, IOW thrust side faces the bearing spacer between the two bearings. Don't forget to use the spacer with the Spridget hubs. If yours were omitted by whoever installed the upgrade, these parts are still available new from the usual suspects.

Front hub nuts are 25 - 65 ft lbs
 
OP
drooartz

drooartz

Moderator
Staff member
Gold
Country flag
Offline
Thanks folks, really helpful.

Old bearings and seal are out and hubs are clean. Spacers present. New bearings and seals should be showing up by the time I get home from work.

If all goes well, we're taking the Morris on a road trip this weekend. Reassemble tonight, test drive tomorrow, head out on Saturday.
 
OP
drooartz

drooartz

Moderator
Staff member
Gold
Country flag
Offline
So everything went together just fine...

...but...

...there's still a bunch of play. Tightened everything up and the left front had noticeable play side-to-side. Not pulling it out, but wiggling it side to side. Like the rear bearing was too loose on the spindle.

The hub went on a little too easily (and the bearings seemed to go into the hub a bit too easily as well). I remember doing the hubs on the Tunebug and it took some effort to get the hubs onto the spindles. These slid right on with no resistance. To me that means too loose.

So I'm thinking the spindles are worn, and possibly the hubs as well. I can get new spindles, so that's what I'm going to need to pursue.

Sadly, this means I've run out of time to get the car ready for our trip with the club. So we'll be wafting in comfort in my wife's Buick Encore. Ah well, can't win them all.
 

Gerard

Luke Skywalker
Country flag
Offline
Drew,

A loose fitting bearing in the hub can be corrected by putting 3 equidistant centerpunch divots midway in the section where each race is pressed into the hub. You really don't want to do that with the axle, but torquing the bearings with the spacer should prevent the center race from spinning freely. Did you make sure to install with the thrust faces toward each other? Not doing so would contribute to the looseness you feel... it would also be a disaster. The other issue could be that the radius of the inner race where it plants itself at the step of the stub axle is not quite right. I understand some bearings are made with the incorrect radius to fit properly. I know you are installing this brake setup as a stopgap measure until you sort out your "big brake" installation, so sorry to hear this didn't go well either. If you don't achieve satisfaction with either, you may want to consider the Nissan conversion that Charlie D. designed. He's been super happy with it on his Morris and it's what I'm installing on my Morris pickup. I have a few sets of the mounting brackets. I expect it to be even better than the Ford conversion.

So everything went together just fine...

...but...

...there's still a bunch of play. Tightened everything up and the left front had noticeable play side-to-side. Not pulling it out, but wiggling it side to side. Like the rear bearing was too loose on the spindle.

The hub went on a little too easily (and the bearings seemed to go into the hub a bit too easily as well). I remember doing the hubs on the Tunebug and it took some effort to get the hubs onto the spindles. These slid right on with no resistance. To me that means too loose.

So I'm thinking the spindles are worn, and possibly the hubs as well. I can get new spindles, so that's what I'm going to need to pursue.

Sadly, this means I've run out of time to get the car ready for our trip with the club. So we'll be wafting in comfort in my wife's Buick Encore. Ah well, can't win them all.
 
OP
drooartz

drooartz

Moderator
Staff member
Gold
Country flag
Offline
The three divots in the hub may have fixed things. I pulled the bearings and punched in the 3 divots. Drove the bearings in and put the hub back on the car. Torqued it down and no play. Still need to do a test drive, but I think we may be good to go.
 
OP
drooartz

drooartz

Moderator
Staff member
Gold
Country flag
Offline
Well, the hubs worked just fine. Put 600 miles on the Morris this weekend without problems. Thanks again for the tips!
 

nomad

Yoda
Offline
Besides the divots that Gerard suggested I like to use LocTite to take up the slack on worn bearing races. Either red or green though I lean towards green. Things don't loosen up again after that treatment.

Kurt
 

Rut

Obi Wan
Country flag
Offline
Kurt,
I really like the loctight green, especially for things I forgot to put blue on when reassembling!
Rut
 

Joe Schlosser

Jedi Warrior
Silver
Country flag
Offline
The product is labeled bearing retaining compound. It may be green but it is formulated to take up the gap between the race and hub.
With the age of our cars, don't leave home without it
 

Rut

Obi Wan
Country flag
Offline
The product is labeled bearing retaining compound. It may be green but it is formulated to take up the gap between the race and hub.
With the age of our cars, don't leave home without it

Joe, thanks for the information! I googled the product and understand what y’all are talking about now...I was thinking thread locker!
Rut
 

nomad

Yoda
Offline
Right, saved my bacon many times over the years on all kinds of old equipment. You just don't want to be in a hurry to take things back apart! Pricking with a center punch as Gerard suggested is an old standby but usually will loosen up again...but not with 640 loctite as well.
 
OP
drooartz

drooartz

Moderator
Staff member
Gold
Country flag
Offline
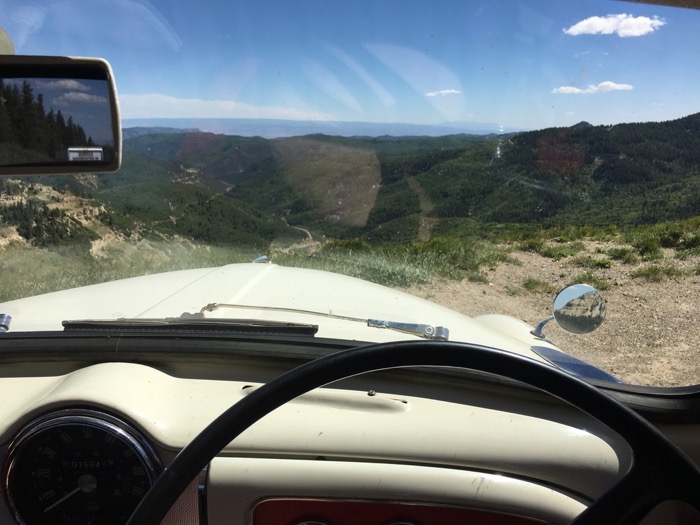
A little view from the car on Douglas Pass on CO on my trip last weekend.

douglaspass.jpg
 
Similar threads
Thread starter Title Forum Replies Date
aero3113 Installing Front rotors to hubs Austin Healey 2
RickB Installing flip front kit, what's easiest way to secure back of bonnet for driving? Spridgets 40
J TR2/3/3A Having fun installing the front bumper and bumperetes Triumph 7
B TR2/3/3A Installing front fenders on TR3 from TRF Triumph 12
bighealeysource Installing front fender stainless steel beading Austin Healey 4
drooartz Installing front suspension/brakes - review Spridgets 1
H Installing New Front Wheel Cylinders Austin Healey 12
T Installing front anti-rollbar poly bushings Triumph 4
J Installing Adapter Hubs for Wire Wheels on a Bugeye Austin Healey 5
S Installing a Radiator Fan Austin Healey 9
G Installing New Rocker Shaft Assembly Austin Healey 3
W Need advice on installing new side curtain glass Spridgets 1
Bayless Help please installing bonnet release cable Spridgets 8
M TR6 Installing Retrosound? Triumph 4
S TR2/3/3A Installing the distributor pedestal. Triumph 3
K TR2/3/3A Question about installing the steering wheel control head? Triumph 1
A TR6 Installing differential and transmission Triumph 10
Z Installing Toe Board Panels Austin Healey 1
K TR2/3/3A Installing Brake Caliper pistons into the bore? Triumph 21
CJ Burton MGB-GT Installing Seat Covers for 1962 - 1967 MGB GT MG 0
A Early 1967 AH Sprite - installing steering column and new directional switch? Spridgets 0
B Installing cam bearings 1275, can I do it? Spridgets 1
bighealeysource Installing stainless steel brake hose on BN2 Austin Healey 5
steveg TR6 Installing stock trailing arm bushings on the car - is it possible? Triumph 2
steveg TR6 Installing adjustable trailing arm brackets Triumph 7
T Installing Garmin GPS in a BJ7 Austin Healey 19
F Installing AC in my 1960 Healey Austin Healey 14
S TR2/3/3A technique for installing a door Triumph 5
R TR2/3/3A Installing wiring harness in steering column Triumph 59
R TR2/3/3A Installing gas tank Triumph 6
C Installing rubber grommets in firewall? Austin Healey 6
S TR2/3/3A installing a fuse in the red tail lights Triumph 4
S TR2/3/3A installing the wiring harness Triumph 8
R Installing Sprite Luggage Rack Spridgets 9
Lukens TR2/3/3A Installing a throttle. Triumph 2
J Powertune booster for a bj8 , trouble installing Austin Healey 2
B TR2/3/3A Installing dzus fastners in bonnet Triumph 8
D Prepping Floors Before Installing Interior Restoration & Tools 6
E TR4/4A Wiring the horn when installing a Moto -Lita steering wheel Triumph 4
K TR2/3/3A Installing Moss wheel spacers? Triumph 5
D BT7 tri-carb installing my crank Austin Healey 4
C Advice for installing a 3000 Grille??? Austin Healey 7
B MGB Installing new upper fulcrum bushings MG 5
B MGB Installing upper fulcrum bushings MG 0
S TR4/4A procedure for installing gauges etc Triumph 0
I Tips for installing intake manifold plugs in a stock Bugeye? Spridgets 6
55modified Help installing toggle dip switch on dash for lights. Austin Healey 23
TRMark TR4/4A Installing a new windscreen Triumph 9
55modified Rear anti-roll bar. Is it worth installing on a BN1? Austin Healey 22
T Installing a Lucas 16 ACR alternator on Bugeye Spridgets 10

Similar threads

Top