71TR6
Jedi Hopeful
Offline
Hello Forum,
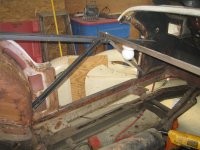
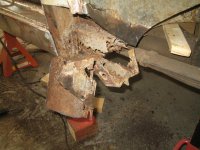
After many unplanned delays, I'm ready to dive in again on my restoration of my '59 TR3A. Next week I plan to tearing into the final major body repair which is to replace the left inner sill, rear dog leg, and floor pan on my TR3A. There's not much left of the existing left floor pan and the inner sill is swiss cheese so I need to replace both. My instinct is to start with replacing the inner sill with the TRF replacement I have and then install the floor pan. My concern with putting the floor pan in first is that it really limits access to properly welding in the sill.
My question to the forum is: Is installing the sill first the best path or should I put the new floor pan in first and then do the inner sill?
Ron

 Hi Guest!

 smilie in place of the real @
 Pretty Please - add it to our Events forum(s) and add to the calendar! >>

