Hey Guest!

 Hey - did you know if you click on the title of a thread it will take you to the first unread post since you last visited that thread?
 but were afraid to ask:
  STOP!! Never post your email address in open forums. Bots can "harvest" your email! If you must share your email use a Private Message or use the
  smilie in place of the real @
 Pretty Please - add it to our Events forum(s) and add to the calendar! >>
AweMan
Jedi Knight
Offline
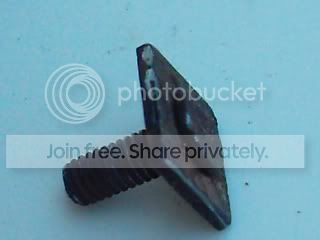
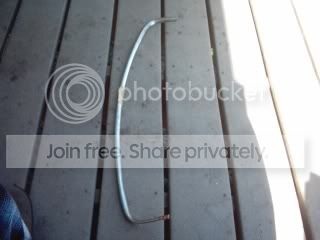
I can`t find the Grill Surround joint clips for my Smallmouth Tr-3, So ....... I decided to try and manufacture some. I started out with a piece of 1/2 In. copper tubing {Water Pipe}
Cut it on one side down the middle and formed to to the somewhat correct contour of the grill surround. Here are some Humble pics of my FIRST attempt.

Eventualy {When I am satisfied at the outcome these will be chromed}

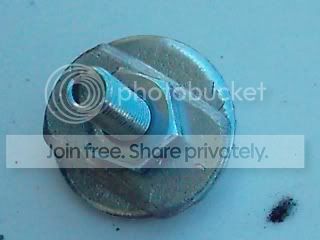
The next feat will be to silver solder on the attaching bolt so it can be bolted to the apron.
More pics to come as progress continues.
Hopefully this will work and look correct. {NOT building a concourse here, but do want the correct look.}
Am I an idiot, or does anyone think this will work?
Cut it on one side down the middle and formed to to the somewhat correct contour of the grill surround. Here are some Humble pics of my FIRST attempt.
Eventualy {When I am satisfied at the outcome these will be chromed}
The next feat will be to silver solder on the attaching bolt so it can be bolted to the apron.
More pics to come as progress continues.
Hopefully this will work and look correct. {NOT building a concourse here, but do want the correct look.}
Am I an idiot, or does anyone think this will work?