• Hi Guest!
    You can help ensure that British Car Forum (BCF) continues to provide a great place to engage in the British car hobby! If you find BCF a beneficial community, please consider supporting our efforts with a subscription.

    There are some perks with a member upgrade!
    **Upgrade Now**
    (PS: Subscribers don't see this gawd-aweful banner
Tips
Tips

TR4/4A Head Leaking Coolant after Coolant Flush

RJS

Jedi Warrior
Country flag
Offline
Hi All,

It's been a very long time since I posted. I had a lot of distractions this past year and didn't have the car out as much as I'd like.

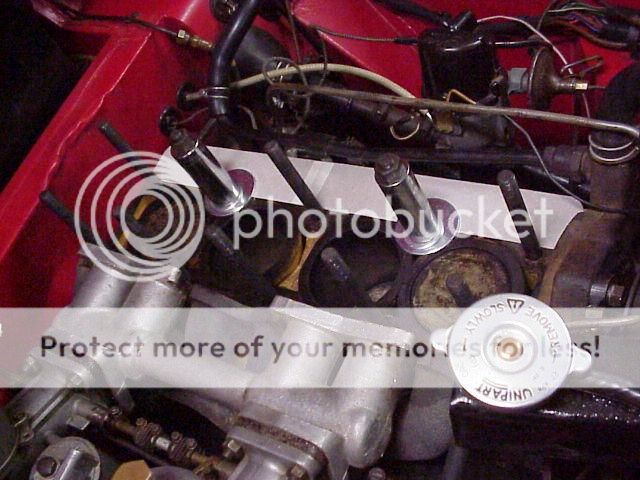
Anyway, two weeks ago I was getting the car prepared for winter storage and performed my every-other-year radiator/ coolant flush. I ran a flushing solution through and then filled/drained two more times with distilled water. I then filled with a 50/50 mix coolant/water. Next time I drove the car (a week later) I noticed coolant leaking/seeping from the rear of the cylinder head. The leak is between the block and the head, on the back, more towards the driver's side.

I probably should avoid those flushing solutions. But, any thoughts/ ideas/ opinions? I was wondering of re-torquing the head is an option or if I am simply in for a new head gasket.

Thanks

Bob
 
I'd give re-torquing a try, but it's not likely to help IMO. If you can, take a longish drive after the re-torque, as the sealer additive in the AF might close it up if given a chance.

The plug on top is inside the rocker cover, so it's not likely you'd see a leak from it showing up outside the cover.
 
Yeah - re-torquing is worth a shot. When I do that I usually put a dot of paint on each nut (say, on the forward side) so I can see when done how much movement I got from each.

Apart from the head gasket the other good leak source back there is the freeze plug. I suppose it could seep and trickle down. Mine failed but in that case diagnosis was pretty easy:

Freeze%20Plug_zps3hagpnwb.jpg
 
Thanks Gents,

So, this will have to wait until Spring as the car is now tucked away. It is definitely coming from b/t the head and block.

Thankfully oil and coolant levels and colors look fine. And no steam out the tailpipe. I'll try re-torquing the head after a compression test. Couple of questions on a re-torque:
1. Do I back off the nuts (i.e. 1/4 turn) or simply apply the wrench and check the torque?
2. If backing off the nuts,
a) do I back off and re-torque one nut at a time in the recommended order?
b) or would you recommend backing off all nuts at once and then re-torquing in order?

If it does come to removing the head, my single biggest concerns are getting the intake and exhaust manifold hardware off without breaking anything and then actually popping the head off the block.

Thanks

Bob
 
2 a. Don't back off fully, just enough to make sure it will turn forward so you can get a torque reading with the nut turning. Shoot for the middle of the torque spec (ie 102.5 ftlb), the range is to allow for inaccuracy of your torque wrench, reading error, etc.

If you do pull the head, be sure to check each head stud for distortion in the threads. Clean with a wire brush or whatever (no tap or thread chasing tool), then spin a new nut down the threads. If it binds about 2/3 down, replace the stud.

The book calls for plain flat washers under each head nut, but IMO they should be at least grade 5. Long ago I found some 10.9 washers at MMC that were also the smaller outside diameter to fit the towers on the head better, but they don't carry them any more. Maybe one of the other suppliers still does.

Of course the usual caveats about checking the head and block surface for flatness. Also check liner protrusion, as too much can cause coolant leaks.

Good luck with the head removal. I've never had much trouble with a TR3 engine (tho I have broken a few manifold studs).
 
...So, this will have to wait until Spring... If it does come to removing the head, my single biggest concerns are getting the intake and exhaust manifold hardware off without breaking anything...

In that case it might be a good idea to give everything a dose of PBlaster every week or two until the robins return. Like Randall, I have never had a problem with removals but then I seem to 'exercise' those nuts and studs on a regular basis.
 
Randall, Geo

Thanks both of you for the advice and good suggestion. PB Blaster is ready to go!

Bob
 
Just a thought, the water sets on the bottom of the oil pan if there is a leak and the oil and water have not mixed from running the motor. The oil level will rise on the dip stick from the water displacement and show more oil. I had that happen once and when I pulled the oil plug clean water came out first. Someone here suggested, to just crack the pan bolt a little and see what comes out.
steve
 
Hey

Since Randall mentioned "...the sealer additive in the antifreeze might close it up if given a chance", if that doesn't work what's your guys' thoughts on any of those head gasket sealants (i.e. Bars Leaks or Blue Devil)? Is that an option prior to pulling the head or do they cause more problems than they're worth?

Bob
 
Just my opinion, but pulling the head on the 4 cylinder is easy enough I wouldn't be tempted to use a sealant if I suspected the gasket had failed.

You don't even have to remove the carbs or even separate the intake manifold and exhaust manifold - just pull the pair back far enough to clear the studs.

head1_zpswsciuhzi.jpg
 
Well, do as I say, not as I do. I used to run a sealer additive in my 3A, because the upper radiator tank was cracked and I didn't want to pull the front apron (again) to fix it. Worked well enough for several years; but I'm pretty sure the sealer additive, combined with sitting idle for a year or two, is what ruined my relatively new radiator core. I moved that radiator to my current TR3 (after the old TR3A was wrecked), and had awful overheating problems with it. No tubes were blocked, but all of them were coated inside with "mud" (scientific term supplied by the radiator shop) that I suspect was sealer. The coating acted like insulation and had reduced cooling capacity to where there just wasn't enough left even in mild weather.

I would much rather pull the head, than risk going through that again!

BTW, a short piece of 1x2 lumber shoved sideways down between the exhaust manifold and cylinder head will make it easier to get off with the manifolds still hanging on the head pipe, like Geo's photo shows. The wood holds the manifolds clear of the studs, so you can use both hands to lift the head.
 
Agreed everyone, thanks

Since pulling the head appears relatively straight forward I'm not going to mess with dubious "fixes in a can". Thanks for steering me clear. I've never had a cooling issue and don't want to start one now. And that technique of removing the head w/o removing the manifolds is encouraging. But, I was thinking the "while I'm at it" syndrome. The single most unsightly piece under my hood is the SEVERELY rusted exhaust manifold. This may finally give me the opportunity to pull it and have it blasted (or even ceramic coated).

Bob
 
Yes, mission creep can happen when you start to disassemble -- but if you remove the carbs one can do a pretty fair job of painting the exhaust manifold in situ with rattle-can high temp paint. Just lots of masking to isolate the part. Recently did this when I had the carbs off the TR4.
 
Hi

If any one stumbles onto this thread, I can confirm the issue is a broken cylinder head stud as subsequently posted here: https://www.britishcarforum.com/bcf/showthread.php?108127-Broken-Cylinder-Head-Stud

I am at least satisfied that I now definitely know the exact cause of the failure and it is a relatively easy fix. I prefer this over some mystery cause like "possibly the radiator flush"(??) or that my head gasket failed for some unknown reason. Those types of failures drive me insane.

Bob
 
Hi Bob,

Thanks for the update to the thread. Nice to have some closure for future readers.

Cheers
Tush
 
Back
Top