
 Hey Guest!

 Hey - did you know if you click on the title of a thread it will take you to the first unread post since you last visited that thread?
 but were afraid to ask:
  STOP!! Never post your email address in open forums. Bots can "harvest" your email! If you must share your email use a Private Message or use the
  smilie in place of the real @
 Pretty Please - add it to our Events forum(s) and add to the calendar! >>
pkmh
Jedi Warrior
Offline
Hello all,
My last post here a few weeks back made reference to the removal of my steering wheel for the Healey in attempts to understand more about;
A. What may cause my signals not to work;
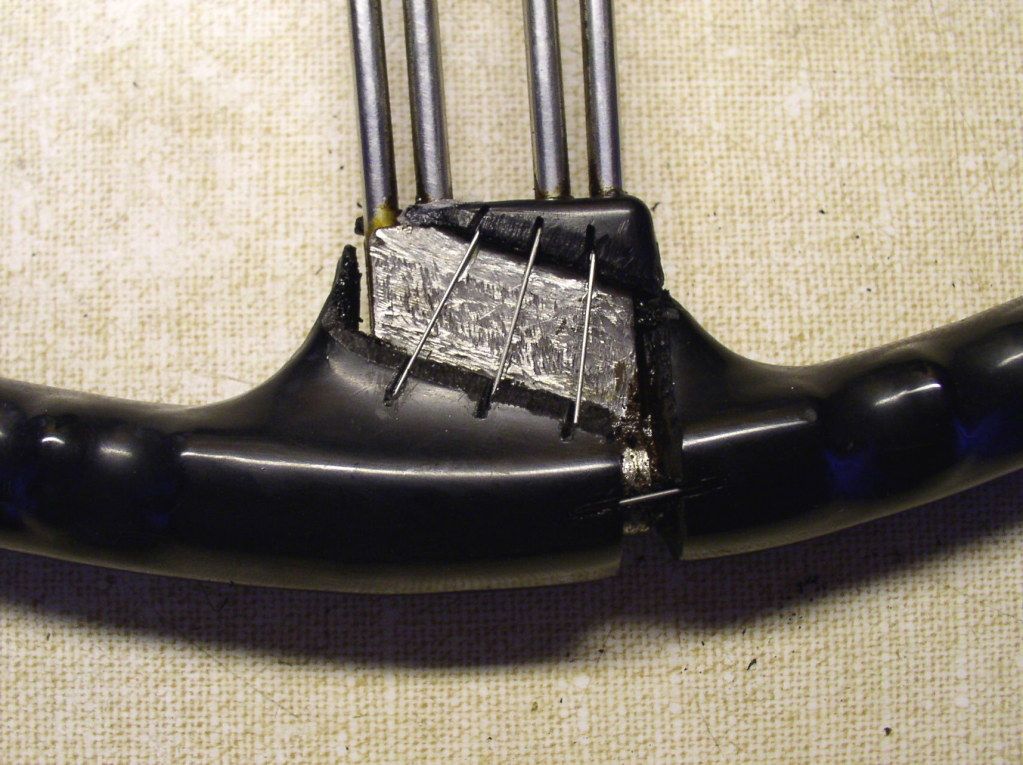
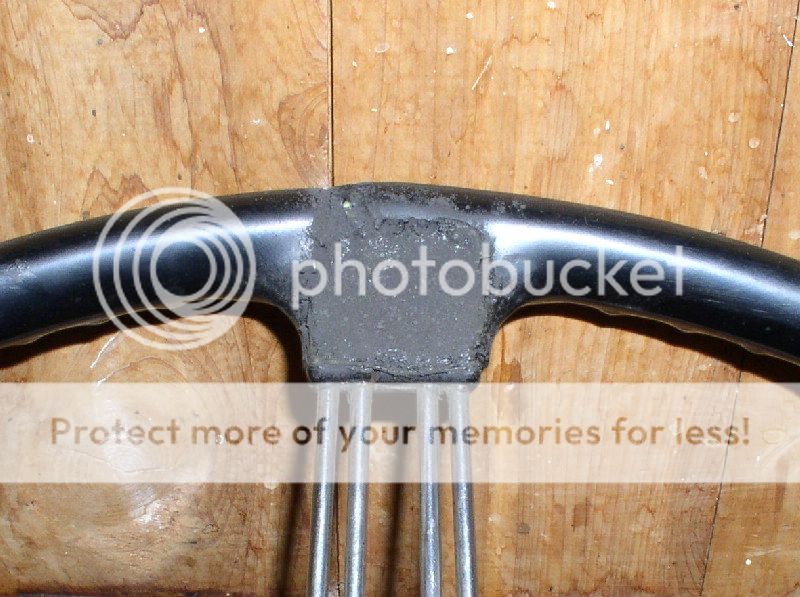
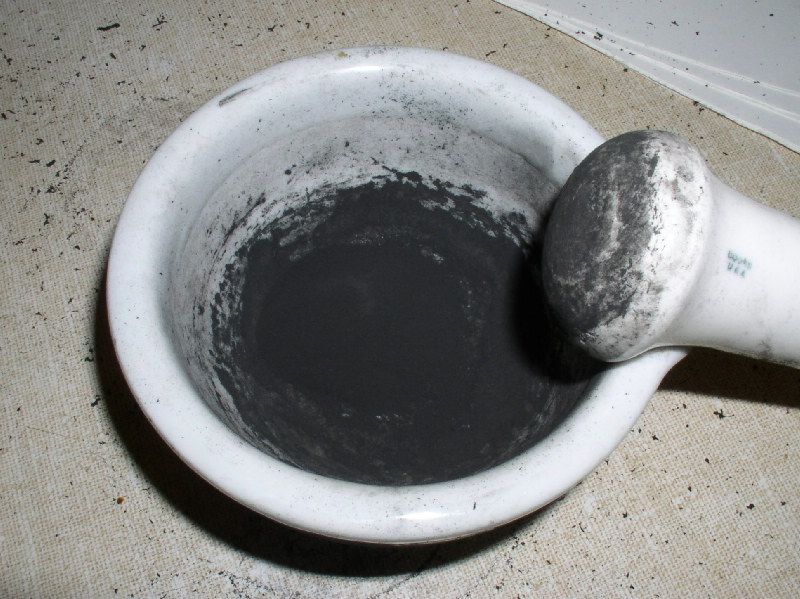
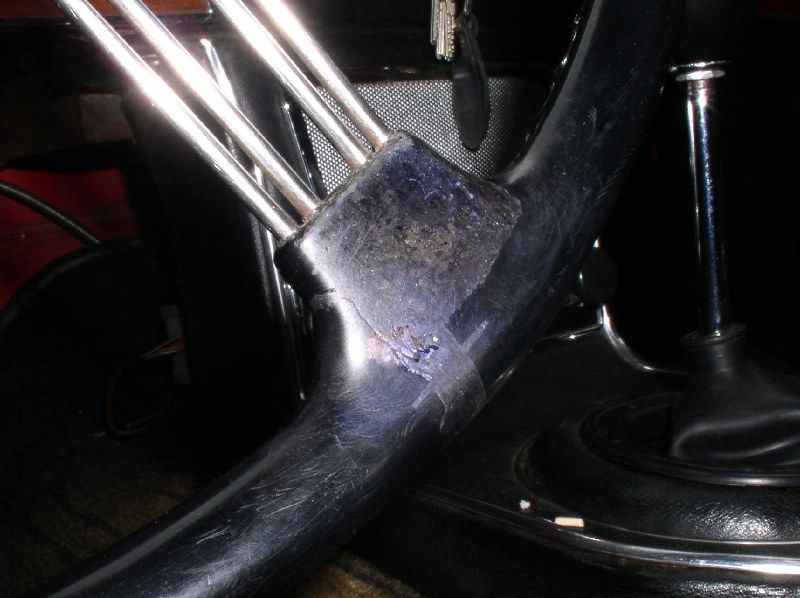
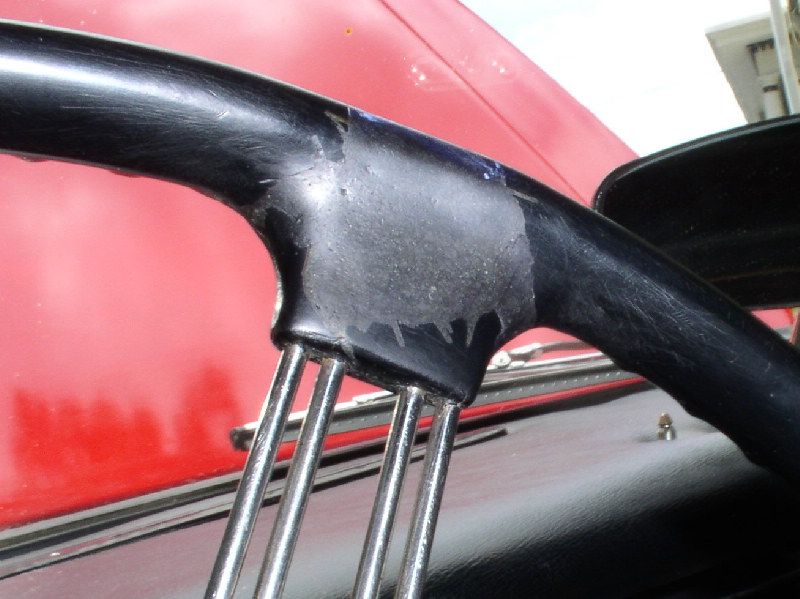
B. I wanted to remove the cracked portions of the steering wheel at the third points and restore by using old 78 records [dust] with glue and;
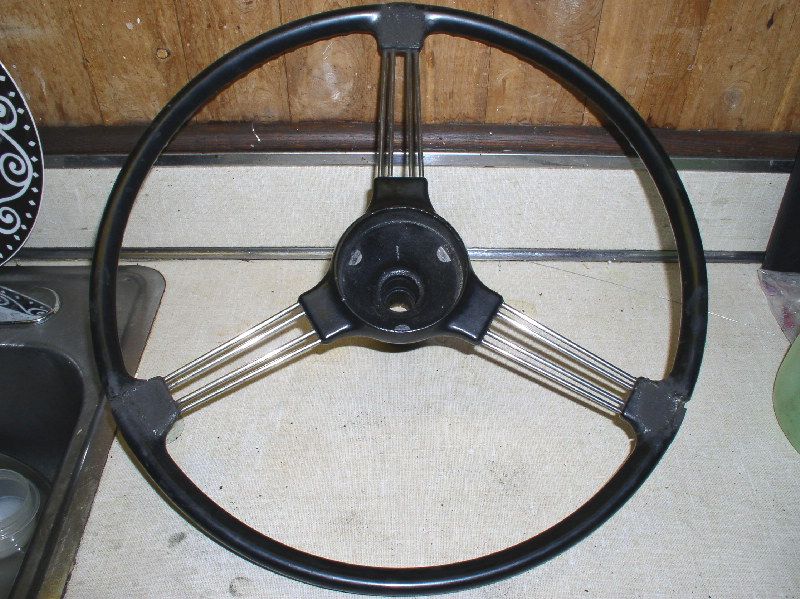
C. Repair the adjustable locking hub for the telescopic portion of the wheel.
I am still in the process of determining the cause of my signals not working, but all wiring within the upper stator tube was not the cause or so I believe, although I had to mend the sheathing to one wire. I will probably need to purchase another flasher unit to test further.
As for the adjustable hub, that is now working as designed, but only after many trials of grinding down the interior bakelite surrounding, resulting from shrinkage over the years and locking up the wheel (or in my case, the hub fixed tight in an open position and the wheel never locking at all). So, most of the inner bakelite surround is still within the hub and I figure I leave as much there instead of removing all.
Finally, the experiment of using pulverized record dust and Elmer's Glue worked well enough to my satisfaction and the final picture will follow soon (sorry, new computer operating system--don't know what I'm doing). I also incorporated wire "rebars" to keep the plastic remains intact as much as possible as well as the glue~dust mixture together as well.
All but the final product is posted here and that photo will be posted soon.
FWIW, I decided to use the Elmers [wood] glue because of the ease of mixing the dust with a more liquid base. It meant having to apply in layers at a time and rough sanding as I went. The curing process also took time and may still take longer before all cures rock hard. I experimented with epoxies and other cements but would not bond well with the dust, and I thought about having contact with Elmers vs. cements, etc. Seems to be a more safer solution.
Again, I have no idea how this remedy will hold up in the extreme heat and cold and aside from the slight difference in textural finish, but only resulting in a dull glossy finish vs. to the surrounding existing rim's glossy finish. The results are very good. Even the feel feels the same. If this solution does hold up, then the textural finish will only improve over time, increasing the glossy feel, after constant finger contact.
Enjoy the photos, so far....
Paul

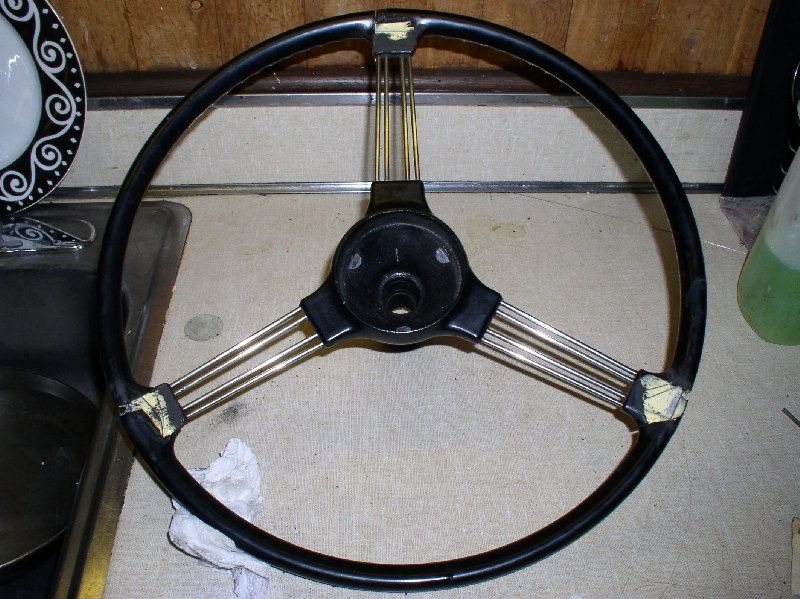
Here are some most recent shots taken today...
My last post here a few weeks back made reference to the removal of my steering wheel for the Healey in attempts to understand more about;
A. What may cause my signals not to work;
B. I wanted to remove the cracked portions of the steering wheel at the third points and restore by using old 78 records [dust] with glue and;
C. Repair the adjustable locking hub for the telescopic portion of the wheel.
I am still in the process of determining the cause of my signals not working, but all wiring within the upper stator tube was not the cause or so I believe, although I had to mend the sheathing to one wire. I will probably need to purchase another flasher unit to test further.
As for the adjustable hub, that is now working as designed, but only after many trials of grinding down the interior bakelite surrounding, resulting from shrinkage over the years and locking up the wheel (or in my case, the hub fixed tight in an open position and the wheel never locking at all). So, most of the inner bakelite surround is still within the hub and I figure I leave as much there instead of removing all.
Finally, the experiment of using pulverized record dust and Elmer's Glue worked well enough to my satisfaction and the final picture will follow soon (sorry, new computer operating system--don't know what I'm doing). I also incorporated wire "rebars" to keep the plastic remains intact as much as possible as well as the glue~dust mixture together as well.
All but the final product is posted here and that photo will be posted soon.
FWIW, I decided to use the Elmers [wood] glue because of the ease of mixing the dust with a more liquid base. It meant having to apply in layers at a time and rough sanding as I went. The curing process also took time and may still take longer before all cures rock hard. I experimented with epoxies and other cements but would not bond well with the dust, and I thought about having contact with Elmers vs. cements, etc. Seems to be a more safer solution.
Again, I have no idea how this remedy will hold up in the extreme heat and cold and aside from the slight difference in textural finish, but only resulting in a dull glossy finish vs. to the surrounding existing rim's glossy finish. The results are very good. Even the feel feels the same. If this solution does hold up, then the textural finish will only improve over time, increasing the glossy feel, after constant finger contact.
Enjoy the photos, so far....
Paul
Here are some most recent shots taken today...
