
 Hey Guest!


 Hey - did you know if you click on the title of a thread it will take you to the first unread post since you last visited that thread?
 but were afraid to ask:
  STOP!! Never post your email address in open forums. Bots can "harvest" your email! If you must share your email use a Private Message or use the
  smilie in place of the real @
 Pretty Please - add it to our Events forum(s) and add to the calendar! >>
Hi guys - this is a cross post but since it applies to TR4a IRS cars I though it might be useful to post here as well. <span style="text-decoration: underline">Please feel free to correct or suggest improvements as this was my first time going this</span>!
Thanks to Bob Danielson for his site documentation, which is located here https://tr6.danielsonfamily.org/TrailingArmBushings.htm .
OK, let's get started. First, test fit the bush by gently knocking it into place with a hammer. This one isn't quite all the way in yet;

Next, insert the steel inner sleeve into the bush and see if it can be pushed into the bush;

Chances are pretty good that it won't be able to so you'll need to hone the trailing arm to get a proper fit. This is a bit of a trial and error process so you just have to hone, test fit, and then hone again if it doesn't slide in (with some real pushing)
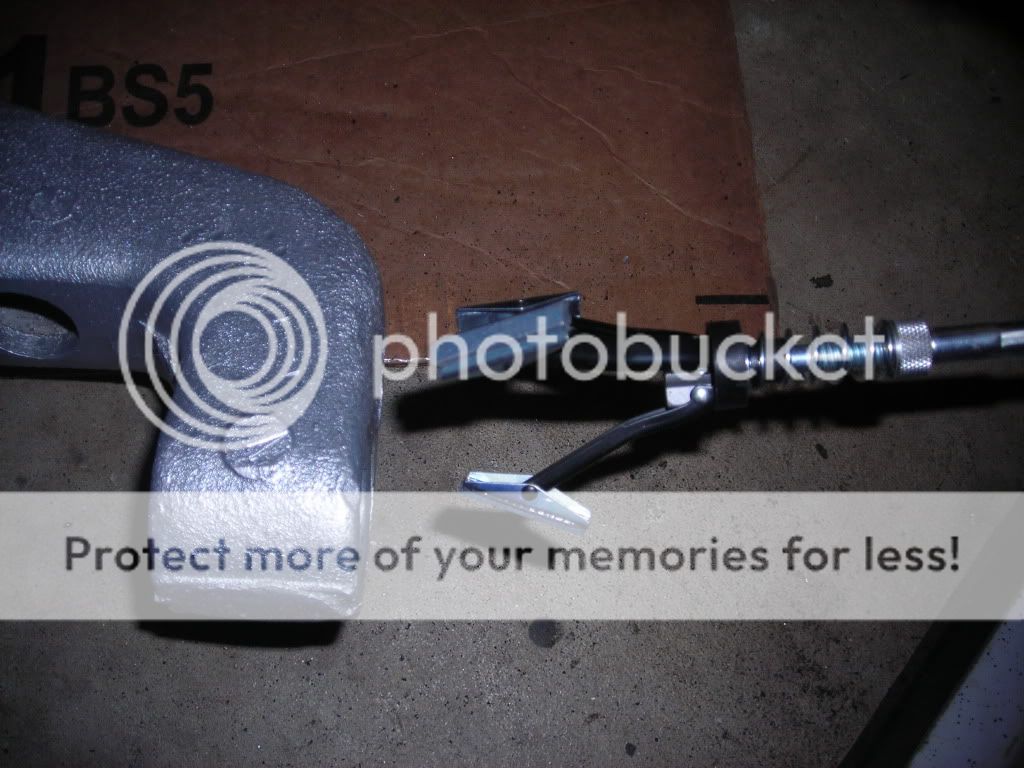

You'll likely need to use a socket and hammer to press against the bush during the test fitting process;

<span style="font-weight: bold">Only</span> once the inner sleeve can be inserted tap the other side bush into place. I used some of this to lightly lubricate the bushing before the final install;

Tap both bushings into place now;

And then push the steel sleeve into place;

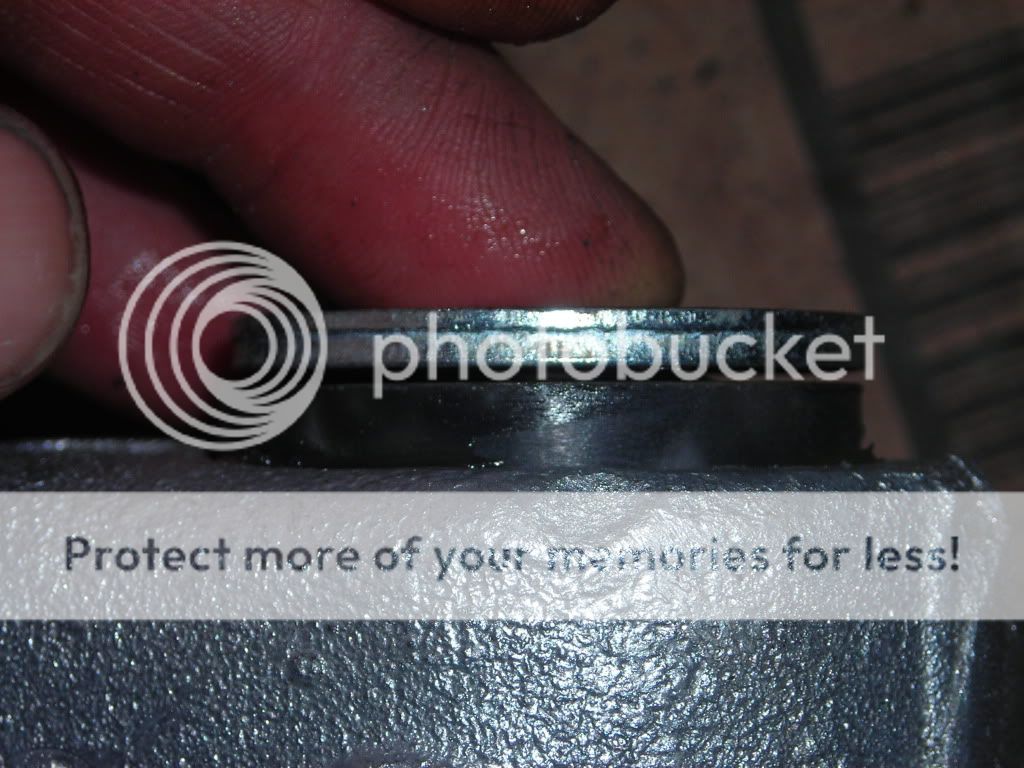
Now we need to check for how the steel washers fit over the assembled bush and sleeve. To do that we will use the washers numbered #1 - 4. Start with the #1 and a .012 feeler gauge.

I got lucky on the first side and everything fit great;

The other side had a bigger gap;
I used a #2 washer and the gap was spot on;
![url]](http://[url="https://i207.photobucket.com/albums/bb73/tdskip_photos/74%20TR6/974TR4RichardGoodTABushings19.jpg"]https://i207.photobucket.com/albums/bb73/tdskip_photos/74%20TR6/974TR4RichardGoodTABushings19.jpg[/url])
Now repeat on the other TA and you are ready for them to be reinstalled or to use Richard's kit that allows for easy adjustment.
Thanks to Bob Danielson for his site documentation, which is located here https://tr6.danielsonfamily.org/TrailingArmBushings.htm .
OK, let's get started. First, test fit the bush by gently knocking it into place with a hammer. This one isn't quite all the way in yet;
Next, insert the steel inner sleeve into the bush and see if it can be pushed into the bush;
Chances are pretty good that it won't be able to so you'll need to hone the trailing arm to get a proper fit. This is a bit of a trial and error process so you just have to hone, test fit, and then hone again if it doesn't slide in (with some real pushing)
You'll likely need to use a socket and hammer to press against the bush during the test fitting process;
<span style="font-weight: bold">Only</span> once the inner sleeve can be inserted tap the other side bush into place. I used some of this to lightly lubricate the bushing before the final install;
Tap both bushings into place now;
And then push the steel sleeve into place;
Now we need to check for how the steel washers fit over the assembled bush and sleeve. To do that we will use the washers numbered #1 - 4. Start with the #1 and a .012 feeler gauge.
I got lucky on the first side and everything fit great;
The other side had a bigger gap;
I used a #2 washer and the gap was spot on;
Now repeat on the other TA and you are ready for them to be reinstalled or to use Richard's kit that allows for easy adjustment.
