• Hi Guest!
    You can help ensure that British Car Forum (BCF) continues to provide a great place to engage in the British car hobby! If you find BCF a beneficial community, please consider supporting our efforts with a subscription.

    There are some perks with a member upgrade!
    **Upgrade Now**
    (PS: Subscribers don't see this gawd-aweful banner
Tips
Tips

TR2/3/3A Ground location for center panel lights 56 TR3

jfarris

Jedi Trainee
Country flag
Offline
I finally got the center panel out far enough to see what was going on. Loosening the choke wire under the hood and disconnecting the oil pressure gauge did the trick. I have one ground wire that is stumping me.
Looking at the center panel from in the car, I can't find the ground attachment for the left light bulb that illuminates the oil pressure gauge and ammeter. It is attached to the "post" next to the bulb between the fuel and temp gauge, but the end that appears to go to the left side bulb was loose and I can't find a place to attach it.
Any ideas or pictures. Next, I'll attack the turn signal indicator.
Whomever designed the electrics behind that panel was psychotic, on drugs, or an engineer who was going to open a Lucas Only Electric Repair Shop in his retirement!
I did manage to allow some pent up smoke to escape from some of the wires, but an ancient fuse put a stop that quickly.
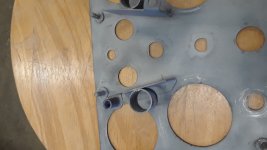
There is only one ground that serves the two light bulbs. That ground is shown on the backside of the panel in the picture on the lower left side above the bulb. That wire is held in by a set screw. If you are looking for an attachment area for that wire I found a black wire in the wiring harness that was for that purpose. But in reality you can use a (hopefully black) wire and connect it between that set screw and a clean area(no paint) on the car. A good location is on the support brackets that the heater sits on.
Charley
 

Attachments

  • 20220323_172356.jpg
    20220323_172356.jpg
    1.1 MB · Views: 126
Thanks Charley, as usual, a picture always helps.
Back to the garage, the weather is perfect for a ride!
 
There is also other than the set screw ground, a single and separate black wire with 2 large soldered in loops about a foot long to help ground the large gauges. If I remember correct, the loops go on the knurled nuts for the gauges and then hooks to the steering bracket or the dash bracket to help ground. If you cannot find any info, I will try and dig one out of my stuff.

Steve
 
When I rewired my TR3A I added a couple of extra ground wires to different locations on the body. I believe there is a ground in the wiring harness that terminates at the regulator mounting point or the regulator itself.
Also did ground wires for the rear lamps terminated at a body screw.

David
 
All good ideas. It appears that my speedo and tach lights will be ok. I had to put an extra ground under the knurled nut on the gas gauge to get it to work properly. David, I also grounded my rear lights to adjacent body parts.
Just waiting on a couple of switches now as you occasionally had to wiggle them to get them to work.
 
Back
Top