• Hey Guest!
    British Car Forum has been supporting enthusiasts for over 25 years by providing a great place to share our love for British cars. You can support our efforts by upgrading your membership for less than the dues of most car clubs. There are some perks with a member upgrade!

    **Upgrade Now**
    (PS: Upgraded members don't see this banner, nor will you see the Google ads that appear on the site.)
Tips
Tips

Front suspension rebuild revisited

John_Mc

Jedi Knight
Country flag
Offline
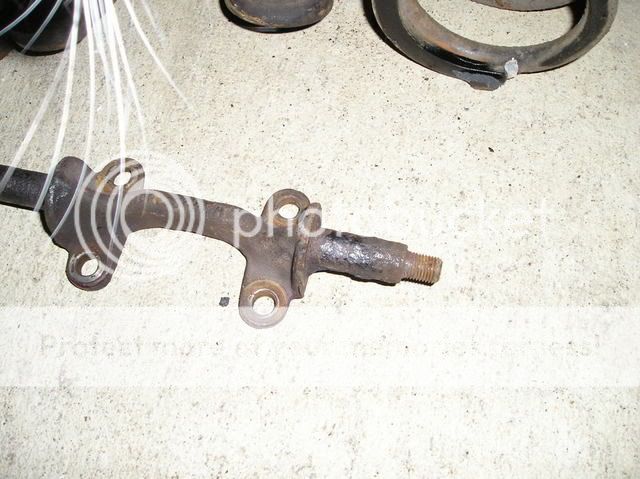
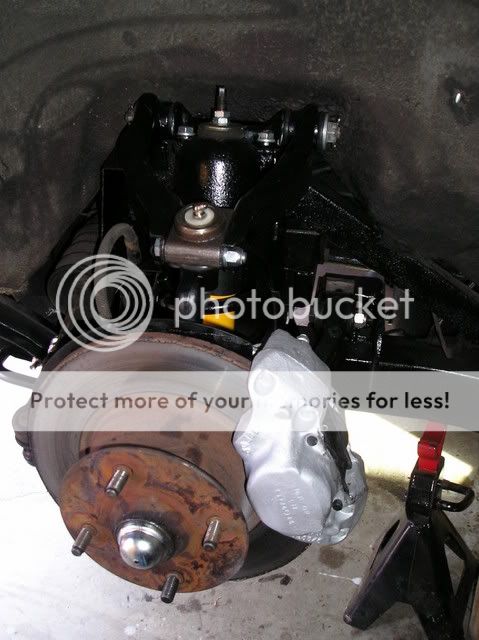
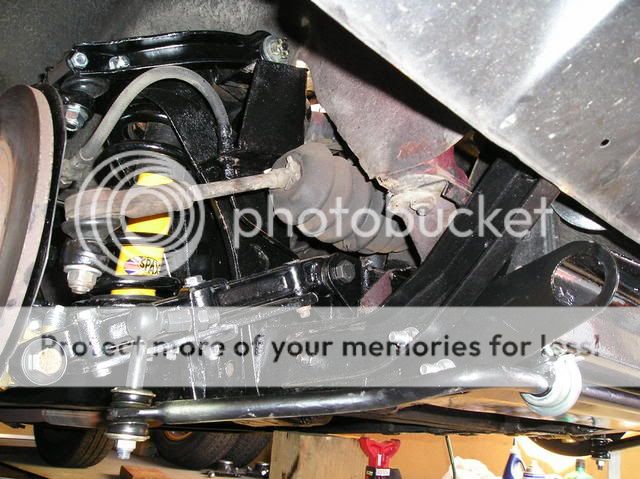
I've begun my first attempt at front suspension rebuild, and so far it has been very straightforward (except getting rusted cotter pins out /bcforum/images/%%GRAEMLIN_URL%%/mad.gif . I'm actually enjoying it. Here's a before pic:
Globetrotters-SLO020.jpg

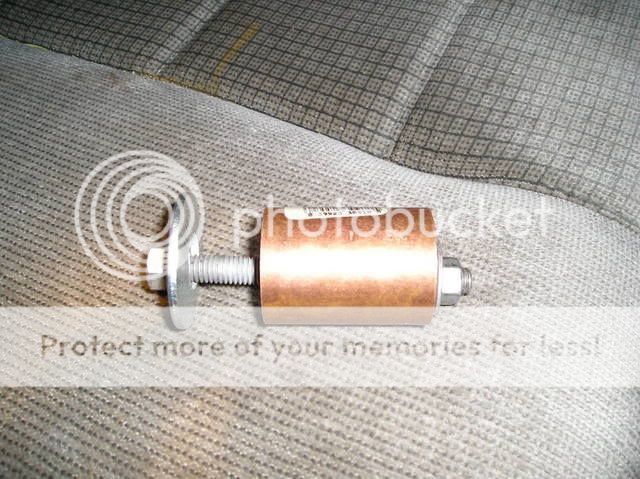
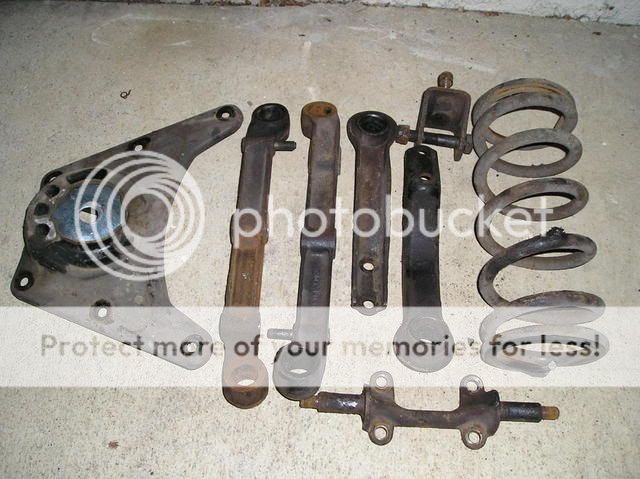
Here's the parts out:
Globetrotters-SLO045.jpg

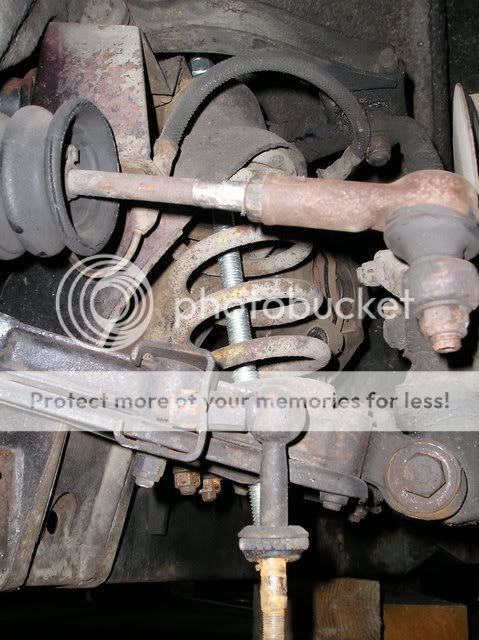
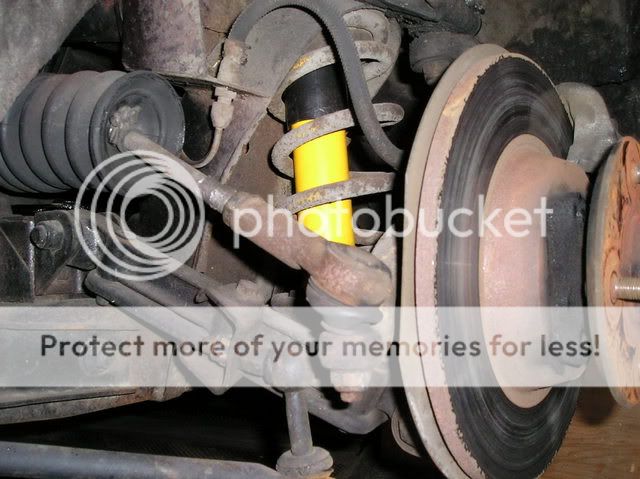
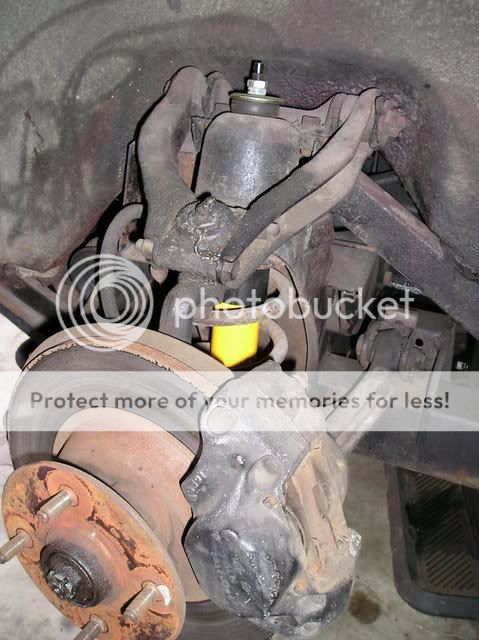
And here are the removed rubber bits:
Globetrotters-SLO046.jpg

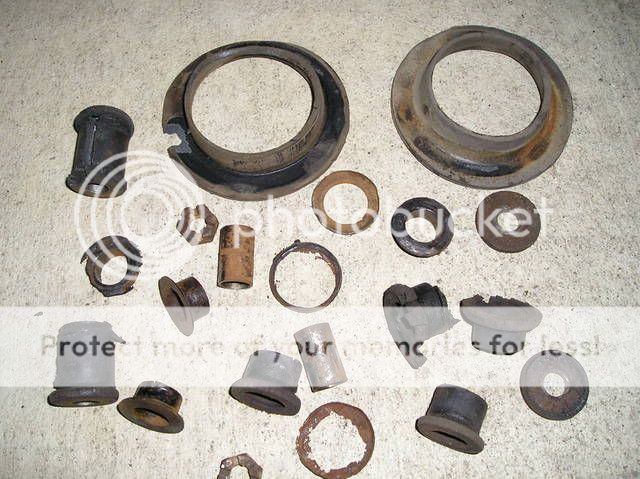
Whaddya think? Was it time to replace them? /bcforum/images/%%GRAEMLIN_URL%%/crazyeyes.gif

So, now I want to clean up the parts and repaint them before installing them again. I've read good things about Krud Kutter for cleaning up the grease and rust before painting. And then I'm thinking just a spray-on paint in either black or silver. Any thoughts?
 
At least you had rubber remaining to remove. I've seen some (mine included) that were missing some of those rubber pieces. /bcforum/images/%%GRAEMLIN_URL%%/wink.gif
 
Is this okay? How smooth do these fulcrum pins have to be?
Globetrotters-SLO048.jpg


I'm sure you have all figured out quick ways to remove bushings, but here was my easy solution. It cost just a few dollars to make, and I could get stubborn bushings out in under a minute or two. I'll have to see if it can work putting them back in.
Globetrotters-SLO049.jpg
 
Lucky, just having trouble with a little cotter pin! I needed a 5 kilo hammer,a blow torch and a hacksaw to disassemble the suspension. At least you had some rubber left. Some DPO "repaired" the rear trunnions on my car by wrapping them with paper and jamming them back in place.

I would paint it with a brush. For the cast bits, clean them off in turpentine (or whatever solvent is compatible with the paint you choose) first and then immediately paint the parts. The paint will soak in very nicely. I did this on the engine block, and it turned out very nice. My choice would be black, to much dirt will show up on lighter colored paint.
Yisrael
 
John_Mc said:
Is this okay? How smooth do these fulcrum pins have to be?
Globetrotters-SLO048.jpg

Hey John, waddaya doin up so late? (What am I doing up so early?)
That bearing surface (not that it has a bearing, just a rubber bush) looks awfully rough to me. Can you get back down to clean metal without cutting metal? I kinda think this surface needs to be fairly smooth.
 
Hi John,

Front end work can be a satisfying project. You're on the right track. I painted mine with POR 15 and an enamel topcoat, but that's probably overkill. The Simple Green and Purple Power cleaners work OK if you use them in high concentrations.

If you clean those fulcrum pins I suppose they would be usable--after all, the car was driven before it was parked and disassembled, right? I wouldn't use them, IMO. Like Bill said, when you clean the ends you tend to find there's not much metal left. Replacements are readily available and not too expensive.

The bad news is that you should also take a close look at your uprights, especially around the brass trunnions. The trunnions themselves and the part of the upright that rides in them are usually shot--this is the location at the center of the oil-or-grease debate that's been going on for a long time. Turns out that a lot of cars never seemed to get lubed at all at this critical location!

Your time spent on the front end is very worthwhile. Good luck.
 
Sand blasting, prime and paint with 2 part black expoxy paint, thats how I did the front end on my TR6 and it came out very nice, make sure you get the upper arms in the correct place, the DPO on my car had them reversed and I put them back the same way and had to get pics to get it right. Made steering very difficult
 
You can try cleaning off the fulcrum pins with a wire wheel. I used the one on my bench grinder. I found out that most of that crud was really just imbeded rubber from the old bushings. Once the crud is off, you should be able to better evaluate their condition. The ones on my TR3 turned out to be usable. The new poly bushings fit on with virtually no slop.
 
Thanks for the replies. Bill, a case of late night insomnia. It seems sometimes the less sleep I know I'll get, the harder it is to fall asleep- a vicious cycle. But you were up REALLY early! That, I CAN'T do. Once I'm down, I'm down.

Mike, I have TRF's suspension magic kit, which includes new trunnions and ball joints, so all that will get replaced. Good thing too, since they seemed to fall apart a little as I disassembled the other parts, and according to Yisrael, my plans to repair them with paper will have to be scrapped!

I will try the wire wheel on those fulcrums and see if it is just a case of petrified bushing or if the metal itself is actually pitted.

Skip, those aren't my whiskers. They are my wife's...cat's. He was helping me arrange the parts for the pics.
 
John, a new set of fulcrums will cost you about $120 (one small resin, that's how I justify things). If those are pitted, I wouldn't hesitate to replace with new. Start with TRF and then Moss. Your entire suspension rides on these. Metal pitting and fatigue are not a good thing.
 
A spring compressor is imperative to own or borrow (or make). Strangely, the Bentley talks about removing the front coil spring with a Jack! You are taking your life in your hands. Everything else are simple hand tools.
 
spring compressors are very useful and life-saving tools. when i took my suspension apart, being quite stupid, i dind't use spring compressors. the nut and upper washer flew accross the room and the washer is still jambed into the drywall. i'm glad it dind't rickochet (sp?) and hit me or anyone else. i bought some compressors the next day and did the other side right.

using them isn't quick and easy or exciting, but it leaves me with all the proper appendages and senses, at least the ones i started with. oh, and get nice ones, mine are cheap and annoying to use. when you skimp on some tools, you end up paying for two to get the one you should have bought in the first place.
 
Hi John,

Glad to hear you got TRF's kit. I like their front end stuff pretty well. The need for new trunnions and ball joints is certainly a given!

The point I was trying to make about the uprights and trunnions was that besides the old trunnions being trashed, the polished part of the upright that fits into the trunnion often looks like the degraded part of your fulcrum pins. New uprights are scarce and expensive!

Let's hope for the best!

Regards,
 
Thanks for the heads-up Mike. I'll definitely look and keep my fingers crossed.

WSPanic, I made my own spring compressor and lived to tell the tale. I may have been foolishly toying with my life, but I figured that with both the compressor AND a floor jack employed simultaneously I could stay pretty safe. I used a large threaded rod to put in place of the shock once removed and some large washers and double nuts on top, and some steel electrical box cover plates and washers and double nuts on the bottom. Here's a mediocre picture of it in place, but you can't see too much:
Globetrotters-SLO021.jpg

I just loosened everything little by little and it went pretty smoothly. No prosthetic limbs required.
 
The upper fulcrum pins cleaned up pretty nicely. It was all just petrified rubber and plastic.

New question: How do I get the new bushings in? I pushed one in already with a screw and washer device (essentially what I used to take the old ones out) but I was worried about distorting the rubbers. Am I worrying about nothing?
 
John Mc, if you will use a silicone grease they go in like a snap, shove then in too far and push them back in place seems to work well. As for the top fulcrum, I shine them up with fine emory cloth and don't forget the washer and the stable end of the fulcrum, they need to be as smooth as you can get them.

I just did the fulcrum on my '70 and had a forum discussion with Sheron about poly and some of the other rubber comonents, as I didn't want to go too hard and the stuff we get is not very good. I had the front flower over the washer in less than 1000 miles with a minimum of sprited driving.

I ended up with a Energy Suspension shock bushing that is single piece. I had to make a small modification, I had to cut the shoulders in half as they were about 1/16 to big to slide completely through. I added a 1/8 washer on the inside, 5/8 hole by 1 1/4" to put the same spacing as original and as an added bonus it made the inside smooth. Get a tube of their silicone grease, it doesn't take much and your tool should do just fine for getting them in.

You can't get these parts on line, but most auto stores and for sure any high performance shop will have them. The numbers are 9.8116R for red and G for black, 2 sets required and hello, $3.65 per set. Oh, put the arms back on the fulcrum before installing, makes putting the split pins in easy.

I have a picture to include if I can get it to work.
The discussion was on the 14th.
Good luck, Wayne

tr6frontend.jpg
 
Well, I finally finished this project today. Fun and rewarding, but tedious at times (mostly owing to my inexperience). If (er,.. WHEN) I have to do this again I'm sure I'll be able to complete it in a small fraction of the time.
Before:
Globetrotters-SLO020.jpg

Globetrotters-SLO019.jpg


After:
finishedsuspension006-1.jpg

finishedsuspension004.jpg


I didn't bother cleaning and painting the hubs. I was just too tired of not driving the car. Next time maybe. I also didn't get around to replacing the steering components of the kit (tie rod ends, boots, rubber rack mounts) but maybe after I drive it and enjoy it awhile, I'll tackle that.

Or I'll just park it in JerseyGirl's driveway with the keys in it and a note that says "Please enjoy my car for a month....and do anything to it that feels right to you."

ps ...to keep the spirit of Dale alive while he's off Cruising, I snapped off one of the wheel studs in the lug nut today while reassembling! /bcforum/images/%%GRAEMLIN_URL%%/wall.gif
 
Back
Top