• Hi Guest!
    You can help ensure that British Car Forum (BCF) continues to provide a great place to engage in the British car hobby! If you find BCF a beneficial community, please consider supporting our efforts with a subscription.

    There are some perks with a member upgrade!
    **Upgrade Now**
    (PS: Subscribers don't see this gawd-aweful banner
Tips
Tips

Front Spring Removal For BJ8

pkmh

Jedi Warrior
Country flag
Offline
Hello All,

As part of my front end rebuilding on my 67 BJ8, a few months ago, I have already replaced the upper bushings and had my Armstrong lever shocks rebuilt. So, far all very good!

In attempts to do the lower bushings to the control arms, it will be necessary for me to remove the 4 existing 3/8" bolts securing the spring pan.

From my shop manual readings and elsewhere here, after the car is jacked up and wheel removed, I am aware how it is recommended to first place 2" wood blocking situated under the upper shocks first(to avoid crushing the rubber bumpers).

Then in sequential order of removing the spring, first remove two of the four existing 3/8" bolts diagonally opposite which secure the spring pan, then replace the removed bolts with 2-3/8" diameter by 4" long bolts, leaving the other two existing 3/8" bolts in place. Then remove the two existing 3/8" before slowly removing the 4" long bolts in attempts to relieve all of the compressive energy from the springs.

Assuming that is the way to go, then my two simple questions are:

1. Is it necessary to use grade 8 bolts (highest grade strength)? Is it possible to use a "Home Improvement" grade or other than a grade 8?;

2. I have a screw thread gauge which seems to indicated the existing 3/8" bolts used are (approximately) 26 screw threads/inch. Is there a difference in using coarse screw threads over fine? Maybe engineering properties to be aware of using one type over another?

Not sure how much compressive strength is stored in a spring. Any thoughts?

Paul
 
Next time I use these, will probably put roll pins through the large nuts on the right, as the jam nuts tend to loosen. Tack welding would be good here if one has it. Right-hand ends also staked to keep jam nuts from coming off end.

The two large 'spacer' nuts make the jam nuts easier to access below the spring pan.

Electric (or other) impact wrench makes short work of spring removal:

SpringToolsHealey.jpg


The threads on our cars are almost entirely fine thread. Spring pan bolts are 3/8-24.
 
Last edited:
Like Steve's. GREASE the threads, as that's where all the load is concentrated. Last time I saw these in the toolbox drawer, they were much shorter...

IMG_2571-la.jpg


EDIT: the all-thread coupling nuts are an easier target to hit when you're throwing a wrench at them. A ratcheting box wrench is worth its weight in gold here.
 
The above listed methods are great especially for reassembly . However when the car has been together for an eternity and bolts are weak and rusty the chance of you removing two diagonally opposite bolts without shearing them off is questionable .
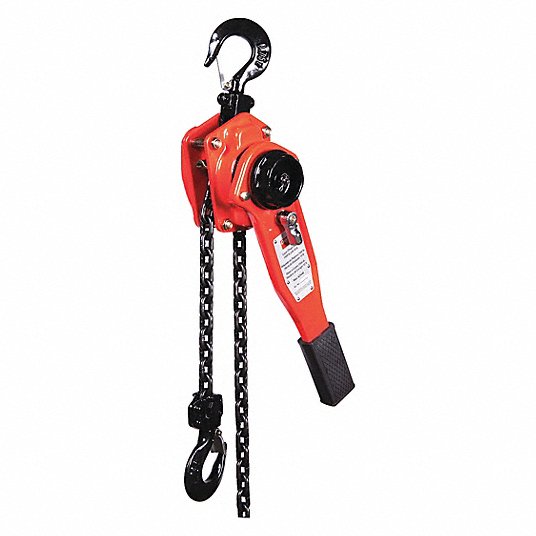
Get yourself a cum-a-log chain hoist . Wrap it below the spring pan over the top of the shock mount plate making sure the chain cant slip off . Take up the tension a bit on the spring , shear off the the old bolts , relax the cum-a-long and spring tension and your done .
Obviously you are going to damage paint etc but if your rebuilding the front end chances are you are going to be doing some repainting .
Theres no way I would rely on two rusty old bolts to hold that spring pan tension in place while I have my head close to it trying to punch out rusted bolts that sheared off or trying to get new bolts through corroded holes in the A arms
 
Manuals are great, but one needn't follow them to the letter; you could swap out ONE (1) bolt at a time for the all-thread, and still have a safe approach to releasing the kinetic energy stored in those springs.
EDIT: you could place a C-clamp on the A-arm/spring-pan while each bolt is swapped out too...

Without being overseen by a trained/certified rigger, I'd be reluctant to trust a come-along to stay in position throughout its travel. Although, with the proper placement of lifting eyes to limit/direct the chain-links placement, securely welded to the shock arms and lower control arms, I suppose it's within the realm of a home-shop mechanic ;) ;)

4ZX44_AS02
True to a point Randy but I always err on the side of safety especially when things like stored energy (ie spring tension) are concerned .
I am a certified rigger by nature of my work and have used the method I listed before for the reasons I stated . The old bolts simply sheared off when removal was tried On both my cars and the portion in the A arm could not be removed until the A arms were off the car and they were heated etc to allow the sheared portion to be punched out .
You would wrap the chain right around and hook the hooks together , make sure the operational part of the chain hoist is on the side of the pull so it’s accessible and easy to operate . No need for lifting eyes welded anywhere .
The other thing to consider is how rusty and corroded the spring base pan maybe ? They are notorious for being rusted partially through and hence weakened .
 
I originally used four of the all-thread setups, but two placed diagonally is all that's necessary. Skeptical of this? Make 4 and try it out. Maybe it's necessary with the 2" block setup.

The advantage of the locked nuts at the bottom is you can use an ordinary ratchet wrench, or an impact wrench - all the slack is at the top.

The length I've shown works with my poly bushings as I'm not using the 2" block under the shock arm. I do use a jack under the lower trunnion in order to lift the spring pan away from interfering with the frame. Suggest starting with longer allthreads and trim as needed.

I haven't had problems with sheared bolts - kroil unsticks them every time. Just successfully used Kroil with rusty bolts rebuilding the front end on my TR6.

These are worth their weight in gold:

screenshot.2431.jpg
 
Thank you all for your advice on removal. I like the roll pin approach with the spacer nuts, which seems to me that spacer nuts can take on more stress loads than say, standard dimensional nuts as found on the spring pan.

I also have an old set of spring compressors that I once used when I had a TR6 many years ago. Though not sure how they would fit on a Healey, given the fact the spring pan is solid and I think the TR6's pan were open at the bottom. But my memory has slipped a bit. But I will check that out and get back here, (eventually).

Thanks again!

Paul
 
Back
Top