Hi Guest!

 Hey - did you know if you click on the title of a thread it will take you to the first unread post since you last visited that thread?
 but were afraid to ask:
  STOP!! Never post your email address in open forums. Bots can "harvest" your email! If you must share your email use a Private Message or use the
  smilie in place of the real @
 Pretty Please - add it to our Events forum(s) and add to the calendar! >>

Offline
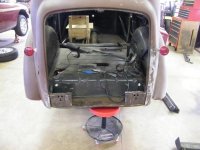
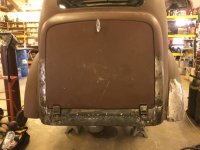
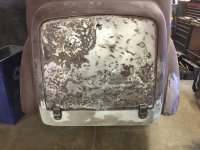
With a little help from a friend, I finally got the rear apron installed and most of the related body work done. This has really held me up a long time. I had been crushed by a DPO, I think by using the jack shelf (shown in the photo below) as a jacking point. With no room to work, I decided to remove it for bench repair then cut away the bottom (seriously damaged) half for new metal. You can get an idea of the condition of some of the metal in the photo with it removed. With the apron gone I was able to repair the rusty floor of the shelf. Anyway, without too much detail, the bench repair didn't work on the apron so we eventually reinstalled the top half for stability then added the bottom with it in the car. I still have a lot of grinding to do and it will require some filler, of course. That MIG welder really is a life saver.