• Hey Guest!
    British Car Forum has been supporting enthusiasts for over 25 years by providing a great place to share our love for British cars. You can support our efforts by upgrading your membership for less than the dues of most car clubs. There are some perks with a member upgrade!

    **Upgrade Now**
    (PS: Upgraded members don't see this banner, nor will you see the Google ads that appear on the site.)
Tips
Tips

Driving again

G

Guest

Guest
Guest
Offline
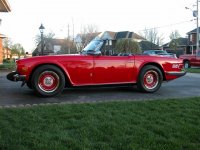
Well, my 6 has been cloistered away in the garage since last fall getting various things done to it. Winter cold slowed me down a bit and I didn't really do much more than collect parts until the spring temps broke. She got a new set of rear hubs and rebuilt rear axles with all new U-joints first. Then a quick spin around the neighborhood just to make sure I got everything back in the way it was supposed to go. Then I tore the front of the motor off to finally real seal it and get rid of the pesky oil leak that developed after I did the bearings and sump last fall. Found the leak right where I though, at the bottom of the front engine plate where it meets the saddle bar. Engine plate gasket was shot at the lower edge. Cleaned and painted the plate, timing cover, balancer, and the fan extension, and put it all back together with new gaskets and timing oil seal and sleeve. Now it's tight and (so far) leak free. Flushed the rad and the block, and finally hooked up the home made cold air intake I bought all the parts for a year ago, and mounted driving lights to the front end. What do you think of the lights? I love 'em. I agonized over drilling my bumper for weeks, it was straight as a pin and rust and ding free. Chrome is a bit worn thin though. In the end I realized that if I get tired of the look it's no big deal. Although a bit pricey these are not rare parts, I could dig up a good used one in a few weeks or just buy a repro. Then I replaced the junky unknown brand of spin on oil filter adapter that was on the car when I bought it (and which leaked like crazy) with a new Mocal unit from BPNW. The old adapter was tapped for oil cooler lines, but the DPO had just put a loop hose in instead of buying the cooler, brilliant. Also adjusted my front hubs and greased a bunch of stuff all over the car.

Got it running again Friday night and cleaned her up yesterday. The final result (notice my oh so oxidized hood, paint has seen better days).

DSCN2238.jpg


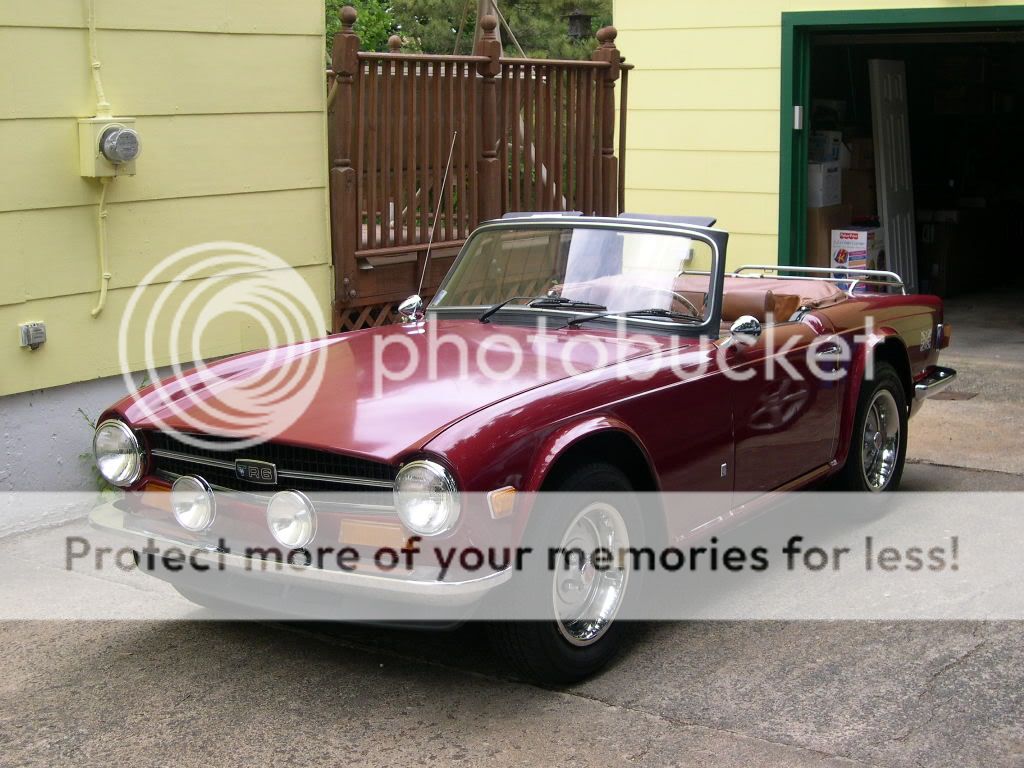
Was so good to take her for a spin, even for just 20 minutes. Made me remember why I bough this car. Next up project wise at the end of the season will be an electric cooling fan, but I want to do the Bosch alternator upgrade before that, which I'll pick up in a week or two. Haven't wired the lights yet for the same reason. At least I can now make our local Friday night cruise in this week, and I'll drive her to the Red Mill Brit only car show coming up in two weeks. At least the wife can't complain now that the car hasn't moved. /ubbthreads/images/graemlins/smirk.gif
 
I noticed those same foglight holes in my bumper and have been trying to picture what it would have looked like with them....Now I know, looks nice actually....but my car has the rubber blocks there too.
I too have been sorting through mine...Pretty much got everything sorted and running smoothly with the exception of that pesky rear end bang....But today I sprayed some penetrating oil on the u-joints and it seamed to make a difference....So I am pretty sure it's u-joints...how difficult was it for you to replace those?

And I am glad to see you've gotten yours back on the road, I've gotta start getting the MG's out...Think I may start with the A's next weekend.
 
Thanks, I really like the way the lights look. For awhile I was looking for some clamp style mounts so that I wouldn't have to drill the bumper, but I couldn't find anything. They probably wouldn't have held the lights in position all that well if I did, so in the end this was best.

You know, I was having a banging in my rear before doing the hubs and joints also. I noticed it when sitting in the car, maybe at a light and not moving. It seemed like something in the suspension would just let go, I'd hear a bang and feel the whole car drop a bit on that side. Turned out I had one U-joint on that side that was almost completely frozen solid with rust. My weight on that side of the car was probably just enough to get it to flex. When I pulled that joint the bearing in the caps were all rusted together and the whole thing was just a mess. Getting the hubs and shafts out of the rear of the car was easy IMO. Just watch for those dreaded worn holes in the trailing arms, if you can wiggle the studs around in their holes then they will most likely not take any torque when you go to put them back together. Fortunately mine were all OK, but one on the drivers side was getting close. I found the easiest way to get to the inner hub flange bolts (where the shafts bolt to the rear diff flange) was using a bunch of long socket extensions so I could sit out in the fender well with the ratchet, and I had an open end wrench on the bolt head wedged against one of the bodywork bulkheads so it wouldn't turn. Not counting the time to get the car in the air and the wheels off, about 30-40 minutes to pull the shafts. I found I also had to bend the big inner rubber boots back toward me to get them through the hole in the trailing arm, it's a pretty tight fit. Getting the joints out of the shafts on the bench is the fun part. Also make sure to really grease those splines on the sliding joints, and make sure those boots are in good shape. All in all it's not a hard job at all. If you need hubs then is the time to do it, but they are a bit expensive.
 
Thanks for the advice...I am debating whether too bring it in or not....I am perfectly capable of doing this myself(I did them on my 77 Corvette) but I'd rather not waste a weekend curseing underneath a greasy car if I don't have to, the motivation just isn't in me anymore. But on the other hand I just gave the mechanic $1200 to fix my Caddy last week.
I decided to try a bit of a redneck repair on it today when I soaked the accessable u-joints in penetrating oil....Then went over to Rona and loaded 6 bag of top soil into the trunk, plus 4 cedars sticking through the rear window. I thought the weight might help free up the u-joints. It did seam to improve slightly, but maybe it was just my mind playing tricks.
BTW: The car handled the weight perfectly and never missed a beat the whole way home.
 
The driving lights look great! I faced a similar dilemma when trying to figure out how to mount driving lights on my TR4. I ended up fabricating a bracket out of stainless steel and using the existing license plate holes in the bumper. See attached photo. The flat bracket is fastened to the bumper behind the license plate and has to "legs" that extend up and raise the position of the lights. It's all hidden quite well by the license plate and the lights themselves.
 

Attachments

  • 215148-TR4_2-26-06_640x480.jpg
    215148-TR4_2-26-06_640x480.jpg
    84.7 KB · Views: 78
Thats a nice looking car Kurtis, your lights look great to. I came close to fabbing up some brackets also, mounting to the same holes. But since I don't run a front plate I wouldn't have had anywhere to hide them. I toyed with running the brackets up from underneath, and having the lights sort of mounted in front of the bumper. I saw a guys car on Ebay that did that and it looked nice, but if anything bumped the front of the car the lights would get instantly crushed.
 
I mounted my Cibie Airport amber fogs beneath my bumper. There were some existing holes in the bumper (from the factory, not sure why) that I enlarged a bit and securely bolted the fogs there. Amber fogs work best at a lower level. The only problem with low-mounted lights is they catch rocks really easily. After changing lenses twice ($$$) I finally covered the lenses with that really thick soft clear plastic shield that sticks to the lense and is trimmed to fit. For the life of me I cannot remember the name but I think they are a 3M product. The trick to using the stuff is to heat the light up (simply leaving it on a while) and heating the plastic shielding material really hot with a heat gun. Then they stick and conform perfectly.
I haven't changed a lense in 3 years.


Bill
 
Those extra factory holes are probably for the licsence plate holder mount.
 
Yep, more than likely. Before I pulled my plate off my mounts were bolted through those holes.
 
Back
Top