
 Hey Guest!

 Hey - did you know if you click on the title of a thread it will take you to the first unread post since you last visited that thread?
 but were afraid to ask:
  STOP!! Never post your email address in open forums. Bots can "harvest" your email! If you must share your email use a Private Message or use the
  smilie in place of the real @
 Pretty Please - add it to our Events forum(s) and add to the calendar! >>
CraigLandrum
Jedi Hopeful
Offline
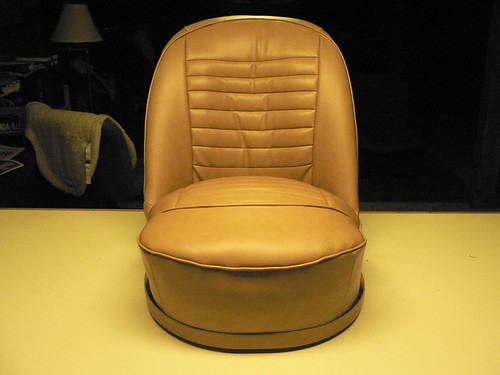
During the restoration of my 1959 TR3A with my son, I decided that the seat covers and interiors sold by the usual vendors were a bit expensive - at least compared to the raw materials that went into them, and resolved to do it myself. I bought 20 yards of 53-inch wide 41 mil marine grade vinyl for about $160 (much higher quality than are used in the commercial covers). I then dissected my existing worn out seats to create sewing patterns. I ironed each piece flat, traced it onto paper, scanned the paper in, and used it as a guide to create a vector drawing in Adobe Illustrator. I then took each drawing and tiled it into 8x10 PDF pages which can be easily printed on any home laser or inkjet printer and reconstructed at full size by taping the pages together. I did this myself to test the patterns, cut the pieces from my vinyl and sewed the seats (my first time on any sewing machine). I recorded my notes and took pictures as I went and the result is packaged into a 4.4MB PDF file that I just sent to the Members Articles area of the forum. Hopefully it will be posted there for anyone who would like to read it in the near future. It provides all the source, instructions, pictures, and patterns you need to make and recover your own seats.
UPDATE: The file wasn't appropriate for the Members Articles area and I didn't feel like reformatting 70+ pages into a wiki, so you can just download it here:
https://xjguy.com/triumph/diy_tr3a_seat_covers.pdf
By the way, I only used about 5 yards of the vinyl, with plenty left over on my 20 yard roll to recover the dash and all interior panels - all for $160 and a little extra effort.
