• Hi Guest!
    If you appreciate British Car Forum and our 25 years of supporting British car enthusiasts with technical and anicdotal information, collected from our thousands of great members, please support us with a low-cost subscription. You can become a supporting member for less than the dues of most car clubs.

    There are some perks with a member upgrade!
    **Upgrade Now**
    (PS: Subscribers don't see this gawd-aweful banner
Tips
Tips

Dash Veneer questions

You guys aren't ready to post finished pictures yet? Man, you've been talking about this for about a week now, so let's get going, OK?
 
<div class="ubbcode-block"><div class="ubbcode-header">Quote:] Besides Shirley likes to use her kitchen table for the holidays![/QUOTE]

See Dale, there is another use for those things in the kitchen!
 
When I stripped my old dash, as a test I put it through my thickness planer and took off the veneer layer only. Came out perfect for the new veneer (which I haven't applied yet.)

Vacuum press is a great method for getting the new veneer on perfectly but with a large surface area, sometime difficult to do unless you have a friend in the business with a large vacuum press. A good rubber roller and a evenly distributed stack of weight will do fine. Put the dash on a flat surface, add a wax paper layer over the new veneer followed but a piece of plywood that totally covers the old dash. Then start stacking weight evenly over the whole area until the glue dries.

I built my sub-woofer (for my home) this way - but that's another forum entirely. Here's my sub looking through one of the 15" passive radiator cutouts at the internal bracing of the cabinet, and the business side (motor) of the 12" woofer. The cabinet is from 1.5" MDF and covered with quarter-sawed cherry PSA veneer. Pressure Sensitive Adhesive veneer uses a pre-applied adhesive made by 3M and is rapidly replacing older technologies, especially in speaker building. The finished sub weighs in at 130lbs.
 

Attachments

  • 8819.jpg
    8819.jpg
    26.3 KB · Views: 70
Just curious Peter. How much did you actually plane off of the top? .010" - .020"? I just wondered how thick that surface is.
 
Ah-Hah! The old toilet tissue thickness comparison trick!!

If it's that thin, why not just use a vibratory sander to remove it? I know nothing about wood refinishing, so I'm just asking.
 
Brosky said:
Just curious Peter. How much did you actually plane off of the top? .010" - .020"? I just wondered how thick that surface is.

Depends on your planer's abilities; mine has both finishing and rough abilities to lock the head to prevent it from changing thickness and sniping the end.

I zeroed the planer https://www.amazon.com/Delta-22-580-13-Inch-Benchtop-120-Volt/dp/B0000648AS to the thickness of the dash then locked the head. As it planed through, it just barely touched the surface. Second pass, I turned the handle about 1/12 and checked the surface, almost there. After a few passes, it did the trick. Just go slowly and check with each pass.
 
when I pulled my dash out it has a thick clear coat like that stuff you see on bar tables I think its called crystal cast, I ended up heating it up with a propane torch and pealing it off luckly the veneer pealed off with heat too, just heat is slowly, then sand reveneer

good luck either way
 
I saw a dash on ebay a few months back and it had pot leaves glued to the dash and then covered with a thick clear varnish. Nobody bid AFAIK.
 
I too had a vacuum pump kicking around so I used the vacuum veneering to re-veneer my dash and it worked out great.

I had a local wood shop run the dash through their 36" drum sander to remove old veneer which left me with a perfectly flat and smooth finish. Unfortunately, he took a little too much off and I had to rebuild the thickness with some pine veneer before the final veneer layer.

I made my own vacuum setup with a length of the thickest PVC sheeting available at JoAnn Fabric. I forget the width but I had it cut about 18" longer than the dash. I used Vinyl pool repair adhesive to place 4" square piece of vinyl on the sheet to double the thickness to mount a bulkhead fitting through. I picked up some fittings at the local hardware store to create a bulkhead fitting for the vacuum hose. The next step is to fold the vinyl sheet in half and use the vinyl adhesive to glue two of the three edges together to make a bag.
For the veneering box, I used 2 pieces of 3/4 particle board to create a box. All exterior corners should be rounded with a router to prevent the box from damaging the bag. I think using the particle board plattens to exert pressure on the dash rather than just relying on the bag provides a better lamination. Make sure you tape wax paper to each piece of particle board to prevent the dash from sticking to it.

The veneering was done with Titebond III waterproof wood glue spread with a printer's brayer. You need to work fast since it sets quickly. Put an even layer on the veneer, position the veneer on the dash, place the dash in the veneering box and put the top platten (lid) on. Slide the whole sandwich into the bag. Fold over the end and clamp with a couple boards and some clamps. Pull the vacuum and let it sit for the glue to dry.

After lamination is complete, use an Exacto knife to rough cut the openings. Finish trimming the veneer to the opening with a dremel-mounted sanding drum. I used a small file to get the corners.

Finish with spar varnish since the spar varnish has UV inhibitors for durability.

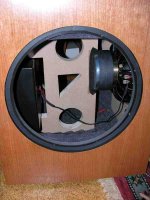
Well, looking at the above, it is way too wordy. Rather than continue to bore everyone with the details, attached are some images of the setup. In hindsight, I probably should have taken more.

I hope this helps!
Ron W
71TR6


Veneer1Small.jpg

Veneer2Small.jpg
Veneer3Small.jpg
Veneer4Small.jpg
Veneer5Small.jpg

Veneer6Small.jpg
Veneer7Small.jpg
Veneer8Small.jpg
Veneer9Small.jpg
Veneer10Small.jpg
 
Tom, it isn't as dark as the photo. The walnut burl is quite pronounced and noticable. Here's what it looks like in daylight...

IMG0010Small.jpg


The one thing I discovered is the walnut burl is quite porous so it took many coats of varnish to finally fill in all the voids. Put on a coat, sand it til you just start to get to the wood again. There will be shiney spots from the varnish in the voids. Add another coat, and repeat the process until there are no more shiney spots. Finish with a couple of final coats, lightly sanding between coats.

If you're using a tighter grained veneer, it will cut down drastically on the coat/sand cycles needed.

Ron
 
Sweet. Very nice pictorial. Thank you. I just learned what I won't be doing with mine. The gauges, I'll do. That is beyond my skills and patience.

Give me metal, but never wood, unless I want to create a pile of tinder.
 
Ron, That is great! Looks like AAA grade veneer. I was hoping it did not turn out too dark. Sometimes walnut gets almost black.

I know there are many fine finish products out there today. I have used TRU-OIL for at least 40 years and have had great time-tested results so I will stay with it. As you did, I apply many coats, hand rubbed, and wet sand them, then reapply until I have a smooth as glass finish. After I am satisfied with the finish I then rub it with a very fine rubbing compound to remove the "wet" look and then apply a special wax to give a nice sheen and help protect the finish. I have found that it still shines and is just enough to reduce the glare and make the grain of the wood stand out a little better. It also does not tend to show the little scratches made when wiping the dash while cleaning it.

Among the qualities of TRU-OIL is that it does not yellow in the least. I have a gun stock I did early on and it is as clear today as the day it was finished.
 
Back
Top