
 Hey Guest!

 Hey - did you know if you click on the title of a thread it will take you to the first unread post since you last visited that thread?
 but were afraid to ask:
  STOP!! Never post your email address in open forums. Bots can "harvest" your email! If you must share your email use a Private Message or use the
  smilie in place of the real @
 Pretty Please - add it to our Events forum(s) and add to the calendar! >>
poolboy
Yoda
Offline
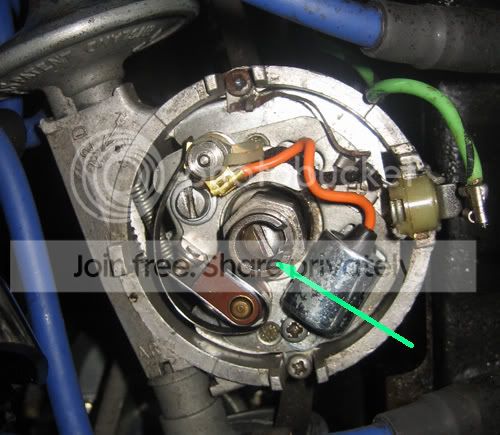
This won't work. The valve cover has a gasket between it and the cylinder head. That is electrically insulating the valve cover from the engine ground. And if you have rubber oil seals under the valve cover washer and nut, that insulates the stud from the valve cover.Tinster said:<span style="color: #000099">Edit: I pulled the fat, center wire out of the coil.
I stuck a screwdiver in the hole and touched another screwdriver
to the first and pushed the assembly close to the valve cover.
The Mrs cranked the engine several times with no sparks anywhere.
I'll install a spare coil and see what develops. </span>
dale[/color]
Best way is stick a spare spark plug in the coil to dizzy wire and ground the threads to the engine block or cylinder head.

 when you spot and correct it! And it's not rocket science, rather just a simple process of elimination.