• Hi Guest!
    You can help ensure that British Car Forum (BCF) continues to provide a great place to engage in the British car hobby! If you find BCF a beneficial community, please consider supporting our efforts with a subscription.

    There are some perks with a member upgrade!
    **Upgrade Now**
    (PS: Subscribers don't see this gawd-aweful banner
Tips
Tips

Converting Rear Reflector to working lamp

Thanks Dave.

I have been searching the last few minutes and found the same place you did. The price is right,(1.95 each). I don't think there will be a problem with space as the end of the bulb will stick out of the rubber piece. I should be able to push those connectors onto the back of the bulbs from the inside of the boot once I put the reflector/mr11 back into the car. ... I looked for connectors/sockets at Lowes when I was buying the bulbs but they didn't have any. I guess I'll look around some more locally in order to avoid the shipping charge which will probably be more than the 4 dollars for the sockets....

Keoke.... I saw the picture of the spade terminals in the article that Dave refered to. I had some of these but they were too loose to make a connection. I squeezed them down a little with pliers but I squeezed one a little too narrow so when I tried to push it on, it broke the pin off the bulb. This is why I am going to take the time to get some sockets that will fit the bulbs. Sockets will also prevent an accidental short and make it easier to remove the reflector if the bulb ever fails. The bulb package claimed 2000 hour life so It may be a while before it needs to be replaced.
 
I converted my reflectors yesterday. It was fairly easy and if you don't include the time to run to home depot twice (broke the terminal off one of the lights) and the trip to radio shack, it can be accomplished quickly. I couldn't find a socket for the MR11 bulbs at home depot or radio shack, but I would think they would be available at a lighting store. That is the way to go as it simplifies the job. I tried soldering the wire directly to the terminals, but they don't take solder well. At radio shack I purchased some insulated telephone butt connectors (64-3073). Butt connectors remind me of the service I used to receive from Qwest, but that's another story. Anyway the telephone butt connectors when crimped slightly fit tightly on the bulb terminals. Prying just a bit on the other end of the connector allows you to solder the wire to it. If I were to do it again, I would definitely try to get the correct socket. It would be a cleaner installation.
The 10 watt bulb is very bright. There is no need to go to a higher wattage. Since this bulb is a single filament, it can only serve one purpose, either (turn/brake) or tail but not both. As my car is an early BJ8 (only one tail/brake/turn light per side), I think this idea is a great safety asset, but still allows the car to look original.
I want to check my car's wiring diagram to make sure that the turn/brake lights are fused. Don't remember. I know I added fuses to the lighting switches so maybe that covered it, but will have to dig out my diagram and check.
 
Shorn,
I also broke one and since the bulbs are 5-6 $ each,
I waited until I had the sockets that I bought from the
place that Dave posted above:
https://www.superbrightleds.com/cgi-bin/store/commerce.cgi?product=MR16
They were only $1.95 each . I also used two of those " double " connectors in place of the single connectors where the wiring harness connects to each turn/brake light wire so I didn't have to cut into the wiring harness. It made for a neat installation and I can always pull the socket off of the back of the bulb while the reflector assembly is still in the car. It will make it easier to change if I ever have to. Once you thread the wires that you are using into the holes in the sockets
put a dab of epoxy onto the wires and socket to keep the wires attached to the sockets.
 
OK Guys,
I can use some bright ideas. I would like to install lamps in MY BN2 reflectors. Maybe Keoke has seen a lot of different stuff. Suggestions from anyone are welcome.

It appears that the later reflector pods are part of the body, have a rear opening & a rubber & a retaining ring for the lens. Not too hard to fit a small lamp into it.

On the other hand, my BN2 has, as you can see from item 33 here:
https://www.mossmotors.com/Shop/ViewProducts.aspx?PlateIndexID=28936&SortOrder=28
The reflector pods are a closed casting that is mounted separately from the shroud metal. The back of it is a solid closed panel except for a small screw hole. A flat solid reflector with a single stud on the back mounts to the pod hole.

Do you have any ideas how lamps could be installed in this arrangement. I don't really wish to cut up $55 pods just experimenting. One person says that his BN1 is modified to take lamps, but doesn't have much detail on how it was done.

I may be missing some simple interchangeable parts? Could maybe cut a large hole & use the later lens, rubber, & trim ring but how would I anchor the ring to the pod? Thanks much for any ideas. Not anxious to ruin expensive parts.
D
 
The base of the rubber reflector asembly has a groove around it that fits into the hole in the body. There is not any mechanical contact other than the rubber groove into the edge of the hole in the body. It is not a very good arrangement and I think I am going to use some more of that RTV around the inside seam of the rubber to the body before I take it back on the road. No matter what type of light that you wind up using, you will have to put a hole through that pod into the body in order to route a wire or two inside the pod. To connect to the back of ??? Don't know what you can use since there is a stud on your reflector. You may have to consider one of those round aftermarket clearence light assemblies of the correct diameter.
 
If your reflector is around 2 inches in diameter like the one in my 65, you may be able to cut a 2 inch round hole into the pod and install the 65 reflector, ( assembly including the rubber base )into your pod. The rubber base only goes in a 1/8th of an inch until the grove seats with the 2 inch hole. I am still at work or I would check the dimension. I think it was right at 2 inches in diameter on my 65.
 
Hi Ed,
No aftermarket truck type stuff on this car. It has to look nearly as original as possible. The present reflector is 2.065" over it's chrome ring. The housing is 2.250. I can accept something like Michael's but not sure how it was done. Scroll down to the rear view of his car. They are somehow lights installed in the originally closed back pods. Look almost original.
https://www.britishcarforum.com/ubbthread...part=1&vc=1

True, I will need to drill a small hole in the shroud also, for a wire to pass through, this really hurts. I just don't want to screw up the pods if things don't come together right.

I guess I could buy a couple of 65 reflectors & rubber bases & then check things over carefully before cutting anything.

Thanks,
D
 
Dave,
I probably can't add much. The rubber grommet reflector assemblies are available at Moss and Sports & Classics for about $20. each. I would measure the hole that the grommet fits into, but the my grommets have deteriorated significantly and I am reluctant to take them out again as the rubber may fall apart. The holes in the shroud are circular, but with two additional notches 180 degrees apart that help when you try to get the rubber lip through the hole. If you cant find the exact hole size and notch locations, let me know and I will pull a reflector out and take measurements and shoot you a picture.
Actually the web site that you recommended in your first post on this thread shows the hole and notches pretty well.
Skip
 
Hi Dave,

I think it's a good idea to buy all potential parts, inspect/measure to see if it's going to work before cutting up your pods. You might be able to drill a hole through the pod mounting bolt to run the wires (might require a larger bolt though) instead of drilling an extra hole through the shroud.

BTW, if your looking for special lucas lighting bits, both these places come to mind.

https://www.s-v-c.co.uk/
https://www.vintagecarparts.co.uk/

Cheers,
John
 
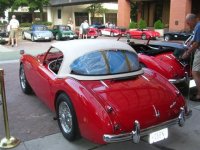
Sorry I don't have a real close-up shot but see how this came out on my car--I used the beehive lens in red. I have these wired as turn signals and a third-brake light on the rear boot deck with the standard lights serving as tails/brakes. I bought a pretty neat third-brake light that is angled and looks like it would be a very good fit installed on the inside top of the hardtop rear window--hopefully a spring project.
 

Attachments

  • 164861-HardtopatConclave--windowloose(Small)(Small).jpg
    164861-HardtopatConclave--windowloose(Small)(Small).jpg
    55.1 KB · Views: 118
[ QUOTE ]
You might be able to drill a hole through the pod mounting bolt to run the wires (might require a larger bolt though) instead of drilling an extra hole through the shroud.

[/ QUOTE ]
John that is an excellent idea! To make it easier, just run the hot wire through the hole, put a star washer under the head of the pod bolt and a ground wire with lug attached between the star washer and the bolt head.
On the inside of the car, put another star washer between the nut and the body to insure a good ground. Now the hole in the bolt can be smaller since only one wire has to go through it. Probably a good idea to put a small piece of heat shrink tubing over the wire where it goes through the bolt to prevent chaffing through the insulation of the wire. Then get the same lens that Michael used and you should be in business.
/ubbthreads/images/graemlins/thumbsup.gif
 
[ QUOTE ]
Shorn,
I also broke one and since the bulbs are 5-6 $ each,
I waited until I had the sockets that I bought from the
place that Dave posted above:
https://www.superbrightleds.com/cgi-bin/store/commerce.cgi?product=MR16
They were only $1.95 each . I also used two of those " double " connectors in place of the single connectors where the wiring harness connects to each turn/brake light wire so I didn't have to cut into the wiring harness. It made for a neat installation and I can always pull the socket off of the back of the bulb while the reflector assembly is still in the car. It will make it easier to change if I ever have to. Once you thread the wires that you are using into the holes in the sockets
put a dab of epoxy onto the wires and socket to keep the wires attached to the sockets.

[/ QUOTE ]

Ed,
Where did you get the "double" connectors?
Is your car neg or pos ground?
Does it matter which wire from the lamp goes to pos or neg?
Which 2 wires (color of the healey wire) did you tap into?
Cheers, Roger
 
victoria British has dbl connectors (14-968) at $.95 ea. Moss part # 161-600 at $.95. Triple-C.com has a pack of five for $3.00. Doesn't matter which bulb terminal on the MR-11 is pos or neg. On my 64 ph1 BJ8 the white/purple wire for the left side and the white/brown wire for the right control the brake and turn signal lights. The black wire is the ground.
 
HI Dave, have a look at the rear lamps on the Jag I20'S they contain a lamp and may also fit the plinth of the BN2.---Fwiw---Keoke
 
Hi Keoke,
Thanks for the tip.
I checked things a bit.
The JAG 120 uses the Moss #143-700 lamp in the plinth, as do the MGTD, TF. The AH BN1, BN2 also uses this lamp in the actual lower tail lamp. The lens & trim are about two inches OD.

The BN2 reflector plinth is smaller & can only handle a lamp/lens diameter of about 1.5" OD.

Need a lens, trim ring, rubber, that is 1.5" OD maximum.

From Ed's description, the later model lamps are also around 2" diameter.

I have no idea where Michael O. found a beehive lens of 1.5" diameter, what socket or rubber was used or how it was fitted together. His is the only BN1 that I know of that has been converted.

I would be way into uncharted waters trying to use the larger XK120 plinths even "if" I could find them.

Anyone know of a 1.5" OD lens & lamp rubber?

Thanks much,
D
 
[ QUOTE ]
I have no idea where Michael O. found a beehive lens of 1.5" diameter, what socket or rubber was used or how it was fitted together. His is the only BN1 that I know of that has been converted.
D

[/ QUOTE ]

Dave and all--

I had Von Patterson (Von's Restorations in Fort Mill, SC) do this while my car was down there for some work a few years ago. I don't have the bills available to me right now but perhaps Von will remember or be able to look it up--I'll try to contact him and will pass along whatever I learn.
 
Dave,
I pulled one of the modified reflectors back out so I could get the proper dimensions for you. There is a 1.310" diameter hole in the body. The base of the rubber of the reflector assembly needs 2.125" diameter of flat metal centered around the hole to sit flat on the body once it is installed. If you can fit a 2.125" circle on the back surface of your pods, you should be able to cut out a 1.310 " hole and install some 65 style reflectors. .....
I guess its time to figure out how to use my wife's digital camera and take some pictures.
 
Back
Top