• Hey Guest!
    British Car Forum has been supporting enthusiasts for over 25 years by providing a great place to share our love for British cars. You can support our efforts by upgrading your membership for less than the dues of most car clubs. There are some perks with a member upgrade!

    **Upgrade Now**
    (PS: Upgraded members don't see this banner, nor will you see the Google ads that appear on the site.)
Tips
Tips

TR4/4A Compressing steering rack bushes - TR4A

TR4eh

Senior Member
Offline
What's the trick to squeeze the play out of urethane bushes? I've loosened the mounting, cranked the wheel over and had someone hold it to compress the bushing, clamped the front and back of the U-shaped housing against the rack to further compress the bushing, then tightened the nuts. After doing both sides, there's still a little play in the rack when turning the wheel side to side, on the order of 1/8". I'm thinking that's going to be unpleasant steering and would like to squeeze that play out.

Thanks in advance,

Cliff
 
I'm not sure if it would be the same on a 4A; but faced with a similar problem on a friend's TR6, I used a wooden carpenter's clamp :
https://www.harborfreight.com/10-inch-handscrew-clamp-4853.html
which I took apart and put back together with the jaws facing the opposite way. Not exactly secure, but just enough to spread the rack clamps against the ears on the rack while tightening the bolts. The owner was very happy with the result; claimed it steered better than it ever had before.
 
Randall, I have both a new set of rubber and a new set of poly bushings for the TR250 rack. I read here the polys don't grip well, but I am unsure about the new rubber ones, though slightly smaller in diameter than the od rubber (static, uncompressed) they also seem to be much softer rubber than the old ones, don't know if this is original spec differences or simply time hardening the old rubber. Anyway if I am understanding the trick right you are trying to push the u shaped clamps out from the center towards the locating piece before you tighten them down? correct?
 
I went a bit overboard, and I doubt much good was done.

Without a picture, this is going to be hard to explain, but:

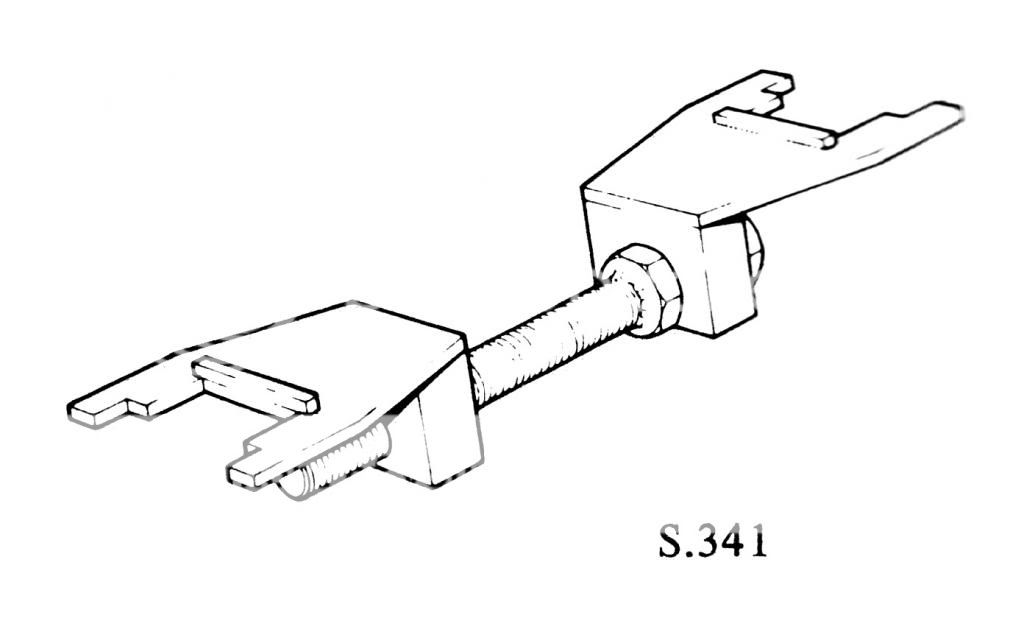
I bought a "turnbuckle" from a local hardware store and fastened a wide and fairly deep "L" bracket at each end using lockwashers and nuts. By rotating the center of the turnbuckle, the two L brackets spread to each side and pushed the steel U-Bracket housings for the urethane bushings outward against the mount shoulders.

I actually think I took that idea for that tool from George on this site who made one and posted a picture. I'll post one if you are the least bit interested. By eyeballing the compression and gaps I really don't think I got them all that tight.

The tool resembles the one in the Shop Manual. It can only be used on your back, under the car and with the flat of each L bracket resting on the rack/tube and pressing against the steel U-Brackets.

I made the tool in an hour. Turnbuckle, threaded rod, a couple of drill holes and two pieces of angle iron. As I recall, this will not work if the bottom of the L on the angle iron isn't deep enough to avoid the upper part first contacting one of the frame members.
 
KVH, I would appreciate the picture, if you can find it. My method was similar to TR3driver's, in that we both squeezed the U-brackets against the ears on the rack one side at a time, I used vice grips, he used a carpenter's clamp. Perhaps pushing out on both brackets at the same time will improve things.
 
I found it almost impossible to get a decent preload on polyurethane bushes - they are just too hard to compress. Maybe if you planned on how you were going to do it, then boiled the bushes for a while to soften 'em up before attempting the preload. I put mine in the parts box and went back to rubber and have been pleased.
 
My method was similar to TR3driver's, in that we both squeezed the U-brackets against the ears on the rack one side at a time,
Er, no, I spread both brackets at once, which I believe is important. That's why I turned the clamp inside-out, so it could fit between the brackets and force them both outwards at the same time. The book says the gap should only be 1/8" on each side, which as I recall took a good deal of force.

Here's the TR6 tool from the manual
SpecialtoolS341_zps6713bc16.jpg
 
Do away with these silly things and buy the kit from Eagle Gate to mount it solidly to the frame.Billet aluminium and beautifully machined
The feel is nicer too .....
MD
 
Mine looks like that above. I'll post a picture. I can't warm up to that solid set up. It's too easy, and if that was intended they could've designed it like that. Isn't the rubber to absorb impact?
 
Honestly could not tell there was any additional shock or feedback (or for that matter any difference at all) with the solid mounts, and with them comes the best benefit - easy installation.
 
Hey, thanks again, the picture really helps. Part of my enjoyment with old cars is making the necessary tools.
 
My only regret is that these DONT work on the early tr4 you must be past CT20k l Like them a lot, gives a very precise feel to the steering very much lacking with any style of bushing you try.Just MHO, but the hot lick no question...
MD
 
Back
Top