• Hi Guest!
    If you appreciate British Car Forum and our 25 years of supporting British car enthusiasts with technical and anicdotal information, collected from our thousands of great members, please support us with a low-cost subscription. You can become a supporting member for less than the dues of most car clubs.

    There are some perks with a member upgrade!
    **Upgrade Now**
    (PS: Subscribers don't see this gawd-aweful banner
Tips
Tips

Commission Plates

CJD

Yoda
Country flag
Offline
I have purchased 2 new commission plates for a 1960 TR3A. Each is from a different supplier, but I am not completely happy with either. Has anyone out there restored an original? The original has raised lettering, unlike the repo's. Is there a way to paint the whole thing and polish off the letters?

Thanks,

John
 
John
I restored my TRA 2000 and my MGA commission plates. I used gloss enamel, but I think a laquar would be better (faster drying). Tape off the outside edges and the area with the vin. Then lightly spray with paint. Let dry and remove the tape and lightly wet sand with 600 grit, use soap in your water. Repeat until you get good coverage, wax or spay with a compatable clear.
Pictures Later
Paul
 
John,I bought the Roadster Factorys commission plate for my 59 tr3,which is blank,and was going to stamp myself,when I locate proper size and font.Based on what I have seen these are not raised.
I thought only the body number plates over the battery box were raised .They now offer these ,stampted to your numbers,with correct raised numbers and letters,but ocould be wrong.I am not aware of anyone who offers this service for the commision plate.If I had a ledgible palte I would use like it is.
Tom
 
3453369370_280f1a6834.jpg


3453369680_34dc5fc0b1.jpg
 
Nice work. But I, too, do not think the TR3 plate (which is what the OP) would have) is raised.

The confusion may be because the original plate (painted?) had a feel of thickeness on the painted bits whereas the repros seem to have been made from a different process (sort of a photo etching) and look a bit smoother if compared side by side.

I kept the original on my TR3A as it looked decent (and decent original beats perfect repro for me) but redid the TR4 plate as STC thoughtfully placed it directly below the master cylinders on LHD cars where brake fluid could strip most of the paint off thru the years.

For the one I redid I used the Harbor Freight 1/8" stamps which were close to the original font -- most noticeable difference was the number '3'. 3's can have the top bit either flat of curvy. If oyu don't have a '3' in the number the HF stamps are not too bad.
 
Geo,Thanks for tip on stamps.I have seen the HF ones and if I remember,the price is right,althouth I have a 3 in the #.The plate's field for numbers isnt painted.
I always like when a restored car still has the original unrestored plate,even if the condition is not that great.Kind of the only window into its past.Mine was torn up by PO's sandbaster.
Thanks
Tom
 
According to Moss catalog P/N 325-300 NA.Searched RF website,no match.
Need a couple also.If not available a good description would help.I dont think they were pop rivets,but believe they were aluminum.
tom
 
Even some crafty work with JBWeld might make a pop rivet look right.

I vaguely recall someone (here or on the TR emai list) offering the correct rivets.
 
Aviation blind rivets have a center that locks the rivet in and stays in it. Aircraft Spruce and Specialty has 'em.

There I go with the aviation again...
 
Paul..I will try your technic with the original, as your plates look great. The original definitely has raised lettering, which none of the aftermarket ones do. The repos look like they are silk screened. To me that is a quick give-away that it was replaced. Also, the wording is ever-so-slightly different on the Gross Weight...both the abbreviation for tons and the placement on the badges.

My rivets were pop rivets, but the post looked like it snapped at the surface instead of deep in the rivet. I plan to pull the rivet snug, but then cut it off flush before it "pops" on it's own.

Thanks to everyone for the good info!

John
 
You must be psychic! I put this off, but was just making plans to get to work on the plate. I still plan to make every effort to restore the original...with the repo as a back up.

I'll post pics of my successes and failures during the venture!

John
 
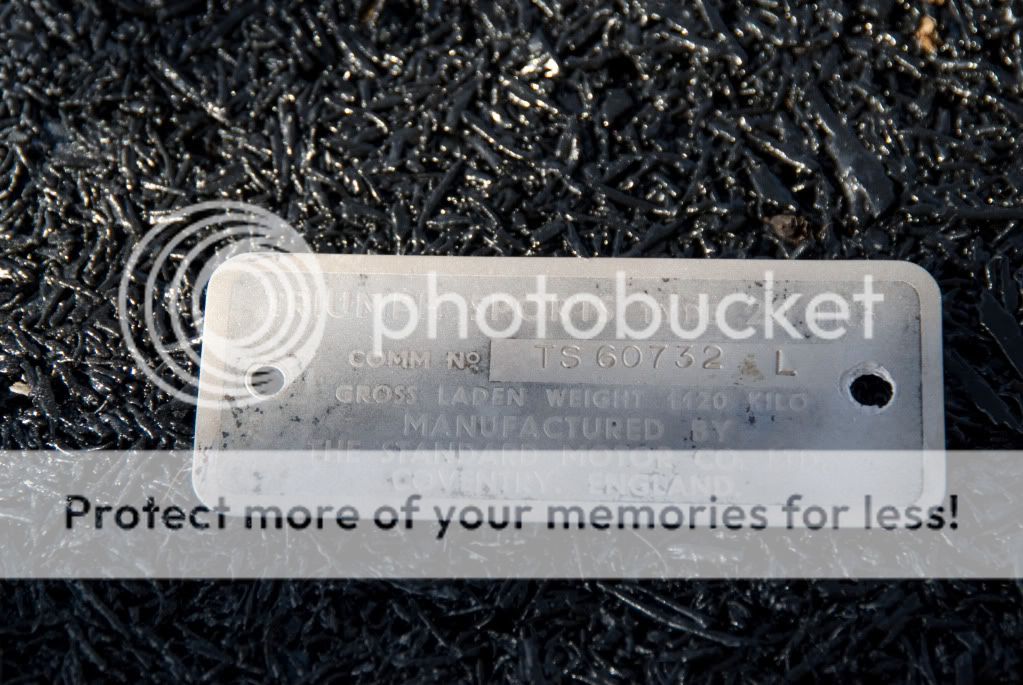
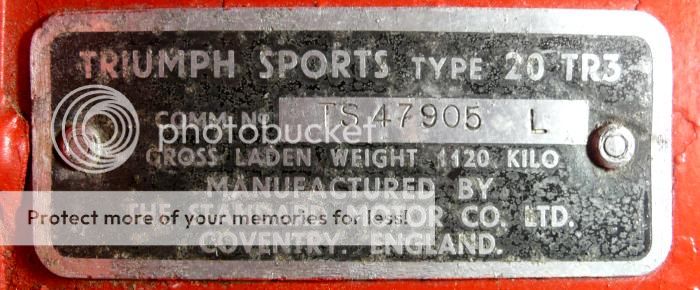
OK, just a follow-up for posterity. I could not bring myself to use either of the repo commission plates. The original has raised lettering, whereas the repos are painted on an absolute flat plate. The repo's also have different info...the worst of which was trying to add 50 kilos to my trim lady!

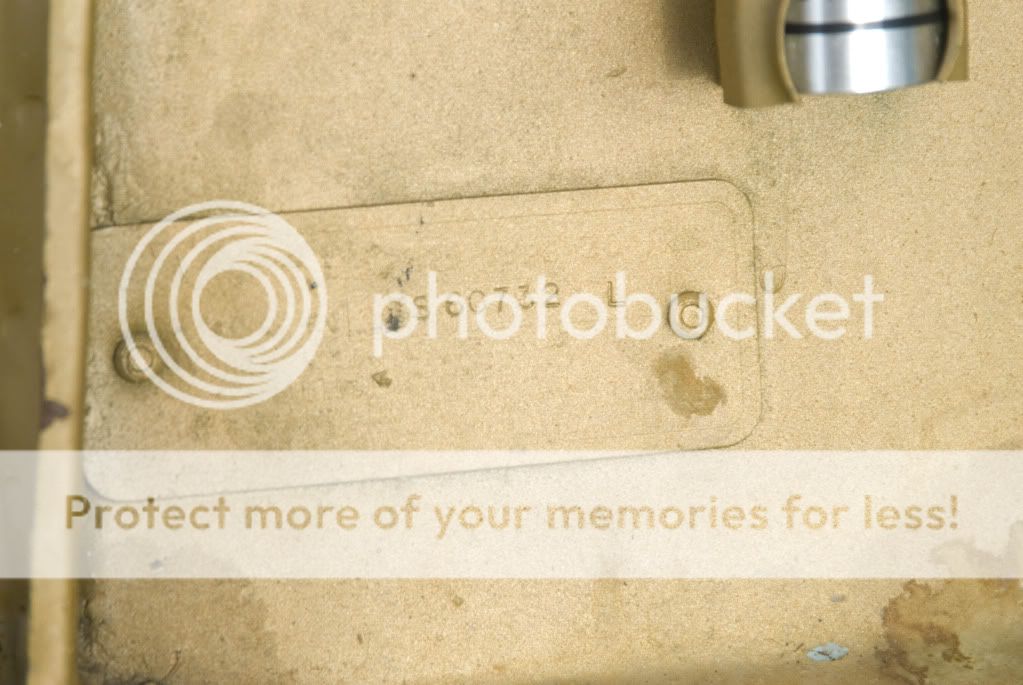
So, here is the process I went through. The first problem as that the PO had painted right over the plate, so the gold had to come off.

_DSC4267.jpg


I did this in a galss bead cabinet. The blasting curls the thin metal, so I had to heat it afterwards with a torch to anneal it and allow it to settle into it's "flat" shape. This has to be done very carefully, as it is just thin aluminum. An oven on 500 degrees would accomplish the same thing, although it would take longer. (I'm impatient!)

_DSC7740.jpg


As you can see, I was not concerned with a small amount of the original black paint. I just needed to remove the gold. At this point I taped the edges and the raised portion with the vehicle number.

_DSC7742.jpg


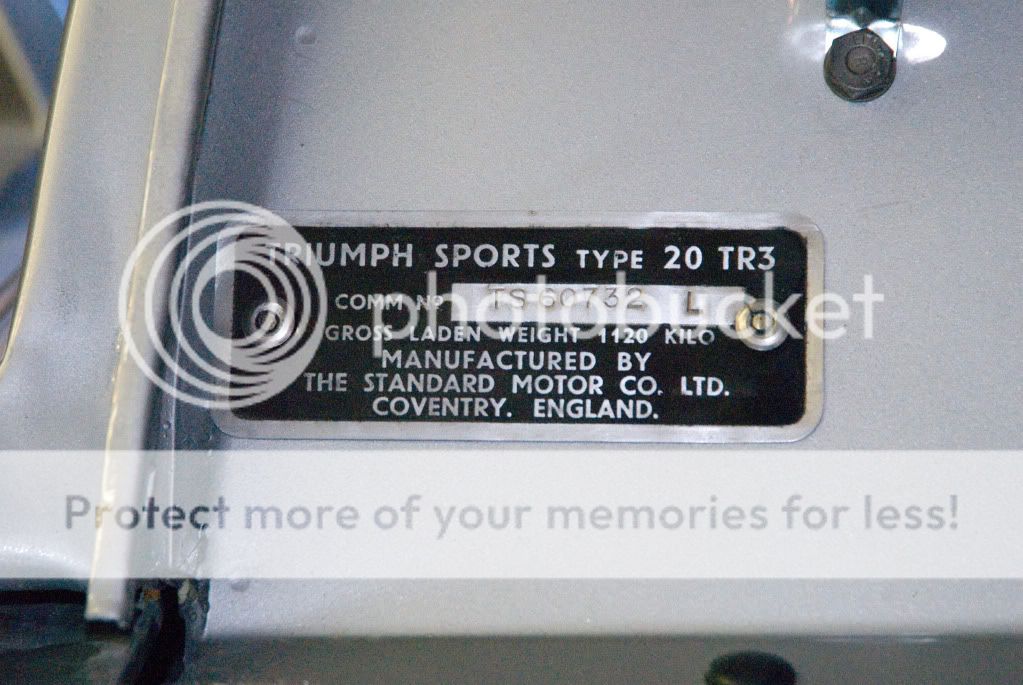
The plate was then painted with a good quality spray-can enamel black paint. Once it dried, I removed the tape and carefully sanded the lettering with 400 grit to bring the letters back out. (note: I tried the finer grits, but I was way too impatient, again!) Once I was happy with the look, I sprayed the entire plate with clear laquer to bring the shine back out of the black paint.

_DSC7787.jpg


And the final mounting was done with standard Monel pop rivets. The only tricky thing here is that the original plate had the center of the rivet cut cleanly flush with the outer surface of the rivet. If you just pop a modern one in, it will break the center well inside the rivet. So, I pulled the rivet until it was snug, and then used a dremel to cut the center flush...just like the original. I also used sealant on the rivet and back of the plate to keep any stray water out of the passenger footwell.

So, it was well worth saving the original plate.

John
 
An impressive result -- I'll admit I doubted that the slightly raised letters would be high enough to allow a repaint & removal technique.

Sadly, the plate I would like to restore is a TR4 and (later ones anyway) had a simple painted plate with no raised letters.
 
John - I refurbished the original plate on mine. It was never sprayed over so it was easier than your job. But I stayed with the original plate, because the fonts on all repros since 1990 are different and not like the original plates.

Not only have you done a beautiful job but it is original with the correct fonts.

I have seen three or four different TRs which have different weights indicated on correct original plates.
 

Attachments

  • 27900.jpg
    27900.jpg
    68.9 KB · Views: 288
Back
Top