• The Roadster Factory Recovery Fund - Friends, as you may have heard, The Roadster Factory, a respected British Car Parts business in PA, suffered a total loss in a fire on Christmas Day. Read about it, discuss or ask questions >> HERE. The Triumph Register of America is sponsoring a fund raiser to help TRF get back on their feet. If you can help, vist >> their GoFundMe page.
  • Hey there Guest!
    If you enjoy BCF and find our forum a useful resource, if you appreciate not having ads pop up all over the place and you want to ensure we can stay online - Please consider supporting with an "optional" low-cost annual subscription.
    **Upgrade Now**
    (PS: Subscribers don't see this UGLY banner)
Tips
Tips

TR4/4A Checklist for installing A-type O/D in TR4a

tdskip

Yoda
Country flag
Offline
Just doing some planning here - is there a punch list of items/bits I'll need to put the an A-type O/D in the TR4A solid axle?

To beat Don to the punch,

1) Acquire A-type O/D (done)

Next would be?

2) ......
3) ......
4) ......
 

TR4nut

Yoda
Country flag
Offline
Tom-

Are you splicing the od onto a non-od trans, or doing a full trans exchange? You'll need to worry about getting an od mainshaft for whatever box you are using if you are splicing things together. If its a whole box you are transplanting, I think it should be a pretty smooth drop in, at best maybe a little adjusting of the rear trans mount if needed depending on the year of the transmission.

With a 4A and a diaphram clutch, you want to check the input shaft cover length and throwout bearing setup.

Only other thing I can think of is sorting out the electrics and getting the 6RA relay for the solenoid. But that isn't hard - certainly not harder than welding in a replacement TR6 valance!

Randy
 
OP
T

tdskip

Yoda
Country flag
Offline
Hi Randy, sorry for not being more specific.

I am doing a full transmission exchange. Is there a specific clutch set up and throw-out I should be using?

Thanks!
 

TR3driver

Great Pumpkin - R.I.P
Offline
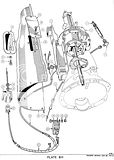
This might help (click for full size):
 

TR3driver

Great Pumpkin - R.I.P
Offline
tdskip said:
Is there a specific clutch set up and throw-out I should be using?
Doesn't matter so much, as long as all the components match. A 4A would originally have had the diaphragm style clutch, which takes a shorter front cover on the gearbox than the earlier finger style clutches did (the diaphragm fingers will hit on the early front cover when the clutch is depressed); plus the later TOB with the curved face.

The later setup is smaller and lighter (which helps performance a bit), but seems to wear a little quicker (smaller friction surface) and be somewhat more troublesome than the earlier setup. Not worth the pain of redrilling (or changing) the flywheel either way, IMO; so just make sure things match.
 

TR4nut

Yoda
Country flag
Offline
Tom-

I think Randall covered it above - but just to add, I'm assuming you have a diaphram style clutch in the 4A just like in a TR6. If that is the case, use the correct throwout bearing for that setup, and check the length of the front cover that bearing assembly rides on. If your replacement od transmission has an earlier and longer front cover it would probably be a simple thing to just swap it out with the shorter one from the original 4A transmission.

I've had to throw away two ruined pressure plates because of mismatched throwout bearings (finger plate style ground away with curved style throwout bearing) - and a friend in our club had to repull his transmission when they accidently put a Gunst bearing in an early TR4 setup which allowed the clutch to permanently slip. So the golden rule is get the components to match as Randall said.

Randy
 

TR3driver

Great Pumpkin - R.I.P
Offline
TR4nut said:
If your replacement od transmission has an earlier and longer front cover it would probably be a simple thing to just swap it out with the shorter one from the original 4A transmission.
Or just hacksaw off about 3/8".
 
OP
T

tdskip

Yoda
Country flag
Offline
Thank picture you posted is a fantastic resource Randall - thanks.

So it looks like I need;

1) Angle drive speedometer adapter?

Ideas on sourcing?

2) O/D switch for the steering column

This is the same as for the TR6, right?

3) O/D relay

Got one already

4) Solenoid for the O/D

Anyone have a good used on, or is the Moss aftermarket supplied one OK to use?
 

CinneaghTR

Jedi Warrior
Offline
Would this be a good deal?

Triumph: TR4 and TR6 A type overdrive car installation kit

This is a complete car kit to install an A type overdrive transmission (not supplied with this kit!) into a non overdrive TR4 or TR6 car. It contains the upper and lower wiring harness set, the overdrive relay, the steering column overdrive switch and escutcheon and the speedometer cable right angle drive and spacer. All new parts. Price is $200. Shipping is $10 In USA.
https://www.quantumechanics.com/categories.php?op=newindex&catid=7

(I'm preparing to do the same thing...)
 

TR3driver

Great Pumpkin - R.I.P
Offline
tdskip said:
1) Angle drive speedometer adapter?
Well, if you keep that TR3 tunnel, you could do without; by routing the speedo cable through the cutout on the right rear. That's how the TR3-4 did it, takes an extra long cable that loops way out against the frame rail. Might be worth a thought, as the angle drives are kind of expensive and fragile. They're by far the weakest link, so if there is a problem with the cable or speedo head, it usually destroys the angle drive as well. (One of my Stags had just had a new angle drive installed when I bought it; less than 100 miles later the speedo head got hot, bound up, and broke the brand new angle drive.)

Should be available new from the usual suspects, or sometimes used from eBay.

<div class="ubbcode-block"><div class="ubbcode-header">Quote:]
2) O/D switch for the steering column

This is the same as for the TR6, right?
[/QUOTE]Ditto the usual suspects. I vaguely recall that the original 4A switch was slightly different than the TR6 version; but most likely the TR6 switch will fit and work. My 4A SPC shows P/N 139793, which TRF has listed for $50 (until Jan 30).

I've not heard anything bad about aftermarket solenoids, so the Moss unit is probably fine. I got mine from Quantum Mechanics, just because he had them for sale cheaper on eBay.

BTW, I do advocate adding a fuse to the solenoid circuit. The solenoid has a pull-in coil inside, with contacts that are supposed to open as soon as the plunger moves. If the contacts don't open for whatever reason (misadjustment, grit, etc.), the pull-in coil will quickly overheat and ruin the entire solenoid. Adding a fuse that will eventually blow if the contacts don't open gives you a chance to solve the problem without having to buy a new solenoid. I used an MDL-8 (8 amp slow blow) just because I had them on hand, but an ordinary 5 amp fuse should work fine. Early Stags were equipped with A-type OD fuses from the factory.
 

Geo Hahn

Yoda
Country flag
Offline
I think you'll also need a different RH nacelle that allows for the OD switch next to the headlamp switch (if going for the original look).
 

TR4nut

Yoda
Country flag
Offline
minor nitpick, and probably wrong - but wasn't the overdrive switch on the left or turn signal side of the column on the 4A? Thought I saw that on a parts car once.
 

bgbassplyr

Darth Vader
Offline
OD switch on the right side. You can drill a hole for the switch through the existing nacelle.
 

TR3driver

Great Pumpkin - R.I.P
Offline
4A Owner's manual seems to agree with Randy:
 

HerronScott

Darth Vader
Offline
Randy is right. Both of my 2 TR4A's have the overdrive switch on the left side behind the turn signal. TR6's followed the same pattern. The only difference between the column switches for a TR4A and a TR6 are the TR4A's had chrome stalks while the TR6's were coated with black plastic. At the time I restored my first TR4A, TR6 parts were plentiful and cheap so I used all TR6 column switches (used or NOS). And it is a different escutcheon with 2 mountings spots as Jeremy and Geo indicated.

The TR4's had it on the right as their headlamp switch was on the dash versus on the right-hand side of the column like the TR4A's and TR6's. If you didn't have overdrive then you got a blanking escutcheion which could be drilled to install an overdrive switch like Jim indicated. I believe at least the early TR4's had metal escutcheon's too based on a friend's very early model. Not sure when they switched to plastic.

Scott
 
OP
T

tdskip

Yoda
Country flag
Offline
Interesting guys - the Original Triumph Book has it on the right hand side, although that is a RHD car.

So, in summary then;

TR4 = right side

TR4A = left side like TR6

Yes/no?
 
Similar threads
Thread starter Title Forum Replies Date
Jim_Gruber Removing a Spridget Engine Checklist Spridgets 5
MisterB Outer structure repair order/checklist Austin Healey 9
DerekJ Overdrive troubleshooting checklist Austin Healey 10
longbridgehealey startup checklist Spridgets 6
tmc Start up checklist Triumph 2
aeronca65t Race Weekend Checklist? Racing 9
Michael Oritt Pre-race checklist: An additional item Racing 7
T Checklist of changes to swap 1098 for 1275 Spridgets 9
beaulieu XK-120 checklist for barn find inspection ? Jaguar 26
G Making my winter maintenance checklist Triumph 11
N Checklist? 3000 Mark III Phase II Austin Healey 8
J Installing Adapter Hubs for Wire Wheels on a Bugeye Austin Healey 5
S Installing a Radiator Fan Austin Healey 9
G Installing New Rocker Shaft Assembly Austin Healey 3
W Need advice on installing new side curtain glass Spridgets 1
Bayless Help please installing bonnet release cable Spridgets 8
M TR6 Installing Retrosound? Triumph 4
S TR2/3/3A Installing the distributor pedestal. Triumph 3
K TR2/3/3A Question about installing the steering wheel control head? Triumph 1
A TR6 Installing differential and transmission Triumph 10
Z Installing Toe Board Panels Austin Healey 1
K TR2/3/3A Installing Brake Caliper pistons into the bore? Triumph 21
CJ Burton MGB-GT Installing Seat Covers for 1962 - 1967 MGB GT MG 0
A Early 1967 AH Sprite - installing steering column and new directional switch? Spridgets 0
B Installing cam bearings 1275, can I do it? Spridgets 1
bighealeysource Installing stainless steel brake hose on BN2 Austin Healey 5
steveg TR6 Installing stock trailing arm bushings on the car - is it possible? Triumph 2
steveg TR6 Installing adjustable trailing arm brackets Triumph 7
T Installing Garmin GPS in a BJ7 Austin Healey 19
F Installing AC in my 1960 Healey Austin Healey 14
S TR2/3/3A technique for installing a door Triumph 5
R TR2/3/3A Installing wiring harness in steering column Triumph 59
R TR2/3/3A Installing gas tank Triumph 6
C Installing rubber grommets in firewall? Austin Healey 6
S TR2/3/3A installing a fuse in the red tail lights Triumph 4
S TR2/3/3A installing the wiring harness Triumph 8
R Installing Sprite Luggage Rack Spridgets 9
Lukens TR2/3/3A Installing a throttle. Triumph 2
J Powertune booster for a bj8 , trouble installing Austin Healey 2
B TR2/3/3A Installing dzus fastners in bonnet Triumph 8
D Prepping Floors Before Installing Interior Restoration & Tools 6
drooartz Installing front hubs, tips? Spridgets 15
E TR4/4A Wiring the horn when installing a Moto -Lita steering wheel Triumph 4
K TR2/3/3A Installing Moss wheel spacers? Triumph 5
D BT7 tri-carb installing my crank Austin Healey 4
aero3113 Installing Front rotors to hubs Austin Healey 2
C Advice for installing a 3000 Grille??? Austin Healey 7
B MGB Installing new upper fulcrum bushings MG 5
B MGB Installing upper fulcrum bushings MG 0
S TR4/4A procedure for installing gauges etc Triumph 0

Similar threads

Top