
-
 Hey Guest!
British Car Forum has been supporting enthusiasts for over 25 years by providing a great place to share our love for British cars. You can support our efforts by upgrading your membership for less than the dues of most car clubs. There are some perks with a member upgrade!**Upgrade Now**
(PS: Upgraded members don't see this banner, nor will you see the Google ads that appear on the site.)

Tips
- We have a special forum called "Member Articles" where you can submit actual articles for consideration for publication. Learn More
- Don't have an Avatar? If not, your avatar will default to the 1st character in your username. Go into "Account Details" to change your Avatar.
- Some basic forum navigation info: click
 Hey - did you know if you click on the title of a thread it will take you to the first unread post since you last visited that thread?
- Hey Guest - Is your British Car Club in our Clubs database? If not, send me a PM - Basil

- Looking for a local club? Click the "Clubs" tab above and browse hundreds of clubs world-wide.
- Add Android or iPhone APP: click
- Did you know - any picture or video you add in your posts in any marque-specific forum will also get added to the Media Gallery automatically.
- A few more tips about posting and replying: click
- Hey there Guest - be sure to keep your profile page up to date with interesting info about yourself: learn more
- More tips and tricks on Posting and Replying: click
 but were afraid to ask:
  STOP!! Never post your email address in open forums. Bots can "harvest" your email! If you must share your email use a Private Message or use the
  smilie in place of the real @
- Want to mention another member in a post & get their attention? WATCH THIS

- So, you created a "Group" here at BCF and would like to invite other members to join? Watch this!
- Hey Guest - A post a day keeps Basil from visiting you in the small hours and putting a bat up your nightdress!
- Hey Guest - do you know of an upcoming British car event?
 Pretty Please - add it to our Events forum(s) and add to the calendar! >> Here's How <<
- Hey Guest - you be stylin' Change the look and feel of the forum to fit your taste. Check it out
- If you run across an inappropriate post, for example a post that breaks our rules or looks like it might be spam, you can report the post to the moderators: Learn More
- If you would like to try some different "looks" or styles for the site, scroll to the very bottom, on the left and click the Style Selector.
You are using an out of date browser. It may not display this or other websites correctly.
You should upgrade or use an alternative browser.
You should upgrade or use an alternative browser.
Carpet
- Thread starter Morris
- Start date

Offline
try Stock Interiors, I think they make the set when the order comes in. Certainly the will sell you a piece of carpet
https://www.stockinteriors.com/
https://www.stockinteriors.com/
G
Guest
Guest
Guest
Offline
Do it yourself. I did my whole car and everyone loves it....even the guys who boguth the expensive Moss kit. I'll post some pics. ( but I gotta vacuum it first.)
G
Guest
Guest
Guest
Offline
Sorry, gotta vac the car. I'll go do it now.
G
Guest
Guest
Guest
Offline
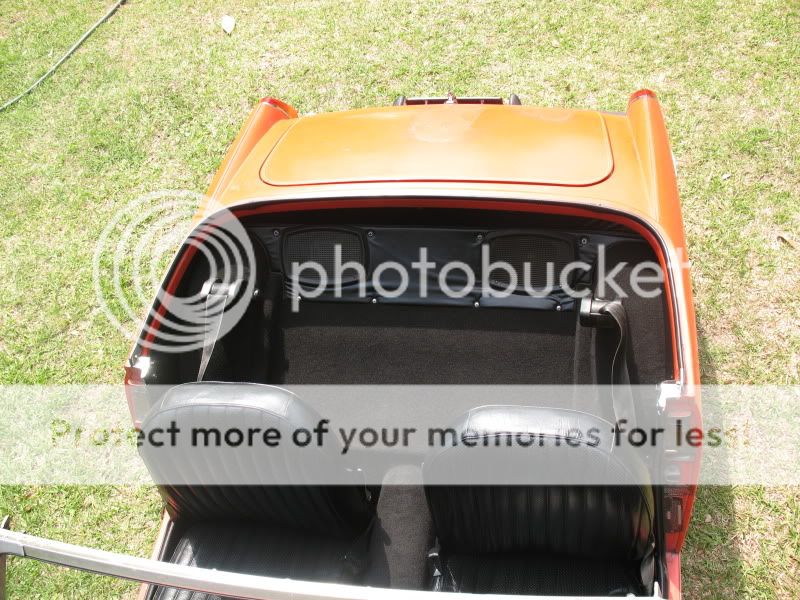
About $80 and a FULL seven days. This was my first attempt of roll-your-own carpet kit. Learned a few things and it will be better next time. This is just driver carpet. I have some wrinkles on the tunnel as I had to pull it loose to get at the trans bolts. I almost didn't pull the motor because of it. I'm leaving it loose till I build another motor. This carpet will stay in the car till I paint it. I have enough left over to do the car again, plus I can make replacements for areas that wear. (That is the biggest reason I did it myself.) Next time I'll use more and better padding (used what little jute they had left.) and it will be flawless.
I'm content for now, and eveyone that sees it likes it. Wrong time of day for pics. The direct sun washes out the color but you get the idea.
The key to a seemless look is how you hold the scissors when you cut.
Each piece was custom cut and fit probably an average of 5-7 times trimming to get it to fit/look right.
G
Guest
Guest
Guest
Offline
Thanks Jack. I thought I could do it in a day or two. BOY, was I wrong!!!
Anyone notice anything?
Anyone notice anything?
G
Guest
Guest
Guest
Offline
JPSmit said:tell me about the seats
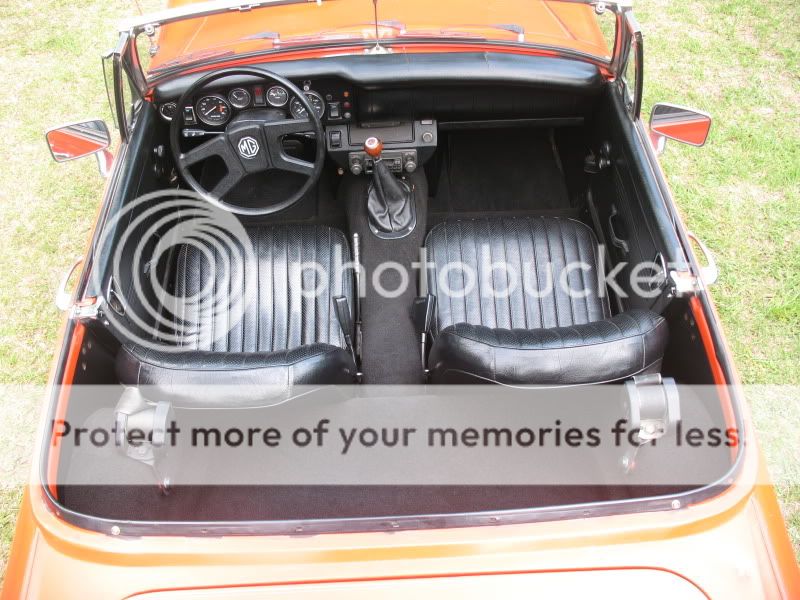
Yep, you got it. P.O recovered the seats. Stock seats that had headrests, but the P.O didn't cut the holes in the new covers cause they BUTCHERED the headrests when they tried to recover them. I love it w/o them and you couldn't pay me to install headrests on this car.

G
Guest
Guest
Guest
Offline
It's orange (slightly faded) but the sunlight is washing out the color with this cheap digital camera.
Offline
Morris said:That ain't ornch... that's vermilion!
Looks great! Any tips on fitting the hump? It looks like one solid piece.
t'aint vermilion, he only wants a couple thou.
In the kits, the hump is two pieces. One is from the back to just in behind the shifter. The next is from just behind the shifter to the front. I glued the back and velcroed the front.
G
Guest
Guest
Guest
Offline
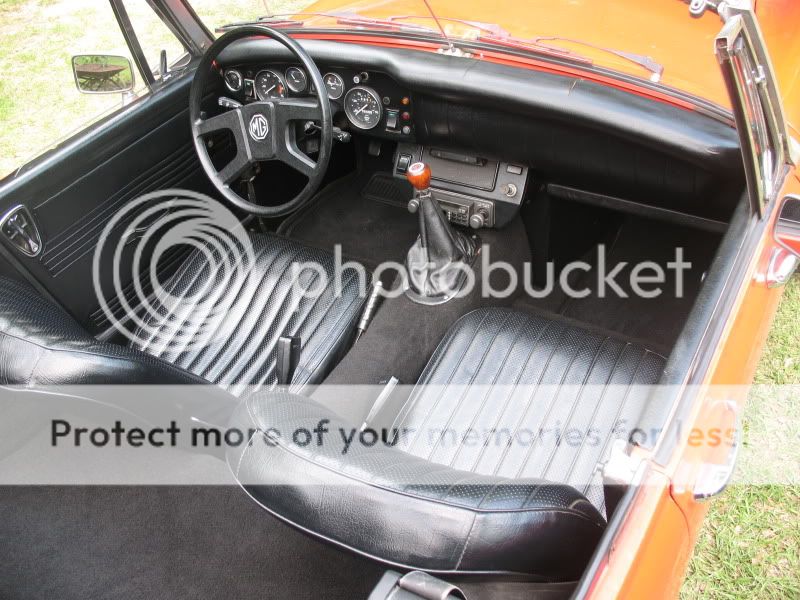
Mine is one piece. I should have used dynamat or someother type of non jute padding as it's hard to get it wrinkle free w/o the jute separating.( glueing it down) Regular house padding would have been better for the tunnel. Fill in any ripples in the metal with padding and get it as smooth as you can. Cut a piece larger than you need, lay it on top and try to get an idea how it wants to lay, then start trimming. Might want to get the back of it hot in the sun so it will stretch better. Be careful what carpet you buy. Make sure it has a backing. The non backing "auto carpet" sold at Pepe boys and othe carpet stores doesn't have this backing and is crap. It's more of a felt and is used for speaker boxes. It lays down nice and easy, but doesn't hold up.
Take your time, it will take allot longer than you think, especially if you do it right.
I used 3M trim spray adhesive. Spray it down all over (the tunnel) and work it from the top of the tunnel to the bottom. Don't go front to back or vice versa.
Don't cut the shifter hole til the end. You might have to cut it a bit earlier to get some wrinkles out. Cut it smaller than you think you have to, then trim later if you have to. Mine is almost too big. You might have to work it backwards ( bottom to top) once you cut the hole to get some wrinkles out.
Pull down on it and stretch it while you stick it to the glue on the tunnel. You'll figure it out. I don't like the two piece look.
If you don't have a radio console it might be tough to get it right as I have a fold under mine ( that you can't see) that helped w/ the wrinkles. it doesn't go all the way forward there either.
If you can MS your car, you can do this.
G
Guest
Guest
Guest
Offline
Hold the scissors at a 45* angle to the piece you're gonna use, top blade away. The idea is to cut the backing smaller than the pile, this way, you won't see the seams when they butt up.