-
 Hi Guest!
You can help ensure that British Car Forum (BCF) continues to provide a great place to engage in the British car hobby! If you find BCF a beneficial community, please consider supporting our efforts with a subscription.
There are some perks with a member upgrade!**Upgrade Now**
(PS: Subscribers don't see this gawd-aweful banner

Tips
- We have a special forum called "Member Articles" where you can submit actual articles for consideration for publication. Learn More
- Don't have an Avatar? If not, your avatar will default to the 1st character in your username. Go into "Account Details" to change your Avatar.
- Some basic forum navigation info: click
 Hey - did you know if you click on the title of a thread it will take you to the first unread post since you last visited that thread?
- Hey Guest - Is your British Car Club in our Clubs database? If not, send me a PM - Basil

- Looking for a local club? Click the "Clubs" tab above and browse hundreds of clubs world-wide.
- Add Android or iPhone APP: click
- Did you know - any picture or video you add in your posts in any marque-specific forum will also get added to the Media Gallery automatically.
- A few more tips about posting and replying: click
- Hey there Guest - be sure to keep your profile page up to date with interesting info about yourself: learn more
- More tips and tricks on Posting and Replying: click
 but were afraid to ask:
  STOP!! Never post your email address in open forums. Bots can "harvest" your email! If you must share your email use a Private Message or use the
  smilie in place of the real @
- Want to mention another member in a post & get their attention? WATCH THIS

- So, you created a "Group" here at BCF and would like to invite other members to join? Watch this!
- Hey Guest - A post a day keeps Basil from visiting you in the small hours and putting a bat up your nightdress!
- Hey Guest - do you know of an upcoming British car event?
 Pretty Please - add it to our Events forum(s) and add to the calendar! >> Here's How <<
- Hey Guest - you be stylin' Change the look and feel of the forum to fit your taste. Check it out
- If you run across an inappropriate post, for example a post that breaks our rules or looks like it might be spam, you can report the post to the moderators: Learn More
- If you would like to try some different "looks" or styles for the site, scroll to the very bottom, on the left and click the Style Selector.
You are using an out of date browser. It may not display this or other websites correctly.
You should upgrade or use an alternative browser.
You should upgrade or use an alternative browser.
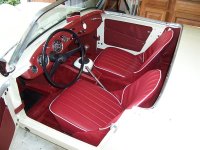
Bugeye Seats
- Thread starter BWillis
- Start date
Trevor Jessie
Yoda
Offline
The nicest that I have seen are from Heritage.
Trevor Jessie
Yoda
Offline
FYI:
I also purchased BE seats from an Ebay vendor (I believe from Utah). I tried to install them myself, but quickly ran into trouble. I then took them to my upholstery guy and HE had trouble with them, saying they didn't fit and needed to be customized. He finished the job and everything came out fine.
MXP

Offline
As an aside, was at Borders the other night and was looking at the Magazine "Rodders Journal" - there is a Rat Rod Pickup and the builder installed Bugeye seat frames (no padding at all) as an approximation of aircraft seats. I must admit ratrods are generally a guilty pleasure
jlaird
Great Pumpkin
Offline
That is not my present car. I did indeed have a bugeye that was cut out like that, my small son sat there, and I did make a pannel like that for the trunk area. It just sliped out easly. Of course when he road mostly the top was up so I needed that pannel.
That Pic came off the web someplace.
That Pic came off the web someplace.

George Zeck
Jedi Warrior
Offline
Ben -
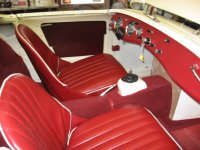
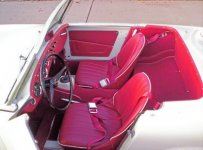
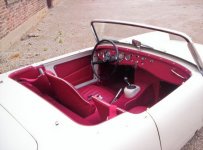
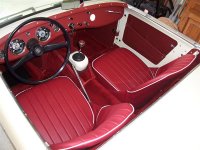
I just bought and installed my seats from the ebay-er in Utah. Had some difficulties and had the arms modified and they worked. I just did this less than 30 days ago so it's fresh in my mind. E-mail me privately if you want to talk. BTW - thye look great. I obviously had the same dilema you did -- redo the entire entire (panels, trim & seats for ~ $400 and a lot of sweat equity vs. paying $1500 / $2000 or more for heritage and / or professional install). I used some cotton batting to fill the added material in.
Having troube with re-finishing the large trim piece on the back with the curves (I went with a thicker fabric and it is bunching up on the curves) - anyone have any experience with this??
Tx-
George Zeck
gzeck2@yahoo.com