• Hi Guest!
    If you appreciate British Car Forum and our 25 years of supporting British car enthusiasts with technical and anicdotal information, collected from our thousands of great members, please support us with a low-cost subscription. You can become a supporting member for less than the dues of most car clubs.

    There are some perks with a member upgrade!
    **Upgrade Now**
    (PS: Subscribers don't see this gawd-aweful banner
Tips
Tips

Bugeye quarter panel structure

drooartz

Moderator
Staff member
Gold
Country flag
Offline
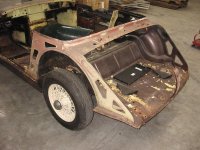
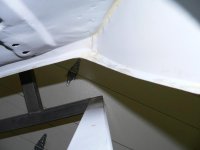
Needing a bit of help understanding how the rear quarters work. Penny Bugeye's had some repair work done on both sides in the rear quarters, and it's not good work (and all rusted now anyways). In some cases there are what look to be a couple panels making up the inner structure, but it's not entirely clear. The Moss catalog shows one inner panel per side.

I could use some insight here into how this is supposed to go together correctly. Any pictures of repairs in progress would be wonderful.

What we're facing:

quarterinner1.jpg


quarterinner2.jpg
 
Hi Drew,

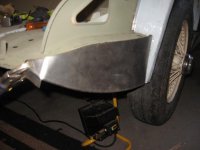
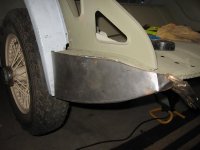
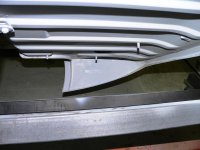
Here are some pics from my Sebring project that show the inside panel which is available from AH Spares. Although this car is a '68, I have removed the floor extension piece that returns the floor to a bugeye shape as seen in the early non sand blasted picture. This panel fills the gap between the floor and the Q panel, tacked onto the Q panel and connects to the rear floor as well, completing the corner. Hope it helps.

The grey wheel arches are the new bugeye wheel arches welded on.

Cheers
Lew

IMG_0002.jpg

IMG_0010.jpgIMG_0006.jpg
 
The idea of the two panels coming together where they do and creating a huge pocket for dirt and rust to accumulate was created because the manufacturers wanted a body that could be completely spot welded together with no welding seams on a painted finished surface. I bought the patch panels needed for my 65 midget and after I took a good hard look at how thin the patch panels were and the original design I got out my hammers and some thicker steel and made my own. I then completely eliminated the rust pocket and welded a piece straight across from the floor to the spot where my repair panel would end up. Worked great. Remember you are not concerned much with strength here just good appearances.

Kurt.
 
Thanks, that helps a bunch.

It looks like Penny's previous "restoration" did the same thing on the inside that they did on the outside -- left the old, rotted metal in place and just slapped a new piece over it -- so there are currently 2 layers of inner panel just like there were two layers of outer panel. That's what was confusing us.
 
Looks like you have your answer Drew. Just confirming one outer panel and then the "closing" panel on the inside. BTW, the lower quarter repair panels require a fair amount of work to fit properly. The shop should measure the opening from the front of the wheel opening to the leading edge of the repair panel. I believe the length of the opening from edge to edge should be 25 inches (maybe have someone measure theirs and confirm). I'm sure they will test fit the panels but just let them know they are bound to need modification.
 
Back
Top