• Hi Guest!
    If you appreciate British Car Forum and our 25 years of supporting British car enthusiasts with technical and anicdotal information, collected from our thousands of great members, please support us with a low-cost subscription. You can become a supporting member for less than the dues of most car clubs.

    There are some perks with a member upgrade!
    **Upgrade Now**
    (PS: Subscribers don't see this gawd-aweful banner
Tips
Tips

BN2 scuttle seal

curtis

Jedi Trainee
Country flag
Offline
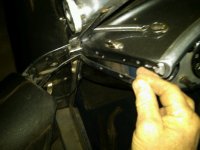
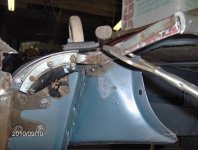
Before renovation my car had a piece of rubber glued on and now I thought it would be better to have the correct item.
I have ordered these and now can't understand how to fit them!
I have been told they don't work anyway,the doors are very tight to close afterwards and you have to take the doors off to fit.
None of these is very inspiring !!
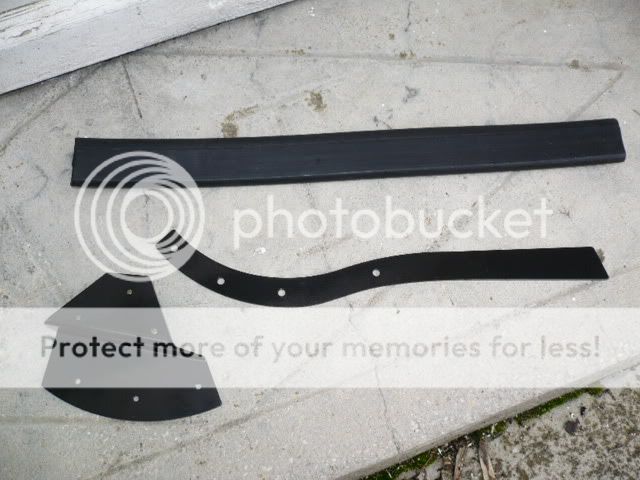
Here is a picture of the parts and maybe someone can post a picture of the seal fitted or some step by step instuctions (hopefully not including "remove the door"!)A picture would be best as I can't visualise what it should be like.
Jardin2008104.jpg
 
Okay Curtis, I'll venture a guess:
The top one in your photo looks like the seal that the tranny tunnel uses to butt up against the scuttle. The lower one, should be two, goes along the bottom left and right side of the transmission tunnel. I don't know where the bracket goes.

Good luck.
 
These are fitted somehow between the door and the scuttle.
On a UK forum where I asked the question there are at least four other people that have the kit and haven't fitted it !!!

Oh, for a picture
 
let me know if you have got the correct answer if not I will post a picture for you to follow the bent piece fit under the fender the long piece screws to it at the end with arch and holes then bend it around the inside of shroud drill holes to fit
Hope this helps dh100m
 
Please post a picture here on the forum. I have the same question regarding this seal.

Thanks!
 
If you go to the Moss Motors site and look for this P/N 806-785 , you will see a little box you can click on for more information. It is a pretty good description of how that is supposed to work. The piece with the 2 90 deg. bends in it gets screwed to the door, the other piece gets screwed to the shroud/scuttle. The are probably holes drilled in the door and scuttle that will match up (approximately). Come to think of it the whole thing is kind of "screwed". For some reason the little piece of rubber always seems to cost a phenominal amount of money. I was all set to install these when I did my rebuild, and then saw the cost of the rubber and said "that's it, I'm done". I have a suitable substitute, but have never gotten around to installing them. I never drive in the rain, and if I did I doubt they would do much. I mean, after all the top doesn't really do much....
 
I'm not so good at posting photos, but there are some pictures on the Moss site. They don't show quite all that you want to see, but between the description and the photos you should be able to see how they go.
 
Jon-

Can you email me via PM and attach a photo or two? Just click on my name (AH100M)on the left
<----- here and PM me.
Thanks.
 
The August-September issue of _Austin-Healey Magazine_ (the publication of the Austin-Healey Club USA) has a very detailed article by Roger Moment--one of the most respected Healey authorities around and co-author of the restoration book--on how to fit door, scuttle and windshield seals. It's ten pages with many color photos and detailed text, both for 100s and 6-cyl models. It's part 31 of his series 'One Approach to Restoration'--worth the price of admission to the Club, IMO.
 
I' ve tried to add a photo to my post. Not sure if it has worked. I'll try again if it doesn't. It shows one piece attached to the forward door post/fender, and I'm holding the other piece in place after it has been shaped to fit. The rubber piece gets attached to them both to keep it in place.
 

Attachments

  • 23531.jpg
    23531.jpg
    90.2 KB · Views: 309
Too late now! I have decided to return the parts for a credit.
Seems they are not to the original design and don't work (that is similar to the originals though)
 
Back
Top