• The Roadster Factory Recovery Fund - Friends, as you may have heard, The Roadster Factory, a respected British Car Parts business in PA, suffered a total loss in a fire on Christmas Day. Read about it, discuss or ask questions >> HERE. The Triumph Register of America is sponsoring a fund raiser to help TRF get back on their feet. If you can help, vist >> their GoFundMe page.
  • Hey there Guest!
    If you enjoy BCF and find our forum a useful resource, if you appreciate not having ads pop up all over the place and you want to ensure we can stay online - Please consider supporting with an "optional" low-cost annual subscription.
    **Upgrade Now**
    (PS: Subscribers don't see this UGLY banner)
Tips
Tips

BJ8 Exhaust System and Brake Servo

Hutchster

Freshman Member
Offline
I recently purchased a 66' BJ8 from a gentleman in New Hampshire who had owned it for 16 years. Kept is up some, but not too much. It is just emerging from the shop after having major cooling system work, carbs rebuilt and heat shield replaced, new fuel pump, rebalanced drive line, rebuilt clutch slave, replaced motor mounts, and miscellaneous other ills fixed. Now I am about to embark on rebuilding the brake servo unit, that was removed at some point (reason unknown, but the detached unit was included with the car), and completely replacing the exhaust system. While replacing the exhaust system I would also like to remove, and restore the exhaust manifold which is rusty and scabby looking.

I have purchased a rebuild kit from Moss for the Brake Servo. It came with a very complete instruction set, but real life is always so different from the instructions. Lots of little parts.

I also anticipate purchasing the complete Tourist Trophy polished stainless steel exhaust system including all three mounting kits and the skid plate from Moss Motors.

I would love to have any input from any other BJ8 owners who have had experience with any of these systems: the brake servo rebuilt (original girling), R and R of the exhaust system, and the removal and restoration of the exhaust manifold. Potential problems, potential solutions, tips and tricks. Any help would be much appreciated.
 
Country flag
Offline
Congratulations on your purchase. I can offer some help based on my experiences, but there are some 'pros' on the site who are, well, pros.

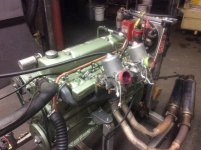
The exhaust manifold is just a lump of cast iron. You can hot tank it, bead blast it or whatever you want to clean it up. There was a long thread on this site not long ago about a proper finish; you can leave bare--it'll rust again--paint with high-temp paint, or have it ceramic coated. I ceramic coated mine, but paint looks fine:

IMG_0416.jpg

The exhaust is just remove and replace; the Tourist Trophy should line up fine if someone hasn't messed with the mountings. I don't care for shiny stainless on a Healey--I scuffed ours and painted it with charcoal-colored high temp coating--but it's a matter of personal taste. The aftermarket rubber/steel mounts typically don't last long; order spares and some have drilled screws into them to make them stronger. You'll probably need to use some sort of sealant on the joints (Edd China does ;)).

The booster is a whole 'nother ballgame. If you don't have the Bentley shop manual, that should be your first purchase. It has a very lucid explanation of the servo operation; it's actually a pretty clever device. The Moss kit will probably work, but this one is more complete:

https://www.ebay.com/itm/Girling-MK...ash=item27f13726ee:g:v14AAOSwkNZUbnlh&vxp=mtr

I don't believe the Moss kit comes with the filter, or the valves for the 'primary' circuit, and some of the other stuff. Moss has a pretty civil return policy; you can wait until you get into the booster to see if you need any of the stuff not included.

The servo has two cylinders: one is activated by the master cylinder, and switches air/vacuum into the large canister. The other is the actual boost cylinder. If either of these is badly pitted, they will need re-sleeving; the jury is out on whether you can just hone, some say no way, some say OK. I'd get them sleeved. If you send it out to be sleeved, make sure the shop doesn't media blast the area where the T valves seat; it's a machined surface and needs to be completely smooth (I had a shop ruin a servo this way). Otherwise, repair is the same as with any brake cylinders (seals, springs, etc.).

The boost is accomplished with a large air/vacuum piston driving the main (secondary) circuit. The canister initially had a dry lubricant coating, if this has worn away there are suitable dry lubricants; one is from Sandstrom and I saw a Teflon coating that might work. The seal on this piston is a leather 'belt' backed by a length of rubber tubing (check the photo of the eBay kit). I've never seen the leather seal in any kit. The rubber tubing has to be trimmed 'just so;' if it's cut too long the seal can bind on the inside of the canister; too short and you won't get a proper seal.

https://www.skygeek.com/sandstrom-2...aign=froogle&gclid=CPGonPC2zc4CFUZhfgodA_8AQw

https://www.amazon.com/dp/B00D3G6IF...&ascsubtag=93fa0c6df18ad8788b5ac6a1fb99d8ba_S

The servo looks like a major undertaking, but I thought it was quite rewarding work and since you can do all the work on the bench--and not on your back--it's actually a treat. Some don't have any luck or don't want to mess with it, and buy an aftermarket replacement, but I'm not sure that's a complete fix either.
 

Keoke

Great Pumpkin
Country flag
Offline
"The booster is a whole 'nother ballgame."

Yep N if you chiken like I was : ;)

Send it to Power Brake exchange in San Jose CA for a flawless rebuild.
 
Country flag
Offline
PBE is good; I just had them do a booster for my dad. I live about 5 miles from their shop; the tech that did my dad's booster showed me his WiP. He had a couple Girlings on the bench.
 

British_Recovery

Jedi Warrior
Bronze
Country flag
Offline
It seems like a lot has just been done that you would undo in order to remove the exhaust manifold (carbs,heat shield).
If the car is running well, I would live with it for a while. If the exhaust needs replacing now, the biggest problem might be the studs that hold the down pipes on. If the brass nuts come off, and the studs are ok, I would just replace the exhaust and leave the manifold in place. If there's a problem with a stud or two, then go on to removing the manifold. Very little of the manifold shows, and you can get it looking better in place if needed. Just my thoughts on extra work.
Bob
 

CLEAH

Jedi Warrior
Country flag
Offline
Hutchster, regarding the exhaust, unless you want the original style 4 muffler BJ8 system (which is complex), an alternative is a simplified two muffler system. My car has the stainless steel Sports Exhaust System from AH Spares (their part number EXS200). This uses two mufflers and goes straight through to the rear on the left side--no zig-zag to add the resonators in the rear. This particular system is louder than stock and has a more raw sound which to my ear is really fantastic. Just thought I would mention it.
 

Keoke

Great Pumpkin
Country flag
Offline
PBE is good; I just had them do a booster for my dad.
I live about 5 miles from their shop;
the tech that did my dad's booster showed me his WiP. He had a couple Girlings on the bench.

Hey BOB you far enough away to stay dry????
 

dcarlg

Jedi Trainee
Country flag
Offline
Hutchster,
I would also suggest sending the booster out for restoration. I wasted time and money trying to do it myself. No joy.
Also, I have the Tourist Trophy SS exhaust.
BT7. Very happy with it.
I painted it black with high temp paint. Except i polished the last 18 inches. I thought it was slightly long, so I sawed off a couple inches at the end.
 
Country flag
Offline
... I thought it was slightly long, so I sawed off a couple inches at the end.

Make sure the pipes extend at least a couple inches past the bumper; lest you get soot on the bumper. Have heard the exhaust gasses--including monoxide--can 'curl' up and actually waft up towards the cockpit; dunno if that's true or not
 

Keoke

Great Pumpkin
Country flag
Offline
Make sure the pipes extend at least a couple inches past the bumper; lest you get soot on the bumper. Have heard the exhaust gasses--including monoxide--can 'curl' up and actually waft up towards the cockpit; dunno if that's true or not

The exhaust gas impinging on the chrome bumper parts will discolor it.
 

Keoke

Great Pumpkin
Country flag
Offline
OP
H

Hutchster

Freshman Member
Offline
Bob, CLEAH Keoke, dcarlg, and British Recovery (CAN the British ever recover??....just kidding),
I want to thank all of you for your input It has all been very helpful.
I have decided, after studying the detailed instructions, and considering the possibility of disassembly, discovery of scoring in valves, and then having to back up and bundle the parts off to some higher power, that I will indeed send the servo unit out to the pros to rebuild for me. Power Brake Exchange seems like an outstanding option. I spoke to them and the cost of having them completely rebuild my unit, assuming no sleeving is required, is only about $130 more then the complete rebuild kit. Seems like the smart way to go. I might very well have enjoyed doing it myself, until I didn't.
So I am left with the exhaust system.
I think the suggestion to leave the exhaust manifold alone for now and not disturb what has just been done is a solid one.
I have had a few people mention the possibility of breaking studs.
I am sure this is always a concern with a 50 year old car.
Are there steps I can take to improve my chances of not breaking the darn things? Solvents to apply beforehand? Removing with an impact versus by hand?
Appreciate the input.
 

Jeepster

Jedi Trainee
Country flag
Offline
Bob, CLEAH Keoke, dcarlg, and British Recovery (CAN the British ever recover??....just kidding),
I want to thank all of you for your input It has all been very helpful.
I have decided, after studying the detailed instructions, and considering the possibility of disassembly, discovery of scoring in valves, and then having to back up and bundle the parts off to some higher power, that I will indeed send the servo unit out to the pros to rebuild for me. Power Brake Exchange seems like an outstanding option. I spoke to them and the cost of having them completely rebuild my unit, assuming no sleeving is required, is only about $130 more then the complete rebuild kit. Seems like the smart way to go. I might very well have enjoyed doing it myself, until I didn't.
So I am left with the exhaust system.
I think the suggestion to leave the exhaust manifold alone for now and not disturb what has just been done is a solid one.
I have had a few people mention the possibility of breaking studs.
I am sure this is always a concern with a 50 year old car.
Are there steps I can take to improve my chances of not breaking the darn things? Solvents to apply beforehand? Removing with an impact versus by hand?
Appreciate the input.


A very wise move.
I went through the same process in buying the rebuild kit and then deciding to send the servo ( booster) for a pro rebuild.
It came back looking like new.
 
Similar threads
Thread starter Title Forum Replies Date
S Side exhaust system for BJ8 Austin Healey 16
J BJ8 Ph I Exhaust System Austin Healey 3
D Installing BJ7 version exhaust system on my BJ8 Austin Healey 3
Xte How to fix my new BJ8 SS exhaust system ? Austin Healey 5
F BJ8 Exhaust Hanger Pictures Wanted Austin Healey 9
AUSMHLY Gasket, Inlet Manifold to Exhaust Manifold BJ8 Austin Healey 8
BJ8Healeys BJ7/BJ8 Exhaust Systems Austin Healey 24
crispy How to Remove the Exhaust Manifold?? [late BJ8] Austin Healey 27
BN6 BJ8 Outrigger Cut Out For Exhaust Austin Healey 3
E BJ8 Seats, Exhaust Hanger, Heat Shield Locations in Floor Austin Healey 7
H Tourist Trophy Exhaust on Healey Bj8 Austin Healey 2
Jeepster BJ8 exhaust down pipe gaskets Austin Healey 6
M ANSA exhaust for a BJ8 Austin Healey 1
C BJ8 Stainless Steel Exhaust - throaty sound ? Austin Healey 4
Jeepster BJ8 exhaust mounting points Austin Healey 17
ttrotter 67 BJ8 Exhaust exit ? Austin Healey 4
J Side Exit 1960's Style Exhaust on my BJ8 Austin Healey 23
wangdango BJ8 exhaust? Austin Healey 6
N Convert BJ8 exhaust to single silencer Austin Healey 6
G exhaust manifold for my BJ8 Austin Healey 4
N Erratic exhaust on BJ8 Austin Healey 17
Schroeders BJ7 Exhaust on a BJ8: do I need downpipes? Austin Healey 10
nicko replacing exhaust bj8 Austin Healey 16
Schroeders BJ8 Stainless Exhaust Q's.. Austin Healey 18
Marvin Gruber Austin Healy BJ8 exhaust brackets Austin Healey 2
bighealeysource BJ8 exhaust question Austin Healey 6
S BJ8 Stainless Steel Exhaust Austin Healey 7
David_K BJ8 stock exhaust Austin Healey 2
Wana Anyone replacing their BJ8 exhaust?? Austin Healey 2
Patrick67BJ8 Custom BJ8 Dash Switch Panel Austin Healey 7
1 BJ8 History Trace Austin Healey 7
Patrick67BJ8 Wanted Looking for a used BJ8 switch panel. Austin Healey Classifieds 5
D BJ8 Top Installation Detail Austin Healey 3
B BJ8 Rear Backrest Hinges Austin Healey 4
S Wanted WTB: 3.5 ratio diff/pumkin for '67 BJ8 Healey 3000 Austin Healey Classifieds 0
AUSMHLY BJ8 Trans Cover Carpet Austin Healey 7
nitro BJ8 Engine Design Austin Healey 1
AUSMHLY BJ8 Carpet and Snaps Austin Healey 2
Overdrive45 BJ8 Interior Trim Austin Healey 8
nitro BJ8 Production Year Austin Healey 6
WHT BJ8 Rear Seat Surround Drain Tube Grommets Austin Healey 0
B BJ8 Seat Sliders Austin Healey 4
B For Sale 1967 Metallic Golden Beige MKIII BJ8 Numbers Matching - The Real Deal Austin Healey Classifieds 0
F Wanted BJ8 Engine Block Austin Healey Classifieds 1
BoyRacer For Sale BJ8 disk wheel hubs, spindles & calipers Austin Healey Classifieds 0
AUSMHLY BJ8 Rear Seat Squab Austin Healey 0
AUSMHLY BJ8 Differential Oil Change Austin Healey 6
S SOLD!! For Sale 1964 AH 3000 MkIII BJ8 Phase 1 Austin Healey Classifieds 2
Patrick67BJ8 BJ8 Factory Hardtop Rear Window Austin Healey 6
AUSMHLY BJ8 Clutch Pressure Plate, Old vs New Austin Healey 4

Similar threads

Top