• Hi Guest!
    You can help ensure that British Car Forum (BCF) continues to provide a great place to engage in the British car hobby! If you find BCF a beneficial community, please consider supporting our efforts with a subscription.

    There are some perks with a member upgrade!
    **Upgrade Now**
    (PS: Subscribers don't see this gawd-aweful banner
Tips
Tips

BJ7 Drain Channel and Small Waist Trim piece question

blueskies

Jedi Warrior
Country flag
Offline
With some difficulty, we fit the drain channel under the front edge of the rear shroud. It certainly would have been easier to do before installing the shroud and painting the car. The chrome trim around the rear of the passenger compartment also is now in place. Fortunately, both pieces are in nice condition without corrosion, etc.

The drain channel has five downward facing spouts to fasten drain hoses to, and the hoses are in good shape, so that part seems straightforward. But I am not sure how to fasten or finish fitting the front ends of the drain channel (the box like sections). They are in place there just behind the door area, but they are not fastened to anything other than the rest of the drain channel, which is riveted to the shroud. The box sections can move or at least flex, which doesn't seem quite right.

In the same area, regarding the small chrome trim waist pieces that fasten to the body behind the doors - what do they fasten to? The chrome pieces have two screw holes - one on top and on in the front. The top screw hole lines up with a hole in the body, just beside the chrome strip that goes around the top of the cockpit. But there is nothing to run that front screw into. It can reach the box section of the drain channel, but there is no hole in the drain channel for that.

Would anyone have any detailed pictures of that area, the front area of the drain channel and trim piece fastening?
 
Still wondering how the front of the drain channel and the small pieces of chrome waist trim behind the doors fasten. Maybe that will become apparent with installing the top? Every step of putting together a car that someone else took apart is a learning experience.

Another question. Not sure, but maybe the next step should be to work on installing the convertible top, before installing the interior. The very helpful top installation instructions from Steve Byers mention fastening the rear part of the top fabric to a piece referred to as the cockpit surround channel, fastened with clips. The surround channel then fastens to the drain channel, with screws. I have not found a cockpit surround channel or clips in the pile of parts that came with the BJ7, and a search of several suppliers has not turned up a source for these parts. Can anyone tell me whether anyone makes/sells these parts?
 
We're in Calgary and our BJ7 is in a shop, partially disassembled/mostly reassembled. If you're in this area, holler and you can have a look-see. Doug
 
The soft top clips to a U shaped piece same shape as the rear chrome surround . The top edge of that piece is rounded over to the outside of the car and you use Z clips to clip the top fabric to it . The metal piece then screws to the drain channel with sheet metal screws or rivets
 
Thanks for the invitation, Doug. I would love to see your BJ7; maybe next time I'm through Calgary. And thanks Healey Nut for the advice. I'm a bit intimidated by the top installation part. The BJ7 project came with a new top, assembled, with the frame and fabric all together. I guess we will soon see how it all fits.
 
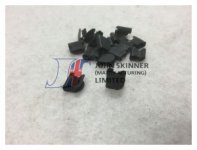
The Moss catalog shows part # 806-735 for the rail and # 326-185 for the clips. image.jpeg
 
I am having the same issues. The gentleman that did the body and paint work some years ago when I started the restoration must have forgot to put the drain channel in before putting the rear shroud on so he put it over the rear lip instead of under. Now I am trying to fix it without taking everything apart. I have heard it can or may be able to be done. I was just wondering if anyone has any words of wisdom.
 
I am having the same issues. The gentleman that did the body and paint work some years ago when I started the restoration must have forgot to put the drain channel in before putting the rear shroud on so he put it over the rear lip instead of under. Now I am trying to fix it without taking everything apart. I have heard it can or may be able to be done. I was just wondering if anyone has any words of wisdom.
The body shop that did my BJ8 Healey made the same mistake. It can be done without removing the shroud. I forget the exact details, but David Nock of BCS was able to give me details that I passed along to the body shop and they got it done. Give David a call, he’s always very knowledgeable and helpful.
 
From my discussions with Bill Rawles it can be done but it is a real bear, I think that the wings may need to be removed as the shroud has to be lifted tad to get the channel in over the wheel arch.

The major problem is that they do not always fit and need a bit of cutting and carving and welding and grinding, then life becomes tedious. I have one hanging up in the garage, but intend fitting it when I do the boot floor - I will take the shroud off.

:cheers:

Bob
 
Well, it is a bear to say the least. I was able to get it in by removing the first 2 bolts and loosing the third on each fender so I could pull the ends of the shroud up a little to get it under the wheel arch. Unfortunately the channel I purchased doesn't fit the best.... (Not even close) As Bob said above, its gonna need a bit of cutting and carving and welding and grinding to make it fit. So bad even the little spouts need to be cut off and rewelded because they are pointing towards the back of the car. (That's even before I tried to put it in.) Probably the poorest fitting aftermarket piece I have bought. It will go with some work though.
 
Back
Top