Hey Guest!

 Hey - did you know if you click on the title of a thread it will take you to the first unread post since you last visited that thread?
 but were afraid to ask:
  STOP!! Never post your email address in open forums. Bots can "harvest" your email! If you must share your email use a Private Message or use the
  smilie in place of the real @
 Pretty Please - add it to our Events forum(s) and add to the calendar! >>
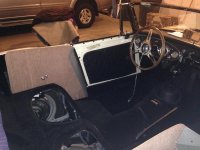
Guys, I am finally at a point where I can start looking at the interior components of my restoration. I need to do a complete replacement of all of the leather seat covers, panels, and carpet.
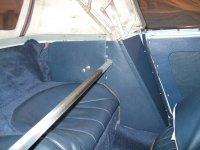
My car is a BJ7, and the restoration required all new floor panels, rear seat deck and boot floor.
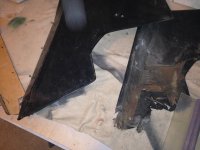
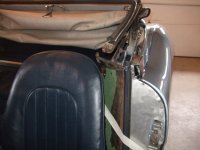
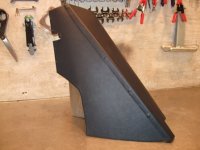
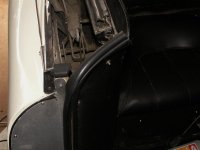
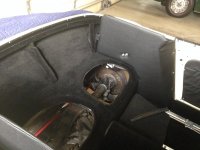
With the interior, my interior rear quarter panels need to be recovered and repaired (pictured below).
I bought a new interior kit from Moss, and it seems like it will work out decently.
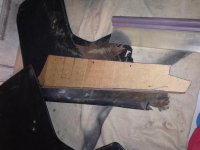
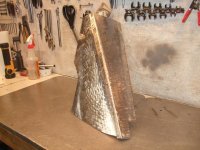
One problem I have is the steel frame piece on the rear interior rear quarter panel is heavily rotted on the bottom. Moss's kit included the wood panel, but I need to figure out the sizes and shape of the steel part that the wood attached to.
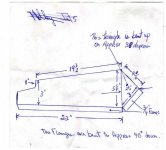
Has anyone else ran into this issue? Is there a place that I can get a template to fab a new one, or can I buy one.....? I am trying to make a cardboard template, which I could probably get to work out, but I really want it to fit right.
Any suggestions are really appreciated!
Thank you,
Bill
My car is a BJ7, and the restoration required all new floor panels, rear seat deck and boot floor.
With the interior, my interior rear quarter panels need to be recovered and repaired (pictured below).
I bought a new interior kit from Moss, and it seems like it will work out decently.
One problem I have is the steel frame piece on the rear interior rear quarter panel is heavily rotted on the bottom. Moss's kit included the wood panel, but I need to figure out the sizes and shape of the steel part that the wood attached to.
Has anyone else ran into this issue? Is there a place that I can get a template to fab a new one, or can I buy one.....? I am trying to make a cardboard template, which I could probably get to work out, but I really want it to fit right.
Any suggestions are really appreciated!
Thank you,
Bill