• Hey Guest!
    British Car Forum has been supporting enthusiasts for over 25 years by providing a great place to share our love for British cars. You can support our efforts by upgrading your membership for less than the dues of most car clubs. There are some perks with a member upgrade!

    **Upgrade Now**
    (PS: Upgraded members don't see this banner, nor will you see the Google ads that appear on the site.)
Tips
Tips

Back in the saddle with timing gear questions.

2wrench

Luke Skywalker
Country flag
Offline
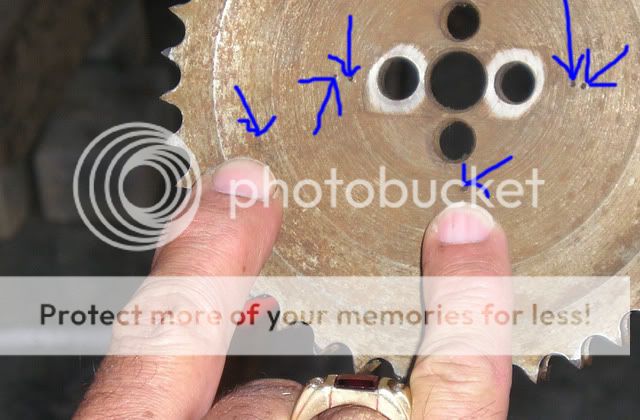
Check out these marks on my cam gear. Looks confusing
to me.

P1010008-21copy.jpg


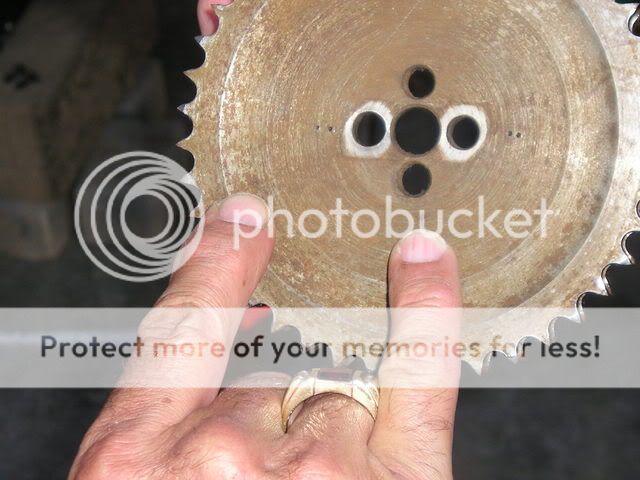
The same photo, no arrows:

P1010008-20.jpg


Can't figure how these line up. My son reached up with a
punch and put one mark on this gear before I could stop him
in the disassembly process.

Next question: Must the timing gear on the crank be
tapped on with a hammer or somewhow pressed on?

Also, my photo album shows only one spacer on the crank
behind the gears. Do you think I should go with just
that one spacer in the rebuild to align the crank gear
to the cam gear?
 
Son's "dots" are meaningless.

You need to have #1 at TDC then degree in the cam timing with that new dial indicator and the degree wheel proceedure. The four holes allow for timing variance. I.E. you can position it in four different "offsets" by using one set or other of the holes, flipping the gear to achieve two other positions. IIRC the variance is in about 2 degree differences between the four positions possible.
 
Oh, and a GOOD straight-edge to check the alignment between cogs. The crank shims are for that. With the one you have all you can do is install it and check to see if you need more, none, or less.
 
Need help titled: Degreeing in Your Cam For Dummies.

Does this mean I install cam followers and then the
push rods and then again measure a push rod (if so, which)
when it is at its highest point, because the firing piston
is at its highest point?
 
:iagree:Don't rely on marks or what shims it had before; check it again and set it right. I'd use a piston stop instead of a dial indicator, but that's just me. Either one will do fine; the indicator just takes more care to get right.

Might take a little persuasion to slide the crank gear on, but not a lot. If you have to pound on it, something's wrong, IMO.
 
I began tapping the crank gear into place with a flat-faced
piece of wood and hammer. Started to go on, then had
to pull hard to remove. Made me wonder if the fit
is correct or if it should just slide on.
 
Hi 2Wrench

It sounds a lot harder than it is once you work it out. Assumign you have a cam that gives you angle values for 0.050" lift (opening and closing)...

1. Find TDC for number 1 cylinder. Set up your degree wheel with a pointer which shows TDC correctly.
2. install tappets and lifters for number 1 cylinder cam lobes (the front two holes)
3. set up dial gauge on inlet valve lifter (the second from the front of the block), and turn the cam until you get to 0.050" lift.
4. Turn crankshaft to correct setting for 0.050" lift of inlet valve (mine was 3.5deg BTDC)
5. Try to find a combination of cam sprocket/chain which lines up the holes in the sprocket with the holes in the end of the camshaft.
6. Attach cam sprocket
7. Turn engine (clockwise) to check that you return to the right crankshaft setting when the cam lift is 0.050", to check the tension in the chain is in the right place
8. Curse because you must have moved something, remove camwheel
9. repeat steps 4 to 8. In my case for about 2 weeks.
10. assuming you now have it set up for the 0.050" lift opening, check it is right for closing, then check exhaust valve lift.
11. Curse very loudly because you find the duration isn't exactly what the spec sheet says. Establish where you want to be in terms of straight up (as spec sheet) advanced or retarded, and start again from step 4.

Hope that helps. No doubt someone will have a better method, which may or may not involve less cursing.
Cheers
Alistair
 
What cam do you have ? If it's an aftermarket cam, it should come with instructions (since the setting varies with how the cam is ground).

If it's a stock cam (or one of the factory performance cams), then you find the point where #1 intake and exhaust are open equally, and make that TDC. Easiest to do with the head, pushrods & rocker shaft already installed (temporarily if necessary, but generally cam timing can be saved until that late in the assembly process). No dial indicator required, just feeler gauges.

Set the lash for both valves on #1 to .040" or .050" (exact number doesn't matter so much, as long as they are equal). Put the crank at TDC, then turn the cam until both #1 valves have reduced (and equal) lash. Hold up the cam gear & chain, try each of the 4 positions until you find the one that fits best. If you have to choose between two positions, take the one that has the cam slightly advanced (intake lash smaller than exhaust lash) since the chain will stretch slightly in operation.
 
Alistair: Thanks for the help. Let's see, I've got the
skills and experience to complete steps 8, 11 without any
problems whatsoever; therefore, I'm 1/10 of the way there.

Yeah, okay...and only about two weeks....I better get
started.
 
You could actually save most of the 2 weeks it took me just by checking what you have first. I kept starting from scratch because I figured that the cam was ground exactly as the spec sheet said, so if I set it to open at 3.5BTDC I figured it would close at exactly 43.5ABDC (or whatever it is), but it didn't. I assumed that I had done something wrong - tension on wrong side of chain, knocked something or just not lined up the holes properly. In the end the job took about 2 hours once I realised that the duration of the cam I had wasn't quite what it said on the spec sheet. That's assuming you have an aftermarket cam with a spec sheet to work with. If you have an original one then you will have to work out what "on the rock" means!

Cheers
Alistair
 
Back
Top