• Hi Guest!
    You can help ensure that British Car Forum (BCF) continues to provide a great place to engage in the British car hobby! If you find BCF a beneficial community, please consider supporting our efforts with a subscription.

    There are some perks with a member upgrade!
    **Upgrade Now**
    (PS: Subscribers don't see this gawd-aweful banner
Tips
Tips

TR2/3/3A back half to chassis questions

Frank Canale

Jedi Warrior
Silver
Country flag
Offline
I was not able to move the back half the way I was planning due to the weather so had to go to plan B.
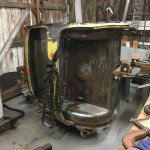
moving back half to chassis.jpg I was planning to move the back half on a dolly laying down out one door and back in the other but heavy snow changed my plans.
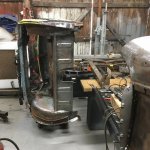
getting ready to fly.jpg Getting it ready to hook it to the engine lift and fly it into position. There was a flight delay due to low hydraulic fluid in the engine lift.
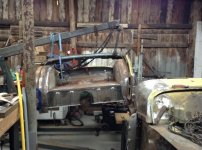
on engine lift flying into position.jpg On its way into position. Landing gear is down about to touch down.
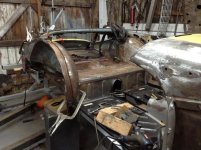
on chassis ready to start alignment.jpg Passengers you can remove your seatbelts. The back half is roughly in position Just for grins I took the driver door frame and set it in position to see how it fit. Looks like about 3/8" gap between the inside of the door frame and the B post where the door catch will be located. At least it is not tight and I think that is good.

This is mainly just to do some checking and to work on the rear body mounts to see how the rear closing panels are fitting and to get a better handle with the rear mounts and the rear bumper tubes as I need to mark the hole in the closing panel for the tube that holds the rear bumperetes. I could use some help at this point, Things I need to be looking at , Things to be checking, is this a logical step or am I getting ahead of myself. Frank
 
I think you are close enough. The only thing I could think of would be the one bolt that goes from the tub to the rear frame. My little quarter panels where still on the rear clip, and I fought that that opening some getting the A post and B post parallel , the way you are doing it the door opening is more friendly. I think your there.
Great work Frank
 
Thank you Steve. I did not get much done today, but this afternoon I took a few minutes to see how far the car has come. It was fun to see the repairs and remember all the rust, missing sheetmetal, and dents. Still a long way to go, so just have to keep plugging along making sure the project doesn't stall. Thank you to all for the support, it means a lot. Frank
 
Yes David it has been very cold in the shop. This last week we have had snow and freezing rain, night time temperatures have been single digit and teens. It doesn't matter if I knock the chill off in the shop, the concrete floor makes my feet cold even with boots and it is time to go back in the house and warm back up. We are supposed to warm back up next week. My prayers have been for those in Texas that they get power and weather gets better for them. A very bad situation. Frank
 
Now that the B post is repaired and clamped back in position I have been able to start checking the door fit. The door frames have been repaired and I made new skins for the over a year ago. The skins have not been crimped over the frames so if I need to adjust them it will be easier. The initial fit up looks like the opening for the door frame is 1/4" too large. Both sides are basically the same. The rear body mounts are all the way to the back of the slot in the frame. For the last couple of weeks I have felt like a real amateur not knowing which way to go so I could use some advice. I don't really have much to go by from the original car as the middle was in such bad shape. I can close up the gap by shortening the back of the inner sill allowing the back section to move forward and that will help the rear body mounts move a little off the back of the slot. I can make shims for the door hinges but I don't think it is a good idea to shim it that much. What about shimming the door striker? I would like to leave a small amount to do shimming but want to make sure I don't get it too small and have to start working on the doors again. Trying to do the dance with the front and rear has been a little over whelming trying to figure what is the right way to get everything to line up and fit correctly. The car seems to be straight and flat it is the door gap that seems a little big. Any advice is appreciated. Frank
initial door fit.jpg
 
Very nice repair...I’ll have to do the same on my 59 when I get back from it.

Cheers,
Tush
 
If you can get the rear section to move forward to reduce the gap that would be the best solution, there are paper-type shims available for the striker plates which may help. I have to take my hat off to you for the way you have tackled those repairs, there wasn't much left to work with.

Graham
 
Frank I would say a ÂĽ is probably the maximum, but 3/16 is probably the minimum. There are so many variables in setting the back section or rear clip up to the front. One thing to consider is the front fender. Is the front fender tight against the A post? How much paint is going to be put on the A and B post? Unforeseen things like that start to add up upon assembly. One of the ones I found challenging is how the door closes. A tr3 door actually closes inside the fender gap which is small and shaped very unique. On the fender at the curve of the door as it starts to return to a horizontal plane (that little 2 inches) the door tucks inside the fender and moves on an axis and radius, real fun.

The cap between the door and fender is a desirable at maybe 3/16 or 1/8. Then you back to how much paint and how big of cap is acceptable to you. I made mine too tight and fought everything. I went round and round. I guess what I mean is the front fender: A post, B post, Door, and outer sill all have a relationship of clearance that is very fiddly. Perhaps bring both sides together with all the pieces. I found it a challenge, but watching your work you have this.

People have welded wire to door and unfolded the end of the door for more metal to fill the gap between the fender and door. I actually bent the hinges to get the preferred axis on one door.


You got this Steve
 
I did the wire thing on the front edge of both doors and a tapered wire on the passenger door. Also I added some to the outer sill to improve that gap. Adjusted the hinges and added paper shims (Gasket material) to both the hinges and striker plate.

Plan for several days getting the final door fit.

David
 
Thank you all for the input. I made shims to determine the amount that the opening needs to be moved to get the door latch to close smoothly. The passenger side will need to move 5/16" and the driver side needs to move 1/8". The front wings are in place bolted to the A post and the lower mounting flange lines up with the inner sill. I am allowing .090" for primer and paint buildup and assembly shimming if necessary. I think I am going to shorten the inner sills at the back to allow the back section to move forward but I will probably take another night to look everything over to make sure I am not over looking something. I was not expecting it to be this much difference side to side but it is a hand built car and I will not waste a lot of time trying to find the error as the line workers were very good at adjusting the cars. I just want to make sure that this does not make the back end of the car look crooked. Frank
 
That's the key...Side to side may have measurable difference, but it should not be obvious from any angle you eye it. When you get close, roll it out onto the drive so you can look at the big picture from 20-30 feet back. Places that tend to show are the front and rear scuttles...as there are times they are very visible to an observer's line of sight. The bottom of the front apron is another part that must look right (level) with the ground. The doors and quarters can be off at least 1/2" before they become noticeable...there is rarely an angle that they can be seen at the same time.
 
You may be able to cheat a little where the inner fender meats the end of the inner sill rather than cut the end of the sill off just hammer the mating panel back. 5/16 and 1/8th is not a lot and shouldn't affect the tyre fit in the wheel space.

Graham
 
Thank you John, that is what I needed to know. Graham , this old girl has been beat on enough so I am reforming the flanges on the passenger side inner sill to move the back forward 1/4". While this is being worked on I decided to remove the passenger floor pan and reform the flange to match the transmission tunnel and relocate 2 transmission cover bolt holes. The floor pan flange and 2 cage nuts are off so I am going to deal with it while I have a chance to get the floor pan out. I am using the original hinges and door catches to check the doors. do I need to go ahead and order new catches and striker plates or are the originals close enough to use for now? Frank
 
Unless they have a new supplier for the striker plates I would stay with the originals, I think I got them from Moss but the bolt holes don't line up with the threaded plate in the B pillar. I cleaned the originals up and had them re-chromed and did the same thing with the catches, I think the springs are too strong in the reproductions so the doors don't close nicely.

Graham
 
I took the catches apart and removed a couple of coils from the spring. That made them much easier to operate. Much like the old catches that were in the boxes of parts that came with the car. The old ones were too rusty to reuse..
I do not remember if I bought the catches or if they were purchased by the PO which would have been in the 1990s

David
 
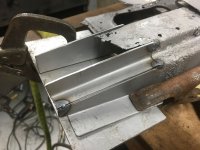
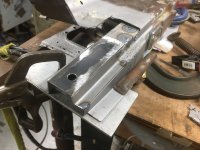
Thank you ,Graham and David. The catches I think are salvageable , The driver side striker plate is worn out and not usable , the passenger side is in ok condition. David, how did you take the catches apart? I see the small tabs that are swedged over but if you grind them off how did you put it back together? I have shortened the passenger inner sill and that worked great. I moved the two cage nuts at the front of the passenger floor pan to match the transmission tunnel. The transmission tunnels bolts up spot on. The floor pan went back in place with no problem put the back section back on and am amazed at how well it turned out. I have been putting this off over analyzing what to do and now looks like I om back on track. Driver side adjustment tomorrow using the same method.

passenger side inner sill modification.jpg
passenger inner sill re forming flange.jpg
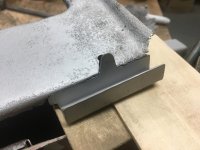
passenger inner sill reformed and trimmed.jpg
passenger inner sill repair complete.jpg


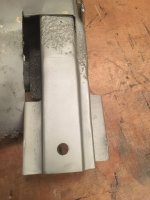
passenger floor pan off a little.jpg
The passenger side floor pan was off a bit. removed the cage nuts, welded up the holes and re drilled new holes. Reformed the flange to the scribe line. There ids a lot of extra material that needed to be shrunk to get the floor pan flat and the flange correctly reformed. After I bolted up the transmission tunnel I felt it was time well spent. Frank

Do you like the larger photos or the medium size? I am trying the medium size photos this post.
 
Last edited:
IMG_1647.jpg

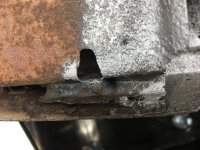
passenger door gap after inner sill modification.jpg

Door frame gap after the modification to the inner sill. The hinge has a .090" spacer for paint build up and any additional shims necessary to get the final alignment. Frank
 
Back
Top