• The Roadster Factory Recovery Fund - Friends, as you may have heard, The Roadster Factory, a respected British Car Parts business in PA, suffered a total loss in a fire on Christmas Day. Read about it, discuss or ask questions >> HERE. The Triumph Register of America is sponsoring a fund raiser to help TRF get back on their feet. If you can help, vist >> their GoFundMe page.
  • Hey there Guest!
    If you enjoy BCF and find our forum a useful resource, if you appreciate not having ads pop up all over the place and you want to ensure we can stay online - Please consider supporting with an "optional" low-cost annual subscription.
    **Upgrade Now**
    (PS: Subscribers don't see this UGLY banner)
Tips
Tips

TR2/3/3A Another question about pulling the wiring thru the stator tube...

karls59tr

Obi Wan
Bronze
Country flag
Offline
Did I read somwhere that others have pulled the wires thru the tube one at at time and some have pulled the "whole" harness thru all at once. I've read the info on the forum from 2012 where this was discussed but I'm not sure of the best way. I have a cloth bound harness and was wondering if I would be further ahead to remove it and wrap it with vinyl before the install to make things easier? Does the stator tube slot run the entire length of the tube? The couple of inches of the stator tube that are showing(at the wheel end) appear to have the the two sides of the tube slot overlapped a bit and I was wondering if the stator tube is like that down its length making the tube diameter smaller?
It just looks like the cloth bound wiring cluster is "too wide" to go down the tube but maybe with lube and a wire attached to the longest wire it could be pulled thru. Any thoughts?
 

DavidApp

Yoda
Gold
Country flag
Offline
The slot on my tube only runs about 2" down the length.

Looking at my harness the 4 wire ends are staggered so I plan to run a pull wire through the tube then carefully tape the harness to the pull wire so that the pull is on all 4 wires not just the longest wire. I may fold the end of the pull wire back to prevent it pulling lose halfway through the tube.
Will use thin picture frame wire or similar.
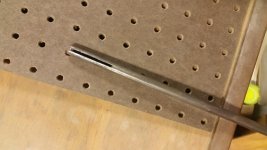
Stator tube.jpg

David
 

TR3driver

Great Pumpkin - R.I.P
Offline
I used wire pulling lube last time, which appears to have been a mistake. The lube I used dried to a wax-like consistency, and effectively glued the wires inside the tube.

The slot is longer if you have the adjustable steering wheel, but still only 8" or so.
 

charleyf

Luke Skywalker
Country flag
Offline
You just need to deal with the front edge of the cloth as you do the wires. I used electrical tape to cover and secure these ends before I started pulling. Like David says stagger the ends of the wires so they are not all lumped in a large ball to try to get through the tube. Do leave the cloth cover on the wires.
Charley
 

TimK1955tr2

Senior Member
Offline
I just did this a few months ago. If the tube is old and corroded on the inside it is a real pain, even it looks clear. After cleaning and pulling small diameter pipe cleaning brushes through it, I still could not get the wires to feed through.

I ordered a new stator tube from Macy's Garage and getting the harness through couldn't have been easier, no problem whatsoever. You pretty much have to cut the bullets off and install new ones for new or old tubes, I think.
 

bobhustead

Senior Member
Gold
Country flag
Offline
Mine came with instructions that I followed and had no trouble (in the old tube, which I cleaned with a rifle brush). The bullets should not come off. The wires inside the sheath are slightly twisted around each other and keeping slight torque in the direction of the twist helps compaction.Tthe sheath narrows on being pulled endwise, like chinese handcuffs. I used straightened light guage baling wire for the pull string. Tape each bullet and the sheath to it separately and sparingly. Loop the baling wire snugly around the wire going into the uppermost bullet. One pull person and one feed person (to apply the torque and sheath extension) were employed. I had expected a nightmare and instead it took three minutes.

Bob
 
OP
K

karls59tr

Obi Wan
Bronze
Country flag
Offline
Well I managed to get the wiring thru the stator tube but I had to carefully cut some of the old loom away as it was bunching up and stopping the pulling process. How much distance should there be between the control head and the steering wheel once the control head is pushed home?...1/8"?
How can I be sure that the turn signal lever is in the correct position so that it will return properly.
How much play is normal for the steering wheel. Will the adjustment screw take up some slack or is a rebuild required if there is way too much play? Thanks for your responses.
 

Got_All_4

Luke Skywalker
Country flag
Offline
For what it's worth now I would leave the cloth on. I did some repairs to mine several years ago and use electrical tape to make repairs on the braided cover. Just recently had a disaster trying to pull the wires back out. Looks like the heat generated in the engine compartment welded the e tape to the inside stator tube and the wire would not move. Consequently they pulled off the terminals inside the head. The braded cover is kind of rotten after being in there since 1980 so I was thinking of replacing it with a full length shrink tube. Should be strong and easy to lube up too.
 

bobhustead

Senior Member
Gold
Country flag
Offline
the 1/8 is probably good. If the three taper tip retaining screws are above the flange on the head, it is right wherever it is. Signal lever should be in off position (middle) and pointed straight up when wheel is in straight ahead position. It will not, in any case, always return to off position. Adjuster will take up some slack, maybe all if wear is not too bad. Removal of one of the shims under the cover will help if the adjuster doesn't do it all. Look at the manual regarding the adjustment to help judge the right tightness (it is not uniform in all positions). If you need a rebuild, you may have an impossible time with the bearings at the ends of the worm. This may require a send away rebuiuld because I don't think the bearings are readily available. To salvage mine, I had to slightly reshape the cages to keep the balls in place during reassembly. Note that the races for these balls are the worm gear ends themselves, not removable parts.

Bob
 

Tinkerman

Darth Vader
Offline
I installed a new harness and I wrapped the ends with electrical tape, keeping the ends staggered so they didn't bunch up. I used pulling lube and had no problem with it at all. I used the original stator tube but cleaned it real well. My experience was good. Don't remember the brand of pulling lube, bought it at a local electrical shop. I did clamp the stator in my vice, well supported so I didn't bend the stator tube. I remember that, what I thought was going to be a tough job went really good. Surprised me! Heh!

Cheers, Tinkerman
 

TR3driver

Great Pumpkin - R.I.P
Offline
IMO, the steering box adjustments are NOT to compensate for wear; but only manufacturing tolerances. You can try carefully going through the adjustment procedure; but if it was properly adjusted before then only replacing the worn components is going to make much difference.

It's also a mistake (again IMO) to just try changing the adjustment and seeing what happens. It's very easy to wind up with the cam & peg overloaded from adjustment too tight, which will damage them. The worm in my 59 looked like it had been chewed by rats! (from my trying to reduce the play in it).

One important point is that the steering box is _supposed_ to have some play in it, every where except exactly on-center. Correct adjustment of the screw is when you can just barely feel the bind as it goes through center, with the steering disconnected and turning the bare shaft with your fingers. On my 59, the worm was worn badly enough that the tight spot was off to one side, and there was a matching spot, not quite as tight, to the other side. Even with all that, replacing the peg & bushing made a world of difference in it. I rather suspect that wear in the bushing is what causes the TR3 to "drive like a truck". At any rate, replacing the peg & bushing stands out as one of those "Why didn't I do this sooner?" actions.

Heat shrink tubing seemed to work well on the 59, as a replacement for the rotted original cloth. Still pulled out easily, many years after I installed it. Although I didn't try to measure, the cloth on the replacement harness seemed thicker than what was left of the original cloth, and a tighter fit in the tube. But that may have just been due to the age of the original.

With the bullets staggered as original, they fit easily through the tube. No need to remove them (tho I did manage to pull one off by force, when attempting to pull the new harness through without lube).
 
OP
K

karls59tr

Obi Wan
Bronze
Country flag
Offline
Someone mentioned that it is difficult to find the correct bearings for the steering box. Is this still an issue or is there a source? Is rebuilding the box a DIY project or are there issues where a machine shop is required?
 

charleyf

Luke Skywalker
Country flag
Offline
I had one rebuilt at TRF and know that they did have it sent to a machine shop for some part of the process. I was in a rush to get it back and found out that it was delayed at the machine shop.
Charley
 

TR3driver

Great Pumpkin - R.I.P
Offline
Last time I looked into it, the caged balls were not available. But it was easy enough to buy just the balls and insert them in the old cages.

If the worm needs to be replaced, you'll probably need a machine shop.

IIRC, the book says the bushing needs to be reamed to size. But I have never found it to be necessary.

Nothing else is very hard. You'll need to be a bit creative with some threaded rod and washers, etc, to R&R the bushing.
 
Similar threads
Thread starter Title Forum Replies Date
K TR2/3/3A Another brake bleed question....... Triumph 17
D TR2/3/3A Another Carb question. Triumph 22
Lin Another Trafficator/Control Head Question Austin Healey 10
pkmh Yet Another Oil Question! Austin Healey 8
P TR2/3/3A Another Differential Question Triumph 22
SherpaPilot TR6 Just Another TR6 Column Question Triumph 4
M TR2/3/3A Another TR3 Piston Ring Gap Question Triumph 1
B Another OD question Austin Healey 32
Y MGB Another question - this time on seatbelts.... MG 2
D TR6 Another Newb Question Triumph 10
C Another leak, another question... Austin Healey 20
K TR2/3/3A Another Steering Question... Triumph 17
CLEAH Another BJ8 Misfire Question Austin Healey 11
B Another disc brake question Spridgets 10
K TR2/3/3A Another windshield question...bolts and screws? Triumph 15
D Another Valve Guide Question Austin Healey 1
D MGB another spring question MG 1
KVH TR4/4A Here'a Another Rear Axle Hub Question/Problem Triumph 7
B TR2/3/3A Another Steering Box Question Triumph 29
Healey Nut Another drain channel question . Austin Healey 21
M TR4/4A Another question on window regulator. Triumph 3
R Not just another throw out bearing pin question Austin Healey 3
J Another what cooling fan is this question? Austin Healey 47
D Not another oil pump question. Austin Healey 7
M_Pied_Lourd TR2/3/3A Another Speedo Cable Routing Question.... Triumph 5
T TR2/3/3A another brake master cylinder question Triumph 16
P TR6 Another eletrical question [uugh!] Triumph 5
M TR2/3/3A Another seat belt question Triumph 8
D Another question 1967 BJ8 top installation,metal retaining strip Austin Healey 1
longbridgehealey Another I just don't understand electricity question Spridgets 6
fpstude TR4/4A Another Wiper Question - Very Sluggish Triumph 12
Morris Another wheel bearing question Spridgets 3
Griz Another BJ7 Wiring Question Austin Healey 4
MarshgrassA Another Dealer 100M question Austin Healey 13
John Turney Another picture question FORUM Navigation Questions 0
T TR2/3/3A having no shame I ask another question about a TR3 engine that is giving me fits Triumph 10
S TR2/3/3A Another Amp Meter & Regulator Question - TR3A Triumph 19
Geo Hahn TR2/3/3A Yet Another TR3A Slave Cyl Question Triumph 4
A another master cyl question Triumph 4
B Another wiring question 57 smallmouth control head Triumph 2
R Another insulation question Austin Healey 3
tri_carb_healey another outrigger question Austin Healey 18
Jim_Newman Another little electrical question - fuel gauge. Austin Healey 3
M Another Tonneau question Spridgets 12
E another dumb electrical question Austin Healey 8
longbridgehealey another 1275 from 948 question Spridgets 3
jlaird Another stupid question from your old friend Spridgets 18
regularman another 1500 question Spridgets 10
nevets another SU fuel pump question Austin Healey 10
I another adjustable steering column question Austin Healey 8

Similar threads

Top