-
 Hi Guest!
You can help ensure that British Car Forum (BCF) continues to provide a great place to engage in the British car hobby! If you find BCF a beneficial community, please consider supporting our efforts with a subscription.
There are some perks with a member upgrade!**Upgrade Now**
(PS: Subscribers don't see this gawd-aweful banner

Tips
- We have a special forum called "Member Articles" where you can submit actual articles for consideration for publication. Learn More
- Don't have an Avatar? If not, your avatar will default to the 1st character in your username. Go into "Account Details" to change your Avatar.
- Some basic forum navigation info: click
 Hey - did you know if you click on the title of a thread it will take you to the first unread post since you last visited that thread?
- Hey Guest - Is your British Car Club in our Clubs database? If not, send me a PM - Basil

- Looking for a local club? Click the "Clubs" tab above and browse hundreds of clubs world-wide.
- Add Android or iPhone APP: click
- Did you know - any picture or video you add in your posts in any marque-specific forum will also get added to the Media Gallery automatically.
- A few more tips about posting and replying: click
- Hey there Guest - be sure to keep your profile page up to date with interesting info about yourself: learn more
- More tips and tricks on Posting and Replying: click
 but were afraid to ask:
  STOP!! Never post your email address in open forums. Bots can "harvest" your email! If you must share your email use a Private Message or use the
  smilie in place of the real @
- Want to mention another member in a post & get their attention? WATCH THIS

- So, you created a "Group" here at BCF and would like to invite other members to join? Watch this!
- Hey Guest - A post a day keeps Basil from visiting you in the small hours and putting a bat up your nightdress!
- Hey Guest - do you know of an upcoming British car event?
 Pretty Please - add it to our Events forum(s) and add to the calendar! >> Here's How <<
- Hey Guest - you be stylin' Change the look and feel of the forum to fit your taste. Check it out
- If you run across an inappropriate post, for example a post that breaks our rules or looks like it might be spam, you can report the post to the moderators: Learn More
- If you would like to try some different "looks" or styles for the site, scroll to the very bottom, on the left and click the Style Selector.
You are using an out of date browser. It may not display this or other websites correctly.
You should upgrade or use an alternative browser.
You should upgrade or use an alternative browser.
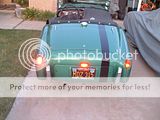
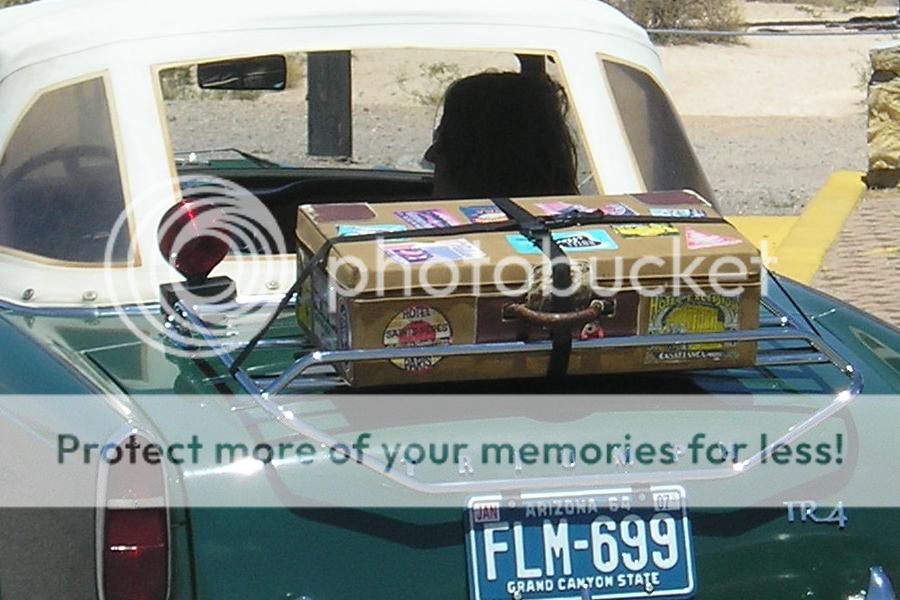
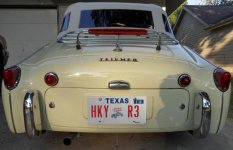
TR2/3/3A 3rd. brake light set up
- Thread starter tomnanney
- Start date
TR3driver
Great Pumpkin - R.I.P
Offline
One possibility is to replace the license plate lamp with the combo lamp from an earlier TR3.
Another is to add some relays and make the turn lamps come on with the brake lights (but still flash if both brake and turn signals are on). You can buy logic devices that will do it with a single box (eg https://www.amazon.com/IIT-16690-Trailer-Converter/dp/B004EKW0DC) or build it yourself with 2 or 3 cheap automotive relays. However, either approach will require that you either change the turn flasher or add some power resistors to make the original flasher work right.

Another is to add some relays and make the turn lamps come on with the brake lights (but still flash if both brake and turn signals are on). You can buy logic devices that will do it with a single box (eg https://www.amazon.com/IIT-16690-Trailer-Converter/dp/B004EKW0DC) or build it yourself with 2 or 3 cheap automotive relays. However, either approach will require that you either change the turn flasher or add some power resistors to make the original flasher work right.
Geo Hahn
Yoda
Offline
Under the heading 'crude but effective' I use half of a set of Harbor Freight towing lights (with a magnetic base) to have a 3rd brake light when I know I will be driving in city traffic:
I added a flannel pad to go between the base and the car body to avoid scratching - also important that the pad is clean and the body is clean and waxed.
Wires just sneak into the boot over the seal and connect with bullet connectors.
I added a flannel pad to go between the base and the car body to avoid scratching - also important that the pad is clean and the body is clean and waxed.
Wires just sneak into the boot over the seal and connect with bullet connectors.
6TTR3A
Jedi Warrior
Offline
The Hoppy converter is available on the internet or at your FLAPS. Part number is 38845
It is recommended that you convert your rear turn signal lights to LEDs.
The HOPPY converter cannot handle much more than
2.1 amps total.
----------------------------------------------------------------------------------------------------------------------
LATE 3, 3A, 3B CONVERSION
>>>>>>>>>>>>>>>>>>NEGATIVE GROUND SYSTEM ONLY<<<<<<<<<<<<<<<<<<
TRIUMPH COLOUR CODES
Black (57) = ground Red (44) = Tail lights Green w/red (18) = Left turn
Green w/purple (22)=brakes Green w/white (21)= Right turn
This converter integrates the brake lights with the turn signal lights, allowing the turn signals to function as brake lights as well. When the brakes are applied, all four lights on the rear apron are illuminated. If the turn signal is applied while the brake is applied, that filament will blink. The advantage is that you now have 4 brake lights instead of two.
Installation instructions:
Locate the loom in the trunk (boot) area. It normally comes down the right side of the body along the fender well base. Choose a spot just before the wires separate out of the loom for the right tail light. Peel back the wrapping, exposing the individual wires. If the colours are still visible, identify each wire either by number or function. Disconnect the battery.
Cut all four wires, then strip ¼” off each end. The exposed ends should be bright copper. Should the bare ends have a dark residue on them (50 years old!) scrape them with a knife edge to assure a good electrical connection. Crimp type connectors are OK, but soldering is suggested. If soldering, use shrink tubing to isolate the solder joints. Be sure to insert the tubing before soldering!! The converter needs to be grounded. Drill a hole in the fender well and attach the ground wire(s) using a sheet metal screw. Note: The inbound side of the converter has a brake wire but the outbound side does not. Once all the connections are completed, reconnect the battery and the conversion is complete.
TR3driver
Great Pumpkin - R.I.P
Offline
That number appears to be obsolete, not listed on the Hopkins web site. But the 48845 appears to be similar. Website says the 2.1 amps limit is per stop outlet, which makes a little more sense.The Hoppy converter is available on the internet or at your FLAPS. Part number is 38845
It is recommended that you convert your rear turn signal lights to LEDs.
The HOPPY converter cannot handle much more than
2.1 amps total.
https://www.hopkinstowingsolutions....light-converters/tail_light_converter_12.html
Curiously, the one I linked to doesn't mention a current limit (but no doubt it has one).
TexasKnucklehead
Jedi Knight
Offline
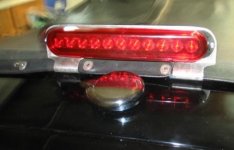
Also under the 'crude but effective' heading is using an LED assembly that fell out of a Celica spoiler. I mounted mine 'permanently' to the highest bar of the trunk rack with some plastic wire clamps. I drilled the lock to allow the wire to enter the trunk via the center of the lock (a small dab of silicon made it waterproof) and grounded to the lock (top and bottom of a mounting screw). I also added a very small in-line fuse from the regular brake light power to the 3rd light in the off chance something in the added circuit shorts out -only the 3rd light would be out and not the other brake lights.
The federal regulation for a 3rd brake light requires it to be higher than the other brake lights, and I think I am much more visible in traffic.
The federal regulation for a 3rd brake light requires it to be higher than the other brake lights, and I think I am much more visible in traffic.
Attachments
Hi,
I mounted a Optronic 1" x 1.5" x 18" LED strip to the tonneau cover, in between the Lift the Dots. In the winter I can mount it to the top. I have a quick disconnect for easy mounting. One nice feature about it being so high, I can see it in the rear mirror, so I know the brake lights are working.
RG
I mounted a Optronic 1" x 1.5" x 18" LED strip to the tonneau cover, in between the Lift the Dots.
In the winter I can mount it to the top. I have a quick disconnect for easy mounting. One nice feature about it being so high, I can see it in the rear mirror, so I know the brake lights are working.RG
Don Elliott
Obi Wan
Offline

mgedit
Jedi Knight
Offline
I've seen Don's first hand and it is great. I did start out trying to duplicate something similar but found it hard to get enough clearance from filler cap, without the light looking a bit too high. In the end, I placed my extra brake light at the bottom of the licence plate (sorry not great picture). Perhaps not an ideal location but the LED is much brighter than the single centre brake light I have, and it blends in pretty well. As well, I added a flash module to that light that flashes it fast three times before going on constantly while brake pedal is pressed. Note that such a light may not be legal in some (many) places. To me it ads a lot of extra visibility and is no different than pumping the brakes at bit. The wiring is run down from the boot into the spare tire cubby and I have a simple 2-prong trailer connector there to disconnect the wires should I need to remove spare or access anything else in there. I definitely feel a bit safer now in traffic.
Cheers, Mike
.jpg")
Cheers, Mike
Last edited:
TR3driver
Great Pumpkin - R.I.P
Offline
The one that RG linked to above can be wired either way. https://www.etrailer.com/static/images/pics/s/t/stl79rb_10_250.jpg Just ground the red wire (black too if you want) and link the white wire to your brake light switch.Any thoughts for a positive ground CHMSL? I do run positive ground LED brake lights...
Would love Don's solution if positive ground.
Others I've seen can be easily modified. Just find the ground strap (usually a strip of metal running over to a mounting hole) and cut it, then solder a wire to the cut end from the lamp.