• Hi Guest!
    If you appreciate British Car Forum and our 25 years of supporting British car enthusiasts with technical and anicdotal information, collected from our thousands of great members, please support us with a low-cost subscription. You can become a supporting member for less than the dues of most car clubs.

    There are some perks with a member upgrade!
    **Upgrade Now**
    (PS: Subscribers don't see this gawd-aweful banner
Tips
Tips

1500 Alternator conversion woes

bigjones

Jedi Warrior
Country flag
Offline
Hi folks,

Hope all is well.

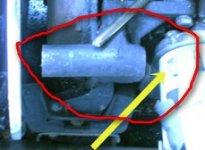
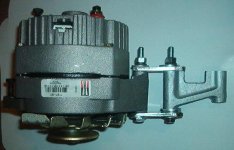
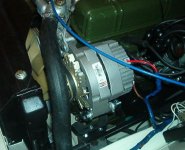
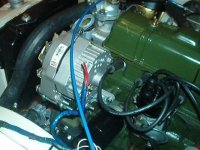
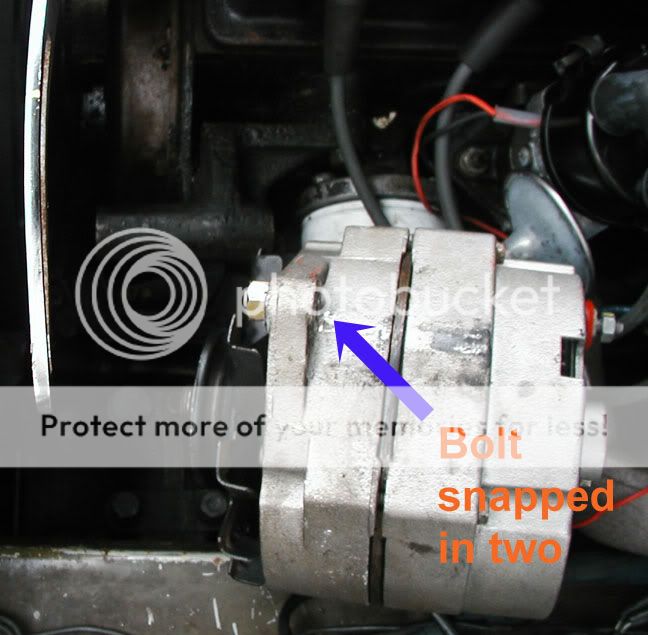
Here's a $30 alternator from Advance Auto. All looks well.

Alternator1.jpg


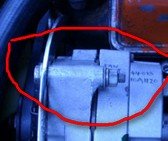
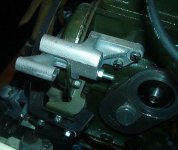
However, the bottom bolt (Grade 8) keeps snapping in two. This is the 3rd bolt I've gone through in not many miles.

Alternator2JPG.jpg


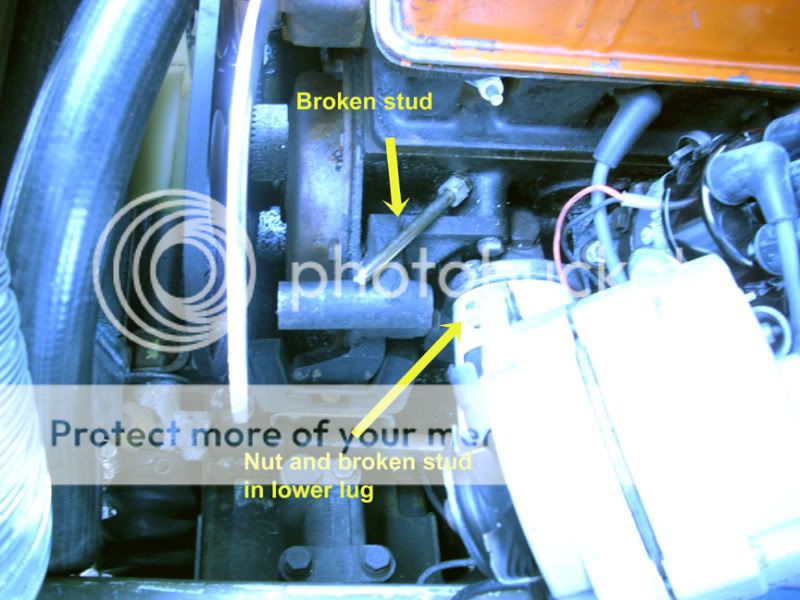
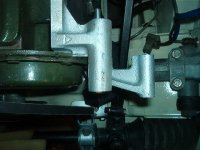
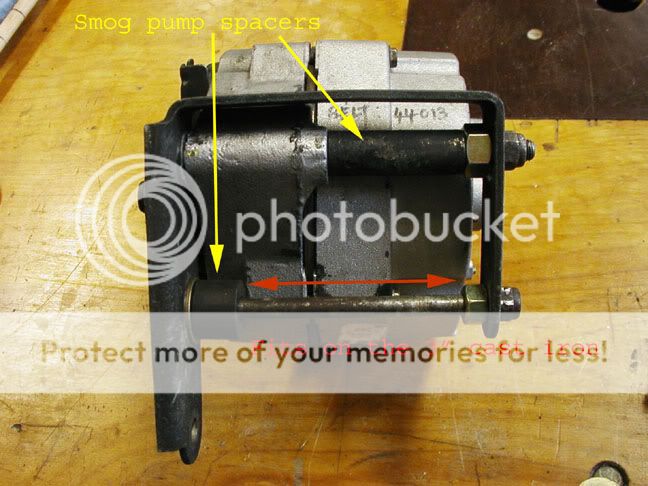
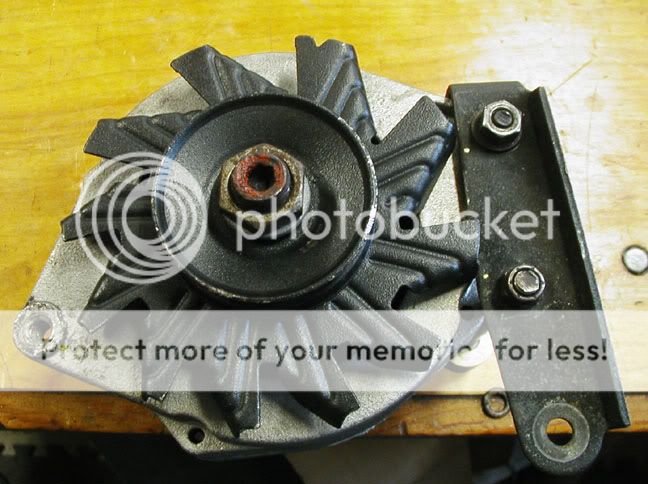
As you can see, in order to get this particular alternator to fit, it has to be installed upside down. The lower clamping lug does not straddle the lower mount, as does the Lucas. There's the problem I think.

Is there a solution or do I need a different alternator (if so, any suggestions - don't say Lucas, they are over $100)

Cheers!
 
I can't see the nut and broken stud in lower lug. YOu mean the small lug broke off the alternator? That's a 7127-3 (GM '73-~'87). It's designed to mount the other way around. Big lug at the bottom.
 
m,
Thanks for the link but I think that discussion was for the 1275's etc, not the 1500 engine.

Kellysguy,
Yeah, sorry about the poor quality of the photo. I'll take another one tomorrow. What has been snapping in two is the lower bolt. This time it left half the bolt still in the alternator lug. Yeah, I installed the alternator upside down but that was about the only way it would fit, with the smaller of the two lugs down below.

Cheers!
 
When I did mine (1500 Delco) I mounted it right side up, and made two brackets that looked like this. I then
 

Attachments

  • 24537.jpg
    24537.jpg
    6.7 KB · Views: 422
I then mounted one on each end of this
 

Attachments

  • 24538.jpg
    24538.jpg
    15.2 KB · Views: 435
and the other ends to this - shimming them parallel with washers.
 

Attachments

  • 24539.jpg
    24539.jpg
    9.4 KB · Views: 405
I then tightened up the top as normal - and managed to make my original bracket from water pump to bolt fit - if this doesn't make sense I can post pics tomorrow.

BTW I made my brackets out of the cut offs from the chrome bracket I bought to hold the top in place before I realized I didn't need it.
 
OK just looked and found the pictures - here hope it makes sense
 

Attachments

  • 24540.jpg
    24540.jpg
    55.6 KB · Views: 415
  • 24541.jpg
    24541.jpg
    55.2 KB · Views: 405
  • 24542.jpg
    24542.jpg
    41.8 KB · Views: 407
  • 24543.jpg
    24543.jpg
    32.9 KB · Views: 391
  • 24544.jpg
    24544.jpg
    41.2 KB · Views: 392
  • 24545.jpg
    24545.jpg
    40 KB · Views: 391
JP,

Many thanks for a most excellent description.
Fortunately, I never throw anything away so I have that hack-sawed off piece of chrome somewhere.

Cheers!
 
JP,
In that first photo.
There is the chrome bracket and under that there is a cast iron thing.
Where did that cast iron thing come from?
Cheers
PS Here's the broken bolt in the lug hole:
Alternater3.jpg
 
bigjones said:
JP,
In that first photo.
There is the chrome bracket and under that there is a cast iron thing.
Where did that cast iron thing come from?
Cheers

it came with the car. :whistle:

seriously, I THINK it was part of the bracket for the air pump before it was removed. I seem to recall it being attached to the bolts that attach the timing chain cover to the metal backing plate - it was behind that. Sorry I can't be more help than that. just went into the files again -you can see it here
 

Attachments

  • 24553.jpg
    24553.jpg
    59.8 KB · Views: 359
JP,
Thanks for that info.
I took the air pump off many moons ago so then I should have that bracket around someplace.
Cheers!
 
Another way to to the job is to cut the upper piece on the alternator mount-a-ma-jig flush with the front engine cover, then flip the alternator over and run a big long bolt through the original mount hole on the alternator and the hole you just cut off. Finally, you drill a hole in the long chrome tensioner bracket, put a few washers underneath it, and bolt it to the upper driver's side bolt on the water pump housing. You can now use the original tensioning flange on the alternator.

I am sure without pictures that makes absolutely no sense whatsoever.
 
That's the one.

I was able to source that part from an early Spitfire engine. The alternator mount on the early Spit... or at least the one I laid hands on... does not have that big honkin' protrusion sticking out. So that may be another option for you if you live near a junk yard full of Spitfires. :wink:

But if not, cutting that part off should achieve the same results.
 
Well I found the air pump! It did not have that small cast iron piece but I managed to used the bracket and spacers to mount the alternator - works great!

P1010040.jpg


Had to grind a bit off to accomodate the fan:

P1010036.jpg


Cheers!
 
woo hoo!!!
 
Looks good from here, but then I am a long way from anywhere.
 
Back
Top