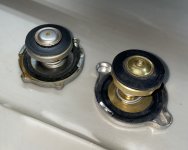
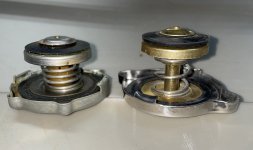
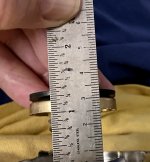
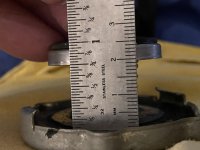
So, both should work as coolant recovery type caps but in your picture # 0233 it looks like the stainless steel one is for a deeper filler neck than the other one - just make sure you use a cap made for the depth of your radiator. Mine is a custom made radiator and they used a 3/4" deep neck but a stock Healey radiator I have in my shop has a 1" deep neck (which I think may be standard for all Healey radiators). This picture is the stock 1" deep cap on the left and my 3/4" deep cap on the right - both 7 lb caps.
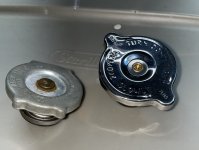
So, it looks like you show a 3/4" on the left and a 1" on the right in your picture. Measure your radiator from the top flange to the inner lower flange the cap seals against - cap distance will be about 1/16" to 1/8" greater when relaxed than the depth so the spring is slightly compressed when the cap is tight.
 Hi Guest!

 Hey - did you know if you click on the title of a thread it will take you to the first unread post since you last visited that thread?
 but were afraid to ask:
  STOP!! Never post your email address in open forums. Bots can "harvest" your email! If you must share your email use a Private Message or use the
  smilie in place of the real @
 Pretty Please - add it to our Events forum(s) and add to the calendar! >>