Hi Guest!

 Hey - did you know if you click on the title of a thread it will take you to the first unread post since you last visited that thread?
 but were afraid to ask:
  STOP!! Never post your email address in open forums. Bots can "harvest" your email! If you must share your email use a Private Message or use the
  smilie in place of the real @
 Pretty Please - add it to our Events forum(s) and add to the calendar! >>
EWD
Senior Member
Offline
Hi folks,
2 Questions:
1. Starter - Have replaced the ignition switch and new gear reduction starter ( British Starters). Starter does not turn without a direct hot wire from the starter to the switch. Did a resistance check on the wire (red/white) from the starter to the relay and appears ok. I assume it’s the relay? How do you check the relay?
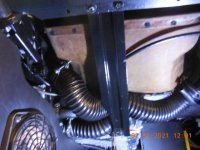
2. Anyone recognize these two parts? The smaller one ( in front) was on the right side of the trans cover towards the rear. It fit just under the old cover. It’s hard to see, but there are 2 raised screw tabs in front where the indents are located. The other one was laying in the car and has been cleaned and painted.
Thanks,
Will

2 Questions:
1. Starter - Have replaced the ignition switch and new gear reduction starter ( British Starters). Starter does not turn without a direct hot wire from the starter to the switch. Did a resistance check on the wire (red/white) from the starter to the relay and appears ok. I assume it’s the relay? How do you check the relay?
2. Anyone recognize these two parts? The smaller one ( in front) was on the right side of the trans cover towards the rear. It fit just under the old cover. It’s hard to see, but there are 2 raised screw tabs in front where the indents are located. The other one was laying in the car and has been cleaned and painted.
Thanks,
Will