Hey Guest!

 Hey - did you know if you click on the title of a thread it will take you to the first unread post since you last visited that thread?
 but were afraid to ask:
  STOP!! Never post your email address in open forums. Bots can "harvest" your email! If you must share your email use a Private Message or use the
  smilie in place of the real @
 Pretty Please - add it to our Events forum(s) and add to the calendar! >>
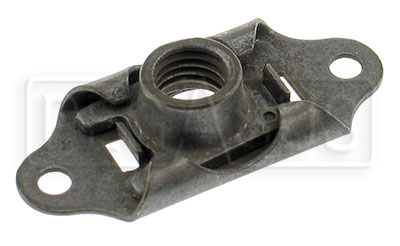
[FONT="] How can I fasten the new heat shields in the engine compartment and under the main floor when the floor sheets were renewed and no nuts are riveted on the ordered sheets? Additional it was necessary to saw off the old screws in the compartment.[/FONT]
[FONT="]In the catalogs of the relevant spare parts suppliers no corresponding rivet nuts are listed[/FONT].[FONT="]
Does anyone have an idea? [/FONT][FONT="][/FONT]
[FONT="]In the catalogs of the relevant spare parts suppliers no corresponding rivet nuts are listed[/FONT].[FONT="]
Does anyone have an idea? [/FONT][FONT="][/FONT]