Hey Guest!

 Hey - did you know if you click on the title of a thread it will take you to the first unread post since you last visited that thread?
 but were afraid to ask:
  STOP!! Never post your email address in open forums. Bots can "harvest" your email! If you must share your email use a Private Message or use the
  smilie in place of the real @
 Pretty Please - add it to our Events forum(s) and add to the calendar! >>
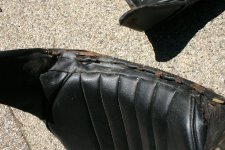
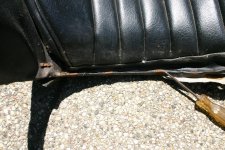
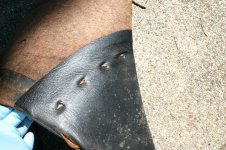
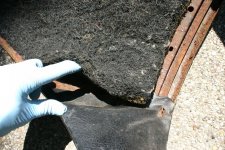
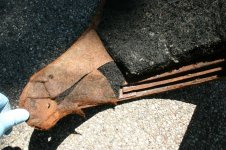
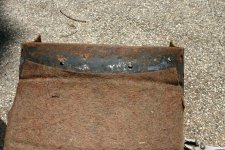
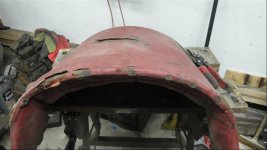
Hello all, been a while since I've touched the never ending BE project. Too many race cars in my life, and a new house, and work, and everything... I've had an upholstery kit in a box for a couple years just waiting for that point of the project. I've never seen the stock seats in finished form, just a pile of metal frames, rusted seat backs, and new pans.
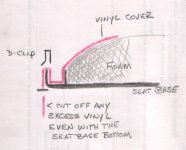
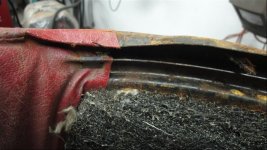
I've searched the web and ten pages of search results here for a picture of how to finish the bottom edge of the seat backs? A couple pictures will answer a bunch of questions and I can drive this car with new interior in a week or so! Wrapping the front and back around the bottom edge, what hooks to what with the clips? Does the reinforcement brace around the lower few inches inside come into play? Is everything gathered on the very bottom lip or does the back wrap all the way around and attach to that brace?
I've searched the web and ten pages of search results here for a picture of how to finish the bottom edge of the seat backs? A couple pictures will answer a bunch of questions and I can drive this car with new interior in a week or so! Wrapping the front and back around the bottom edge, what hooks to what with the clips? Does the reinforcement brace around the lower few inches inside come into play? Is everything gathered on the very bottom lip or does the back wrap all the way around and attach to that brace?