Hey Guest!
BierRunner
Member
Offline
Top down weather here in Ohio and I took my wife out in the TR6 to get ice cream. Just as we made it to the bottom of our street a coolant leak started. I hightailed it back to the house without trouble (the last time my wife agreed to ride in the TR6 we were stranded by an electrical issue. So disappointing, it had been running so well but now I may never get her back in the car. It was a little surprising since I had the hoses and belts replaced about a year ago.
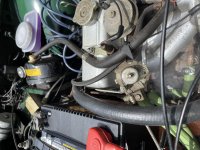
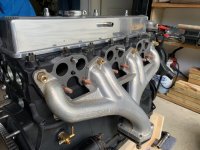
After a little troubleshooting, I identified the culprit in the attached photo (lower right above the black house). I tried to attach a short video of the leak but too large a file for the site.
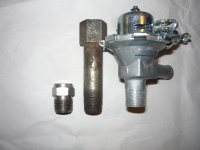
I do believe that is the Heater Valve. Would love some affirmation from this august group before proceeding. I also ask if this is something I can remove and replace myself? As you can probably tell, since I'm asking what the part even is, that I am a basic level mechanic. Any guidance would be greatly appreciated.
After a little troubleshooting, I identified the culprit in the attached photo (lower right above the black house). I tried to attach a short video of the leak but too large a file for the site.
I do believe that is the Heater Valve. Would love some affirmation from this august group before proceeding. I also ask if this is something I can remove and replace myself? As you can probably tell, since I'm asking what the part even is, that I am a basic level mechanic. Any guidance would be greatly appreciated.