• Hi Guest!
    You can help ensure that British Car Forum (BCF) continues to provide a great place to engage in the British car hobby! If you find BCF a beneficial community, please consider supporting our efforts with a subscription.

    There are some perks with a member upgrade!
    **Upgrade Now**
    (PS: Subscribers don't see this gawd-aweful banner
Tips
Tips

Clutch Frozen

Gary H

Freshman Member
Country flag
Offline
I have a 1966 3000 MKIII that has been in storage for 20+ years. I know that is shameful but I am interested in getting driveable again.

The clutch has bonded itself to the flywheel. The engine will start in 4th gear. Is there a way to seperate the clutch and flywheel, hopefully without pulling the engine again?

I have been told to bring up the RPM's and lock the brakes! Since the car is on jack stands I am a little concerned about this remedy.

Any suggestions will be welcomed.
 
<blockquote><font size="1" face="Verdana, Arial">quote:</font><hr>Originally posted by Gary H:

I have been told to bring up the RPM's and lock the brakes! Since the car is on jack stands I am a little concerned about this remedy.
<hr></blockquote>

That's the method I have used on many cars, many times (barn finds in Louisiana, high humidity).

Chock the front wheels (you could lower the front back to the ground) if it makes you feel any better.

Bring the revs up in fourth gear and with the clutch pedal in, stand on the brakes. More than one application may be required.

This is of course, assuming you've already addressed the brake and clutch hydraulic circuits and they're working...

[ 03-02-2004: Message edited by: Randy Forbes ]</p>
 
Hello Gary,
this method has worked for me in the past. Basically it is to drive the car with the clutch pedal depressed.
Assuming the engine works OK, put the car into gear, start the engine and the car will move off. Now stand on the brake and apply some throttle simultaneously. (heel and toe). This has always worked for me in the past.

good luck,
Alec
cheers.gif
 
Haven't tried this on a Healey, but if you can get a large screwdriver in contact with the pressure plate through the clutch lever opening (may have to disconnect the lever) by tapping on the end of the screwdriver you may dislodge it.
wink.gif
 
<blockquote><font size="1" face="Verdana, Arial">quote:</font><hr>Originally posted by Johnny:
(may have to disconnect the lever) by tapping on the end of the screwdriver you may dislodge it.
wink.gif
<hr></blockquote>
J,
How would that work? It seems like the disc would be clamped firmly between the pressure plate & the flywheel while you tapped.

Randy,
Do you know if the disc is usually stuck to the flywheel or to the pressure plate? Just curious.
D
 
<blockquote><font size="1" face="Verdana, Arial">quote:</font><hr>Originally posted by Dave Russell:

Randy,
Do you know if the disc is usually stuck to the flywheel or to the pressure plate? Just curious.
D
<hr></blockquote>

Hmmm...
Can't say that I ever gave that any thought.

If I had to guess, I'd say the flywheel. I would think that retracting the pressure plate would break the seal on that side (and with some minimal friction on the input spline) and that it would want to stay mated to the flywheel.

Just a guess!
 
<blockquote><font size="1" face="Verdana, Arial">quote:</font><hr>Originally posted by Gary H:
The clutch has bonded itself to the flywheel...
Any suggestions will be welcomed.
<hr></blockquote>

Had this happen on a TR that sat for a year. Sounds extreme but I jacked up the rear, started it in a forward gear, revved it and had my wife lower the jack.

Made double-darn sure it was in a forward gear with some open road in front of me. Be careful.

Freed it just fine... though as noted with other methods, only works if you have other systems such as brakes in place.
 
I am ashamed to admit it has been almost 12 years since my original post but my recent retirement has permitted the time and budget to again work on the Healey. I have replaced all fuel and brake lines, rebuilt brake maser cylinder, wheel cylinders and calipers. Clutch master and slave cylinders rebuilt. New fluid and both systems bleed. New fuel tank and fuel pump. Converted to negative ground system. With fingers crossed the engine started in 4th gear and the clutch released with the first push of the pedal!

Much left to do but happy to have the drive train still in tact. Being only 15 miles from Moss Motors in Petersburg, Va is good but expensive!
 
I have done pretty much the same. I have a side road I can drive on. I crank the engine and make sure its warmed up. Then crank the car again in gear with my pathway open. I floor the gas peadal while holding the clutch pedal down. I let on the gas for couple of seconds then floot it again. It sometimes will take a few tries but will usually break loose.
Marv
 
We have broken a clutch loose by towing the vehicle in gear, with the engine not running with the ignition key off, with the clutch pushed in. This seems less dramatic (and maybe safer) than some of the other methods described above.
 
I am ashamed to admit it has been almost 12 years since my original post but my recent retirement has permitted the time and budget to again work on the Healey. I have replaced all fuel and brake lines, rebuilt brake maser cylinder, wheel cylinders and calipers. Clutch master and slave cylinders rebuilt. New fluid and both systems bleed. New fuel tank and fuel pump. Converted to negative ground system. With fingers crossed the engine started in 4th gear and the clutch released with the first push of the pedal!

Much left to do but happy to have the drive train still in tact. Being only 15 miles from Moss Motors in Petersburg, Va is good but expensive!

Congratulations on retirement and getting the Healey underway!! Sounds like you had a hydraulic problem.
 
We have broken a clutch loose by towing the vehicle in gear, with the engine not running with the ignition key off, with the clutch pushed in. This seems less dramatic (and maybe safer) than some of the other methods described above.

Since it was on jack stands with no wheels I was glad the car didn't move when the clutch released. Next task is to get the Carbs rebuilt by someone who has done them before. We have 8- 10" inches of snow today so after we thaw out I will venture to the garage.
 
Since it was on jack stands with no wheels I was glad the car didn't move when the clutch released. Next task is to get the Carbs rebuilt by someone who has done them before. We have 8- 10" inches of snow today so after we thaw out I will venture to the garage.
.

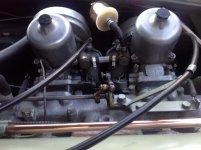
S.U carbs are super easy to rebuild and I am very sure you can do it! Their are only a hand full of moving parts in these carbs. You may or may not have to replace the throttle bushings..if you do, it's not a very difficult task. Order a S.U. Rebuild kit, take one carb apart at a time and never inter mix each carbs parts... Soda blast the bodies, (use armor hammer household baking soda) it's mild media and leaves a nice new factory finish! wash them and blow out all passages with compressed air and reassemble.check your float setting height for your particular carbs in your manual. Take a few pics before disassemble in case you need reference. You will save big bucks as well! A quick note: If I remember correctly Randy Forbes had some really great detailed complete carb building photos you really should review to help you along. image.jpg
 
.

S.U carbs are super easy to rebuild and I am very sure you can do it! Their are only a hand full of moving parts in these carbs. You may or may not have to replace the throttle bushings..if you do, it's not a very difficult task. Order a S.U. Rebuild kit, take one carb apart at a time and never inter mix each carbs parts... Soda blast the bodies, wash them and blow out all passages with compressed air and reassemble. Take a few pics before disassemble in case you need reference. You will save big bucks as well!

Agree, though I'm not sure about 'soda blast.' I haven't used soda, but if it's at all abrasive--and I suspect it is, that's what media 'blasters' do--I would advise against it; aluminium is very soft, you can scratch it with a fingernail if you try. I sent a brake servo body to a highly-recommended rebuilder for resleeving and they media-blasted it, and it roughed-up the exterior and the area where the air/vacuum valves--they control the vacuum piston's movement--seat to the point I doubt the valves can seal properly (I never installed it). Used to be you could buy gallon cans of carb cleaner--nasty stuff, I think it's similar to lacquer thinner--with a basket that you could soak the carbs in and it would clean them well (though it wouldn't provide a shiny/polished surface that some people like, and since it worked really well it has probably been banned). If you're gonna media-blast a soft metal like aluminium I suspect dry ice or walnut shells--be sure you get the residue out--would be better. (Side note: Walnut shells were used to clean the oil passages in an Army Chinook chopper a couple decades ago and the residue caused it to crash, claiming 46 allied lives: https://law.resource.org/pub/us/case/reporter/F2/769/769.F2d.115.84-1446.html).

If the throttle shaft bushes are worn there are several companies that will install the bushes and ream them (for less than the cost of buying the needed special reamer); I had my BJ8 carbs re-bushed by Apple Hydraulics, and I know White Post will do them ($$$) and Worldwide might offer this service now as well.

Re-building SUs--or any carburettor--on the bench is one of the more pleasant tasks in auto mechanics.
 
Actually, I used regular baking soda....very mild and leaves the perfect stock finish! See my posted photo..I should have pointed that detail out in my above post. Household Armor hammer baking soda..works great! Yes,I definitely agree benching the carbs are one of the most pleasant, relaxing and rewarding things to do.
 
Good to know; though I doubt we could ever get all the garden-grade sand out of my dad's media blaster (might be time to try one of the small, bench-top blasters).

Your carbs look great; for some reason I didn't notice your photo first-time reading it.
 
Good to know; though I doubt we could ever get all the garden-grade sand out of my dad's media blaster (might be time to try one of the small, bench-top blasters).

Your carbs look great; for some reason I didn't notice your photo first-time reading it.
. You know Bob, it always amazes me how much people spend to send out their carbs for rebuilding when it is such a simple and relaxing task on the work bench... Especially amazing when many folks have already undertaken much more difficult tasks while engaged in their restoration! Wow.
 
. You know Bob, it always amazes me how much people spend to send out their carbs for rebuilding when it is such a simple and relaxing task on the work bench... Especially amazing when many folks have already undertaken much more difficult tasks while engaged in their restoration! Wow.

That may be because working on carburetors falls into the same category as brain surgery (or rocket science) in many people's minds. Or one needs some of that magic dust to sprinkle on them to make them work right.

That said, I plan to undertake rebuilding a set of H4 carbs when the kits arrive. I hope that the kits include bushings for the shafts, as they probably need to be reamed out before fitting new shafts. Also looking for a hand reamer.
 
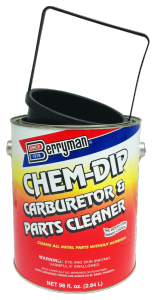
Used to be you could buy gallon cans of carb cleaner--nasty stuff, I think it's similar to lacquer thinner--with a basket that you could soak the carbs in and it would clean them well
If this is the stuff you're thinking of, yeah, you can still get it. Even here in California. O'Reilly carries it.
09961-154x300.png
 
Looks like it ... though the ingredients might have changed (like the aerosol brake cleaners whose formula was changed to eliminate ozone-damaging halogenated hydrocarbons). Remember carbon tetrachloride--or 'carbon tet'--haven't seen that anywhere in years.
 
Back
Top