• Hey there Guest!
    If you enjoy BCF and find our forum a useful resource, if you appreciate not having ads pop up all over the place and you want to ensure we can stay online - Please consider supporting with an "optional" low-cost annual subscription.
    **Upgrade Now**
    (PS: Subscribers don't see this UGLY banner)
Tips
Tips

BJ7 Caliper rebuld

bob hughes

Luke Skywalker
Country flag
Offline
Hi Guys

Woke up the other day to do some welding in the garage and when I pushed the BJ7 out there was a not so nice puddle of hydraulic oil waiting for me under the near side front wheel. I had only recently replaced a corroded brake line from the rubber to the caliper, but the connections were dry, the disc (rotor) and the caliper were covered in Hydraulic oil so I have to suspect the caliper. The parts are on their way, and I have discovered the BJ8 caliper rebuild here, is there any other advice, ideas etc. on how to get the piston in with that darned dust cover configuration?
I am intending to split the caliper and the internal transfer seal has been purchased, so this should make life a little easier.


:cheers:

Bob
 

Keoke

Great Pumpkin
Country flag
Offline
Just be sure you get the correct seals for the caliper halves and you might want to consider SS replacement pistons TOO!.

Have fun.
 
Country flag
Offline
I've come to terms with the seals (easy) and dust boots (trickier). A lubricant for the rubber is essential (AH Spares/SC Austin-Healey both sell the desired product).

With the dust boot half on the piston, I work the inner lip of the dust boot into its retaining groove, wiggling and rotating as I go, until I'm reasonably confident I have it seated all the way around.

Now you can gently push the piston into its bore; if the dust boot (or seal) isn't fully seated, there will be resistance to pushing the piston into the bore. Don't force it, find out what's stopping it!

It will take some effort to push the piston to the bottom of the bore, but you should be able to tell if it's an excessive amount (which would indicate a problem, like a pinched lip on the dust boot).

I echo keoke's sentiment for using stainless steel pistons; well worth the premium, particularly on cars that get minimal annual mileage. Of even greater importance, is purging/replacing the brake fluid every couple of years, even annually, if you really want to keep all the internal circuits in top condition.
 
OP
B

bob hughes

Luke Skywalker
Country flag
Offline
Thanks Guys

I have SS pistons in already, the calipers have been refurbished about five or six years ago, why the caliper has let go is a mystery at the moment. But, when I installed them one of the calipers was found to be faulty then, so maybe this is a hang over from the original refurbishment. I am going to fill the caliper with hydraulic oil and apply a little air pressure on top to see if I can spot the problem area before I dismantle - should be tomorrow.

:cheers:

Bob
 

Healey Nut

Luke Skywalker
Country flag
Offline
Be careful with the air pressure or that piston will become a missile . Block the caliper opening with a piece of wood or put a C clamp around it to hold the piston in place and pump up the pressure S-L-O-W-L-Y !!!!!!
 
OP
B

bob hughes

Luke Skywalker
Country flag
Offline
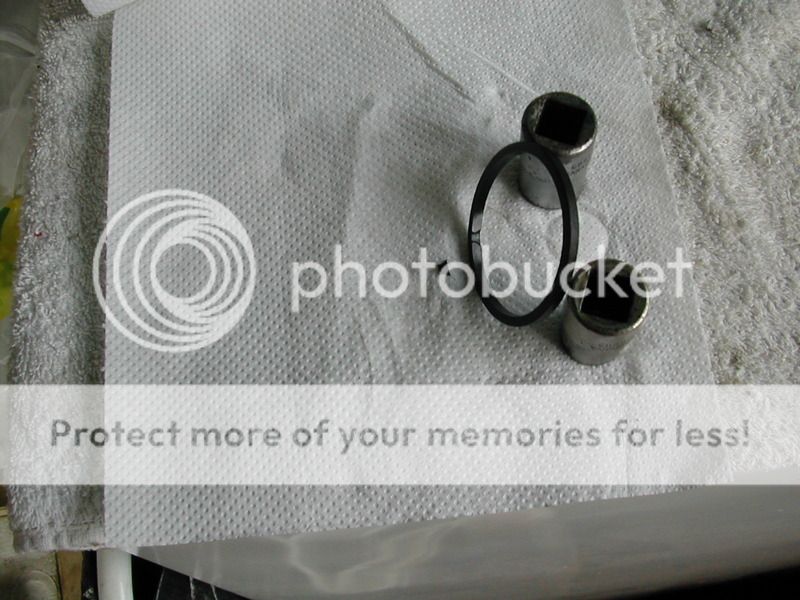
All is revealed - can't understand it but there was a chunk of rubber in the bottom of the bore and a slice out of the seal that mirrored the chunk. The calipers were 'new' some 5 years ago and how it has lasted so long with this defect defies me. When photobucket decides to play ball I will post a photo. I am still waiting for the parts to arrive so I have been practicing with the old bits to put them back in - no problems so far as long as I can use the red rubber grease in the assembly. The seal is definitely not square and I have read somewhere that the thicker bit should be down the bore - away from the dust cover, the thinner side to be nearer to the dust cover, when I stripped it out it was the other way around, any thoughts?


:cheers:

Bob
 
OP
B

bob hughes

Luke Skywalker
Country flag
Offline
Gotcha


You can see where everything went wrong, It must have been damaged during the 'manufacture' but how on earth did it last for so long without failing before.

:cheers:

Bob
 
Country flag
Offline
All is revealed - can't understand it but there was a chunk of rubber in the bottom of the bore and a slice out of the seal that mirrored the chunk. The calipers were 'new' some 5 years ago and how it has lasted so long with this defect defies me. When photobucket decides to play ball I will post a photo. I am still waiting for the parts to arrive so I have been practicing with the old bits to put them back in - no problems so far as long as I can use the red rubber grease in the assembly. The seal is definitely not square and I have read somewhere that the thicker bit should be down the bore - away from the dust cover, the thinner side to be nearer to the dust cover, when I stripped it out it was the other way around, any thoughts?


:cheers:

Bob
Yes, the memory fades; the irregular cross-section of the (squarish) seal is to facilitate "knock-back" and as such, in my mind, that would put the thicker end closest to the dust boot, so that when pressure is released it pulls the piston back into the bore that minimal bit.

But by all means, do consult the manual, or instructions included with the seals!
 
Country flag
Offline
The Bentley Manual, The Complete Official Austin-Healey 100-Six and 3000 1956-1968, in section MMM.6 (1) seems to support this, saying Fit the internal seal into the the groove in the cylinder bore with the scraping edge(smaller diameter) innermost.

I had to check, but common sense dictating that I was correct in my original thinking :cheers:
 
OP
B

bob hughes

Luke Skywalker
Country flag
Offline
Ok Thanks

I had consulted my Guru here and he thought that the seal was square and that the seating was on the tilt, as it were. I guess I will find out if the parts ever arrive !

However - I am sooo dead - decided to paint the caliper whilst I was waiting for the parts. As it is slightly cool over here now, and the garage is not heated, I persuaded the catering management to allow me to paint the caliper halves in the kitchen. Took all precautions except one - I was too near the radio, which now has a go faster stripe on it - ouch. I then cleaned said stripe off with a drop of thinners - bad news the plastic was not self colour but painted - it still has the stripe but at least it does not stand out so bad. 'Tis only a matter of time before Hawkeye spots it then I'm toast.

:cheers:

Bob
 
OP
B

bob hughes

Luke Skywalker
Country flag
Offline
Well the seals finally arrived to day and I have installed them.

I can confirm that the seals were indeed square. Method used - ( I had split the calipers and obtained a new transfer seal ) drop the main seal into the groove and lube well with the red rubber grease, lube the dust seal with the rubber grease and fit the dust seal into the groove - no drama literally just falls into place. Lube the piston and place it onto the dust seal, using a blunt right angled piece if coat hanger wire - L shaped - tease the dust seal rubber over the piston all the way round. Have a few gulps of fresh air and try and push the piston down - there is resistance but I rocked it a little from side to side and eventually it passed the main seal. the dust seal seemed to slide up the piston as it was going down and located itself into the groove near the edge of the piston, I just needed to check that this was so all the way round and there you go. I then bolted the to halves together with the new transfer seal in place, no torque specified for the two bolt types, but I put them up to 50 and 40 Foot pounds. Of course I have no way of checking if the pistons have been installed without pinching the rubber seal but slapping the caliper back onto the car and checking after bleeding will confirm one way or the other I guess.


:cheers:

Bob
 
OP
B

bob hughes

Luke Skywalker
Country flag
Offline
Breaking news

It is on the car, that corner has been bled and the real good news is that it is holding. First one that I have ever attempted.

I have the original old ones in the garage somewhere and I am tempted into refurbishing them now, complete with SS pistons, could act as spares or sell them on once they have been proven, I'll give it some thought.

:cheers:

Bob
 
Similar threads
Thread starter Title Forum Replies Date
Austin64 BJ7 Brake caliper kits Austin Healey 2
5 WTB: BJ7 Squab Austin Healey 13
5 BJ7 Boot Rust-Through Austin Healey 13
B For Sale Too many Healeys - BN2, BN4, BT6, BJ7 For Sale Austin Healey Classifieds 0
Walter74 BJ7 Throttle Linkage "Support Panel" Austin Healey 5
T BJ7 Trim Recession (Convertible Top) Austin Healey 2
ModifiedBJ7 BJ7 Windshield Surround Rubber Seal Austin Healey 2
R New Hood for BJ7 Austin Healey 3
chicken BJ7 Chrome Trim Austin Healey 15
JMACENGINESHOP BJ7 Engine Rebuilding Austin Healey 23
R BJ7 Rear Axle Maintenance Austin Healey 5
B Wanted Grill Top Cowl and Surround - BJ7 Austin Healey Classifieds 1
B BJ7/BJ8 Door Check Straps Austin Healey 10
R Changing BJ7 Differential Ratio Austin Healey 10
X Trouble shooting trafficator - 1963 BJ7 Jaguar 9
T BJ7 Hard to find First Gear when G/Box is hot Austin Healey 3
B BJ7 Rear View Mirror Mounting Hardware Austin Healey 7
chicken BJ7 Door Fit Austin Healey 27
T Wanted BJ7 parts needed Austin Healey Classifieds 0
T Weight of BJ7 Transmission/Overdrive Austin Healey 10
D BJ7 Clutch Austin Healey 6
R BJ7 Back Seat-Rest Austin Healey 1
HealeyRick BJ7/8 Convertible Top Issues Austin Healey 5
HealeyRick BJ7 Side Window Alignment Austin Healey 31
B BJ7 Interior Finishing Details Austin Healey 2
chicken Healey BJ7 door (i think) Austin Healey Classifieds 0
chicken BJ7 Rear Number Plate Mounting Austin Healey 3
chicken BJ7 Door Seal Austin Healey 5
chicken BJ7 Rear Quarter Panels Austin Healey 6
B BJ7 Boot Trim Austin Healey 7
T Early BJ7 Vent Window Seal Austin Healey 2
D BJ7 Underdash Trim Austin Healey 9
G Steering Arm Installation Recommendations - BJ7 Austin Healey 2
D BJ7 Rear rail trim Austin Healey 0
D BJ7 Hood frame mounting plate Austin Healey 7
D Wanted BJ7/8 front grill top cowl Austin Healey Classifieds 4
BLong63AH BJ7 Hard Fuel Lines Austin Healey 20
T Spin-On Oil Filter Removal [BJ7] Austin Healey 12
T Installing Garmin GPS in a BJ7 Austin Healey 19
pbraun How much does a BJ7 or 8 transmission weigh? Austin Healey 3
P BJ7 Upholstery Austin Healey 1
B BJ7 back end rebuild Austin Healey 1
Marvin Gruber BJ7 door panels Austin Healey 4
Marvin Gruber BJ7 Top Installation Austin Healey 1
B Rear shroud connection to the floor pan on a BJ7 Austin Healey 21
P BJ7 HS6 Carb Baseline Setting Austin Healey 10
Marvin Gruber BJ7 tach cable location. Austin Healey 3
T Toyota 6 cylinder eng & trans in a BJ7 Austin Healey 0
BJ8Healeys BJ7/BJ8 Exhaust Systems Austin Healey 24
W For Sale Hardtop for BJ7/BJ8 on BaT : No Reserve Austin Healey Classifieds 2

Similar threads

Top