• Hi Guest!
    If you appreciate British Car Forum and our 25 years of supporting British car enthusiasts with technical and anicdotal information, collected from our thousands of great members, please support us with a low-cost subscription. You can become a supporting member for less than the dues of most car clubs.

    There are some perks with a member upgrade!
    **Upgrade Now**
    (PS: Subscribers don't see this gawd-aweful banner
Tips
Tips

Windshield Pillar Bolt & Nut

apbos

Jedi Knight
Country flag
Offline
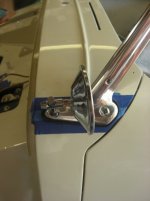
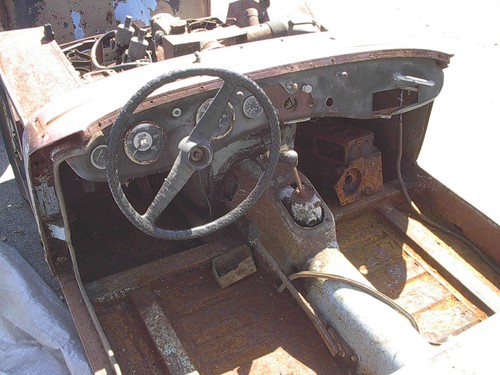
The A-posts are welded in and the doors have been fitted. Before I weld on the skin I need to replace one/two of the capture nuts for the windshield pillar. Does any one have an idea as to the size of the bolts and the capture nuts. I'm thinking I'll have to use body epoxy to keep them in place.

6122589040_000dce0ba5.jpg


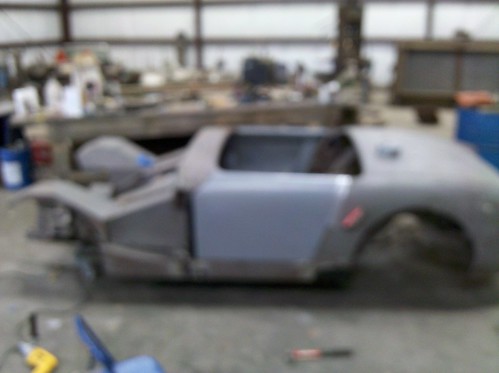
Sorry about he image quality, this is a major step forward for this car.....


1871380976_30df3c2352.jpg


Paul
 
Way to go Paul. Can't help you with the sizes, just giving encouragement. Put a box behind the wheel, sit on it and go VROOM!!! (not that I did that doing my restoration..)
 
The size is 5/16-24.
 
Thx Guy's.
Might try welding (glueing) it in on a washer.

Paul
 
The one in the front uses a captive nut which was correctly sized above as 5/16-24 which is NF. The ones to the back do not use a captive nut, as the nut is accessable from underneath. I think you could install a swage type nut here, as the metal is thick enough. FWIW, here is my mirror, which threaded into the captive nut. Most people put such mirrors on the back bolt, which is easier, as various sizes of stems can be fitted.
Scott in CA
 

Attachments

  • 26380.jpg
    26380.jpg
    67.7 KB · Views: 477
Nice looking windsheld Posts. What is the finsh?
 
Hi Jack,
Posts are polished....some say they should be painted the same color as the original wheels...I like the bling...
Scott in CA
 
They really look nice. Think I just may do that with mine.
 
smaceng said:
The one in the front uses a captive nut which was correctly sized above as 5/16-24 which is NF. The ones to the back do not use a captive nut, as the nut is accessable from underneath. I think you could install a swage type nut here, as the metal is thick enough. FWIW, here is my mirror, which threaded into the captive nut. Most people put such mirrors on the back bolt, which is easier, as various sizes of stems can be fitted.
Scott in CA

Scott, Can you share where you got this mirror??
 
I did the same thing as Scott with the mirrors, although I put mine in the back. There is normally a wide variety of motor cycle mirrors on Ebay, which is where I got these. Some on the forum have said they have Harley mirrors, which are probably a little better quality. Here is what mine looks like.
Kevin
 

Attachments

  • 26757.jpg
    26757.jpg
    54.5 KB · Views: 301
This is my mirror as used on my BE. Originally I wanted to use a mirror that could be used with side curtains.....a purist as such.
It turned out that in a year and a half of driving, never put the curtains on....even in the rain. This is what I did. Maybe more trouble than it was worth. The only thing more difficult on my BE(rebuilt the entire car) was the 5-speed conversion!
 

Attachments

  • 26760.jpg
    26760.jpg
    41.8 KB · Views: 306
Could I resurrect this to find out exactly what these mirrors are... and where you got them (maybe including the model)? Did they have the 5/16"-24 thread the way they came?
Thanks.
- Mark

P.S. - when I look at various motorcycle mirror URLs I find a lot of metric stuff and I guess I'd like to avoid an adapter (and many don't tell you much at all about the dimensions of anything other than the mirror size). It would be great to get a definitive source and model.
 
Here is the link for the mirrors:
https://www.browardmotorsports.com/eshopp...OM__MIRRORS.htm

The mirror used a 3/8" diameter shaft, and I substituted a straight shaft, as I wanted to be able to screw in the post and not worry about the orientation of the mirror. I turned down the end to 5/16" dia. and then threaded it 5/16-24.
As I said, this is not an easy mirror to make, as you need to have tools and such, but it can be reproduced.

If you want, I can take it off and take pictures of all the parts.
cheers,
Scott
 
Thanks Scott! I've also seen mini adaptors for threads (at a motorcycle site). This should do me for now. It would be nice if we had a menu of options at these motorcycle sites (with combinations of parts)... with known threads and dimensions. Again, this is helpful for now.
- Mark
 
Adding, to my way of thinking, the most optimal (i.e., looks the best and would be less prone to vibration and wind issues) would be a Raydot or equivalent attached as in this photo (from a car I saw, of which I made this composite - and it appeared that the doors opened fine)....
 
But I should expect that with the side curtains in they would not.
 
I think you're right about the side-curtains, but I don't think I'll EVER use them (nice as they are). Thanks for the pic (that I looked at in your Photobucket - lots of nice reference shots there).
- Mark
 
Very nice work BillW...I like the contrast of the silver with the black on the wheels.
Scott in CA
 
Back
Top